


K
MH2415 User Manual
12
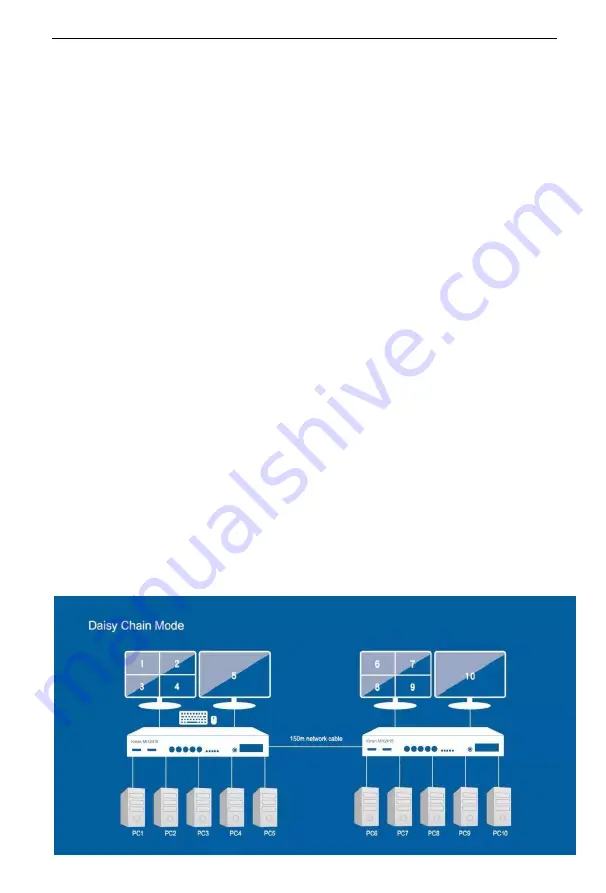
Daisy Chaining
To display even more source devices, up to 2 additional MH2415 units can be daisy chained
from the original MH2415. As many as 10 source devices can be controlled from a single
console in a complete daisy chain installation. Each MH2415 in a daisy chain requires its
own monitor as the video signals cannot be passed through to other units on a daisy chain.
To set up a daisy chain installation, make sure that the power to all devices has been turned
off, and do the following:
1.
Use a Cat 5 cable to connect the Out port of the primary MH2415 to the In port of
the secondary MH2415 unit(s) (first station out to second station in).
2.
Plug an HDMI display into the Console HDMI OUT 2 port and another HDMI display
into the HDMI OUT 1 port, both HDMI out ports are located on the unit’s front panel.
3.
Cable up the computer and the switch according to the information provided under
Single Station Installation.
4.
Power on the installation: plug in the power cord for the first station, then power on
the second station. After all the stations are up, power on the computers video
source devices.
Note
: Make sure the computers and devices that the MH2415 connects to are also
properly grounded.
5.
To switch to a computer in a daisy chain, press hotkey
【
Win
】
+
【
Alt
】
, and then press
【
TAB
】
. When switching to a computer, only the keyboard and mouse signals are
connected.
Daisy Chain Installation Diagram


