USING DATA RECORDER
Before downloading data stored from a kistock datalogger, this kistock has to registered in the data
recorder.
See kilog RF user manual to register a datalogger in the data recorder.
➢
Turn on the data recorder.
➢
Go to
“Kistock”
with left and right arrows then press
OK
.
➢
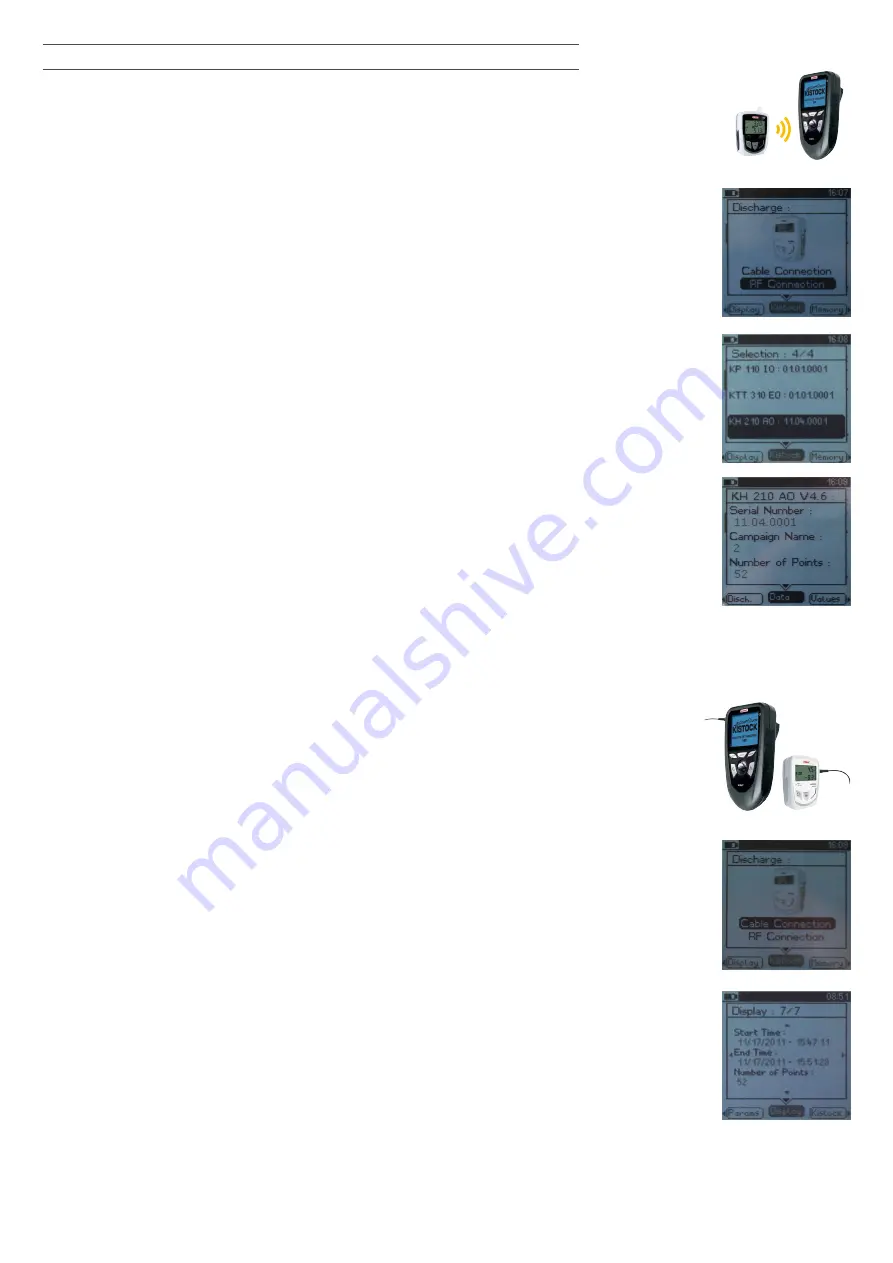
Select
“RF Connection”
with up and down arrows then press
OK
(see fig.1).
A progress bar then the list of registered kistock are displayed.
➢
Select the Kistock to download with up and down arrows then press
OK
(see fig.2).
Connection screen then
“Infos”
screen are displayed. This last screen displays the
kistock serial number, dataset name and number of dataset point.
From this screen :
➢
Select
“Discharge“
with left and right arrows then press
OK
.
Discharge screen with its progress bar is displayed.
When discharge is finished :
➢
Select
“Display“
then press
OK
to visualize main features of the dataset : type of
Kistock, serial number, dataset name, dates of beginning and end, number of
measurements and of registered channel with minimum and maximum values for each
channel (see fig.3).
Or
➢
Select
“New dataset“
then press
OK
to launch a new dataset.
●
Discharge date from a wired kistock to the data recorder
➢
Connect the data recorder and the kistock with the cable.
➢
Turn on the data recorder.
➢
Go to
“Kistock“
with left and right arrows then press
OK
.
➢
Select
“Cable Connection »
with up and down arrows then press
OK
(see fig.4).
A progress bar is displayed
« Infos
“
screen. This last screen displays the kistock serial
number, dataset name and number of dataset point.
From this screen :
➢
Select
“Discharge“
with left and right arrows then press
OK
.
Discharge screen with its progress bar is displayed.
When discharge is finished :
➢
Select
“Display“
then press
OK
to visualize main features of the dataset : type of
Kistock, serial number, dataset name, dates of beginning and end, number of
measurements and of registered channel with minimum and maximum values for each
channel (see fig.5).
Or
➢
Select
“New dataset“
then press
OK
to launch a new dataset.
Fig. 4
Fig. 2
Fig. 3
Fig. 1
●
Data downloading from a wireless kistock to data recorder
Fig. 5
Kattreppeln 28
• 38154 Königslutter •
05353 / 9545 - 0
•
¬
05353 / 9545 - 45 •
|


