Kimex 031-3200K1 Quick Start Manual Download Page 9

A

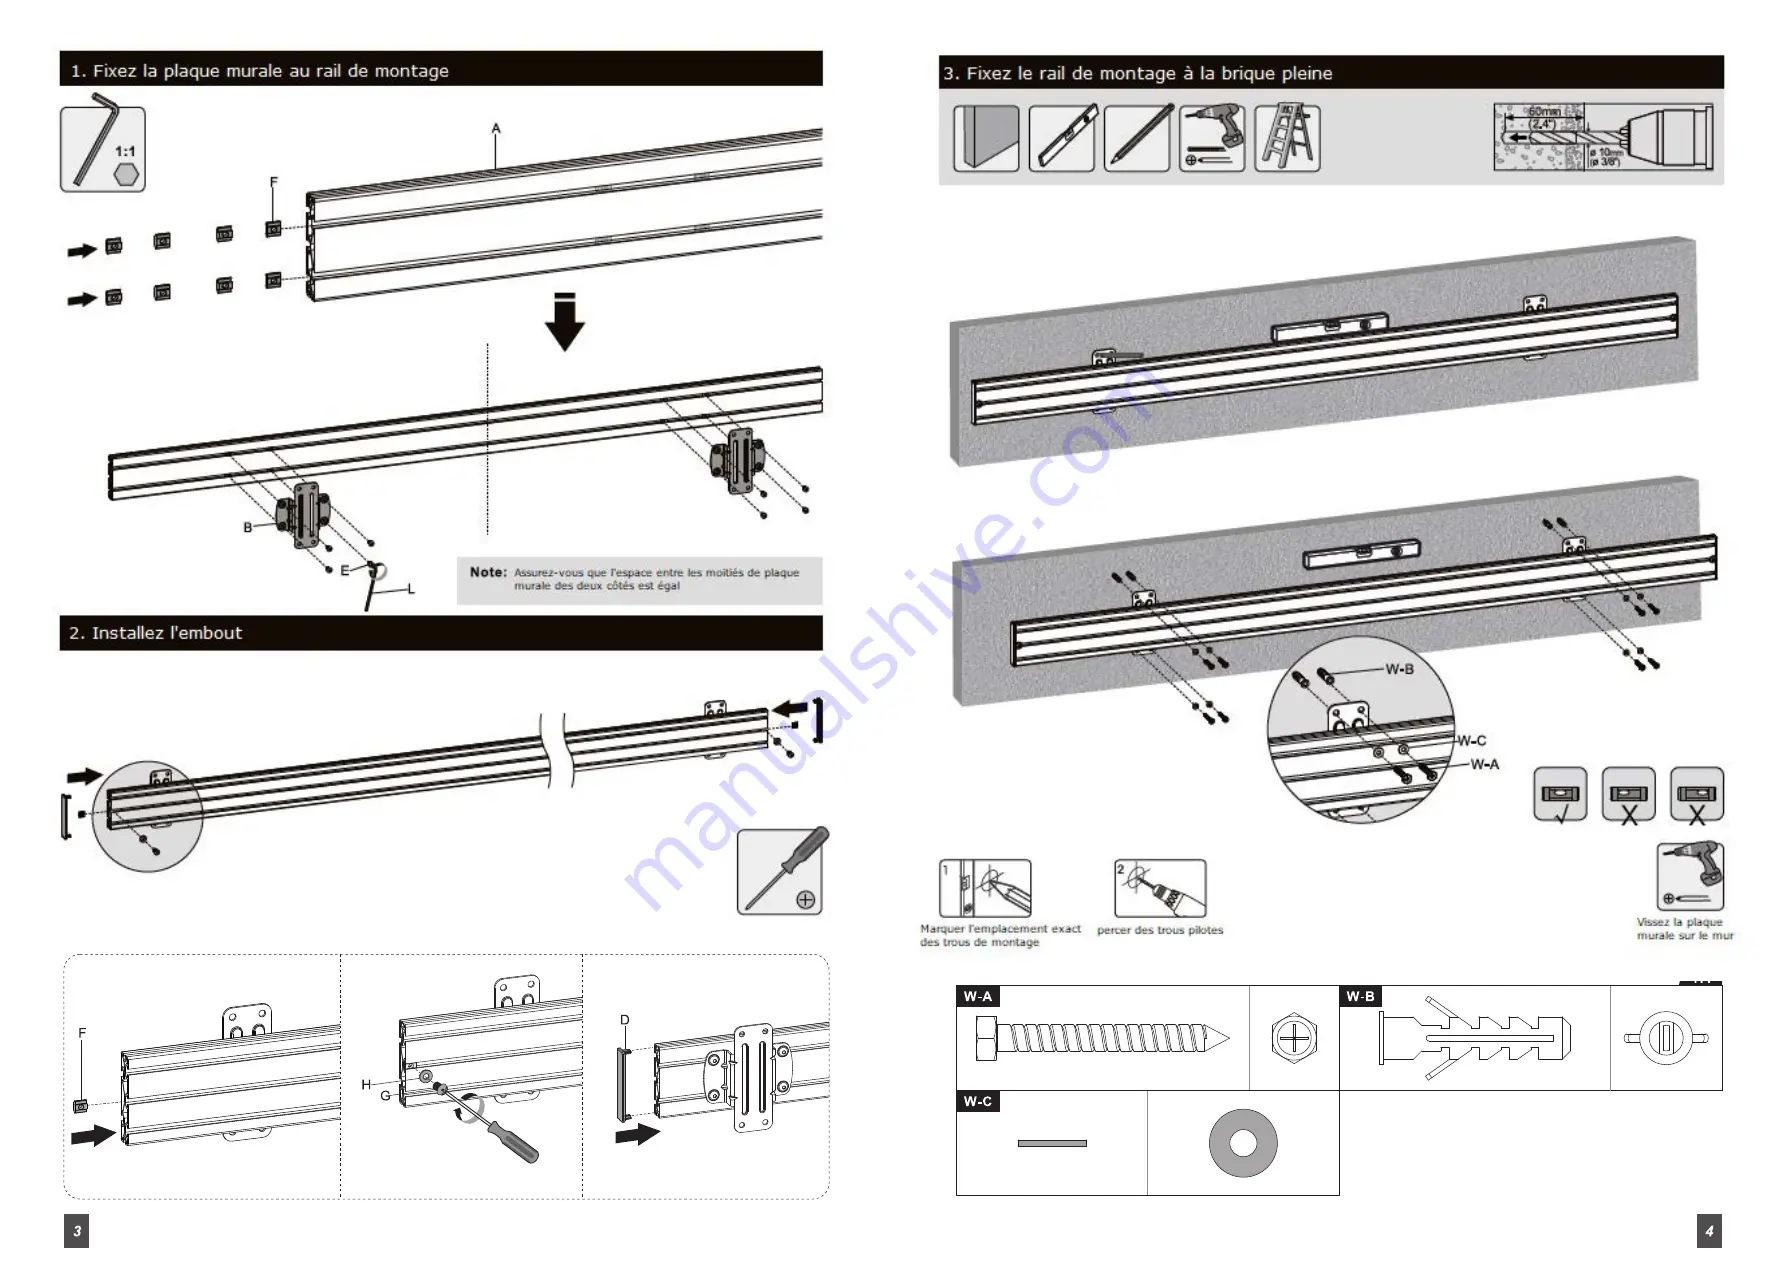
ttach the mounting rail to the solid brick

Install the mouthpiece

A

ttach the wall plate to the mounting rail

make sure the space between the wall plate 

halves on both sides is equal.

Drill pilot holes

Mark the exact location of the 

mounting holes

Screw the wall plate to 

the wall

Summary of Contents for 031-3200K1

Page 1: ...SUPPORT MURAL 2 ECRANS 55 MANUEL D INSTALLATION 031 3200K1...

Page 2: ...e fournies et NE SERREZ PAS TROP LES VIS de montage Ce produit contient de petits articles qui pourraient pr senter un risque d touffement en cas d ingestion Gardez ces articles hors de port e des enf...

Page 3: ......

Page 4: ...iseur 1 1 0 0 0 0 0 0 0 0 g_c Haut de l cran 1 0 i 1 1 20 15 10 5 0 1 c 20 estl anglenatureletlagoupilledes curit n estpasn cessaire 0 0 0 0 0 0 0 t 0 0 0 1 0 r Avec la fl che pointant vers le haut 0...

Page 5: ...M H e M H cb M G M H ffi Qo Choisissez les vis rondelles et entretoises appropri es si n cessaire en fonction du type d cran Centrez les supports de l adaptateur l arri re de l cran comme illustr et...

Page 6: ...vec cadenas Note Laissez un espace d au moins 1 mm entre les crans 1 Note Le cadenas n est pas inclus Maintenance V rifiez que le support est s r et s r utiliser intervalles r guliers au moins tous le...

Page 7: ...Wall mount for 2 screens 55 Installation manual 031 3200K1...

Page 8: ...ided and DO NOT OVER TIGHTEN THE mounting SCREWS This product contains small items which could present a choking hazard if swallowed Keep these items out of the reach of children This product is inten...

Page 9: ...ick Install the mouthpiece Attach the wall plate to the mounting rail make sure the space between the wall plate halves on both sides is equal Drill pilot holes Mark the exact location of the mounting...

Page 10: ...he TV stand 1 1 0 0 0 0 0 0 0 0 g_c top of screen 1 0 i 1 1 20 15 10 5 0 1 c 20 isthenaturalangleandthesafetypinisnotneeded 0 0 0 0 0 0 0 t 0 0 0 1 0 r With the arrow pointing up 0 0 5a Attach the TV...

Page 11: ...M H e M H cb M G M H ffi Qo Choose the appropriate screws washers and spacers if necessary according to the type of display Center the adapter brackets on the back of the display as shown and screw th...

Page 12: ...re with padlock Note Leave a space of at least 1 mm between the screens 1 Note The padlock is not included Maintenance Check that the mount is safe and secure to use at regular intervals at least ever...

Reviews: