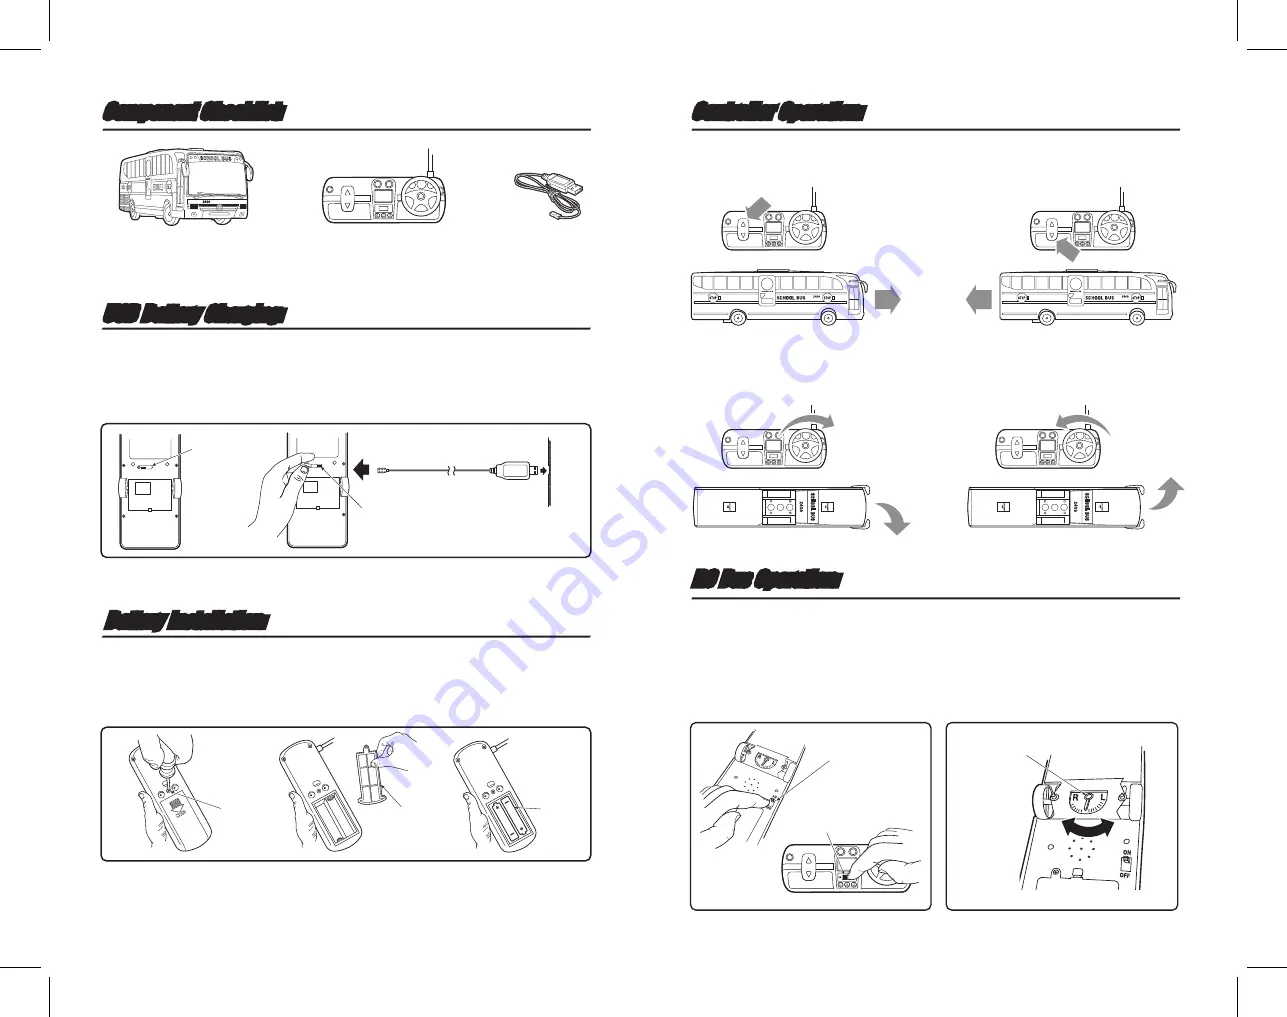
USB Battery Charging:
Battery Installation:
Controller Operation:
Component Checklist:
RC Bus Operation:
Power On/Off
Bus Alignment
USB Connector
USB Charging Port
Rubber Plug
USB Charging
Port
USB Charger
USB
Port
1. Locate the rubber plug on the bottom of the bus and bend it back exposing the USB charging port.
2. Plug USB charger into this port and your USB device.
3. Remove when the USB charger’s LED light dims.
1. Locate the battery compartment on the bottom of the controller and unscrew the battery cover.
2. Open the cover and insert (2) AA batteries as shown.
3. Remove when the USB charger’s LED light dims.
Note: The battery terminals must be positioned as shown.
Battery Cover
Screw
Alignment
Level
To power the car on locate the on/off switch on the
bottom of car as shown. Push switch to the on
position. Next power on the controller.
To keep the bus driving straight locate the
alignment level on the bottom. Move the lever in the
direction the bus needs to go in order to drive
straight. Make small adjustments.
Bus Power
Switch On
Controller Power
Switch On
Push top of throttle button;
Bus moves goes forward.
Turn controller wheel clock-wise;
Bus turns right.
RC School Bus
Battery
Cover
2 AA
Batteries
Controller
USB Charger
SCHOOL BUS
Push bottom of throttle button;
Bus moves goes backwards.
Turn controller wheel conunter clock-wise;
Bus turns right.
SCHOOL BUS


