Summary of Contents for Iona
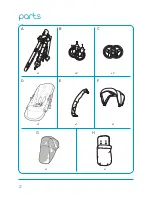
Page 2: ...2 parts x1 x1 x2 x1 x2 x1 x1 x1 D G A E H B F C ...
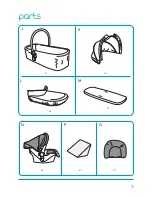
Page 3: ...3 parts x1 x1 x1 x1 x1 x1 x1 M N P Q J K L ...
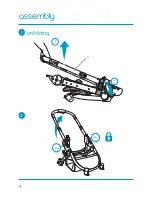
Page 4: ...4 assembly unfolding A click click 2 2 1 1 ...
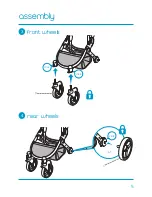
Page 5: ...5 front wheels rear wheels 3 4 assembly click click B click C X2 ...
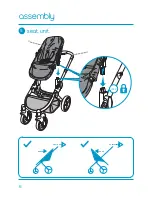
Page 6: ...6 assembly click A D seat unit 5 ...
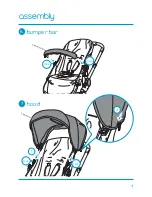
Page 7: ...7 assembly bumper bar hood 6 7 click click E click click F 1 2 ...
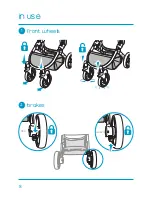
Page 8: ...8 in use front wheels brakes 1 2 RED GREEN ...
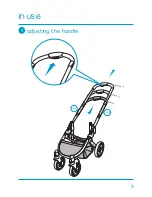
Page 9: ...9 in use adjusting the handle 3 click click 3 2 1 ...
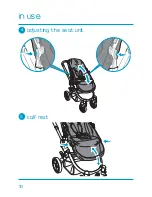
Page 10: ...10 in use adjusting the seat unit calf rest 4 5 ...
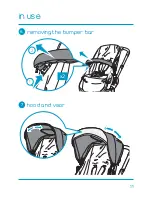
Page 11: ...11 in use removing the bumper bar hood and visor 6 7 x2 1 2 ...
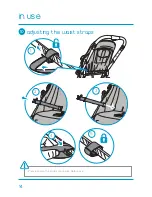
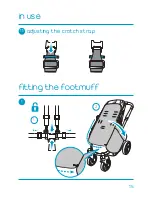
Page 15: ...15 adjusting the crotch strap 11 1 in use fitting the footmuff 1 2 ...
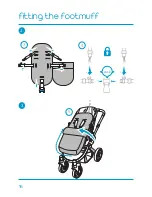
Page 16: ...16 fitting the footmuff click 3 4 5 2 3 H ...
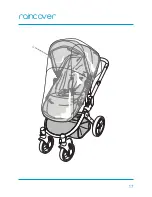
Page 17: ...17 raincover G ...
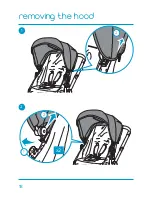
Page 18: ...18 x2 1 2 removing the hood 1 2 2 ...
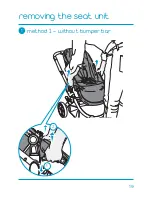
Page 19: ...19 removing the seat unit method 1 without bumper bar 1 1 2 ...
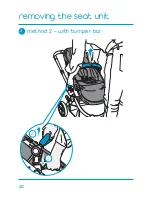
Page 20: ...20 removing the seat unit method 2 with bumper bar 2 1 2 ...
Page 21: ...21 carrycot M J L 1 2 3 assembly 1 ...
Page 22: ...22 4 carrycot assembly 1 5 x2 M ...
Page 23: ...23 carrycot apron 2 J 1 2 x2 x2 3 L ...
Page 24: ...24 carrycot K hood removing hood 3 4 click click 1 1 2 1 2 ...
Page 25: ...25 carrycot click click fitting 5 ...
Page 26: ...26 carrycot removal 5 1 2 ...
Page 27: ...27 click click car seat 1 fitting ...
Page 28: ...28 car seat 2 removing 1 2 ...
Page 29: ...29 folding ...
Page 30: ...30 click folding 1 2 3 2 3 2 1 ...
Page 31: ...31 removing the front wheels removing the rear wheels ...
Page 32: ...32 ...
Page 33: ...33 ...
Page 34: ......


