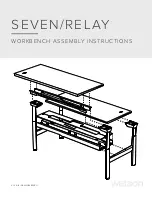
Assemble units as described herein only. To do otherwise
may result in instability. All screws, nuts and bolts must be
tightened securely and must be checked periodically after
assembly. Failure to assemble properly, or to secure parts
may result in assembly failure and personal injury.
1330 Bellevue Street • P.O. Box 8100 • Green Bay, WI 54308-8100 • Tel 1-800-424-2432 • www.ki.com
© 2019 Krueger International, Inc. All Rights Reserved • Code KI-AI-000050/KI/PDF/0719
Ruckus
®
Tote Storage - Optional Laminate Worksurface
Assembly Instructions
5. From the top of the unit, drill a
1
/
4
” diameter hole at each marked
location. When all appropriate
mounting holes have been drilled,
remove debris from storage unit
(Figure 3).
6. Apply 3” long strips of
double-sided tape to top corners
of the storage unit, about
1
/
4
”
from the edges of the front and
back at each side (Figure 4 &
Detail B).
Note:
Two or more people are
required to correctly align and
position the laminate top onto
the storage unit. Ensure the top
is positioned correctly before
setting the top onto the tape as it
will be difficult to move afterward.
7. Remove the backing from the
double-sided tape adhered to the
storage unit top. Carefully center
the laminate top over the storage
unit such that the top is flush with
the front, back and sides of the
unit (Figure 5).
Note:
For the step below, it is
advised to either have a second
person press down on the
laminate top while driving in
each screw, or pre-drill each hole
using a
1
/
8
” drill bit to no deeper
than
1
/
2
” before driving in screws.
8. Assure that the laminate top is
properly aligned on the storage
unit. From inside the storage unit
at the pilot holes, use a power
drill with #3 Phillips tip and
#14 x
7
/
8
” Phillips Pan Head
screw to secure the storage unit
top to the laminate top at each
corner (Figure 6).
9. Replace the totes if removed in
step 4.
Detail B
Figure 4
double-sided
tape
tote storage
unit (top)
1
/ ”
4
1
/ ”
4
1
/ ”
4
1
/ ”
4
1
/ ”
4
Figure 5
laminate
worksurface
double-sided
tape
tote storage
unit (top)
Figure 6
cordless
power drill
#14 x / ”
phillips pan-head
screw
7
8
laminate
worksurface
Figure 3
tote storage
unit (top)
cordless
power drill
marked
pilot hole
locations
Part# 2.80714


