Installation Note N9010-90072
15
Option MTU and MTP, MultiTouch User Interface Upgrade Kits
Replacing CPU Assembly - N9010A-MTP Upgrade Only
The steps in this section apply only to N9010A-MTP upgrades, where the CPU is replaced. If the
N9010A-MTU upgrade is being performed, skip to "
Replacing Solid State Drive (SSD) -
".
1.
Turn off the instrument and remove the AC power cord.
2.
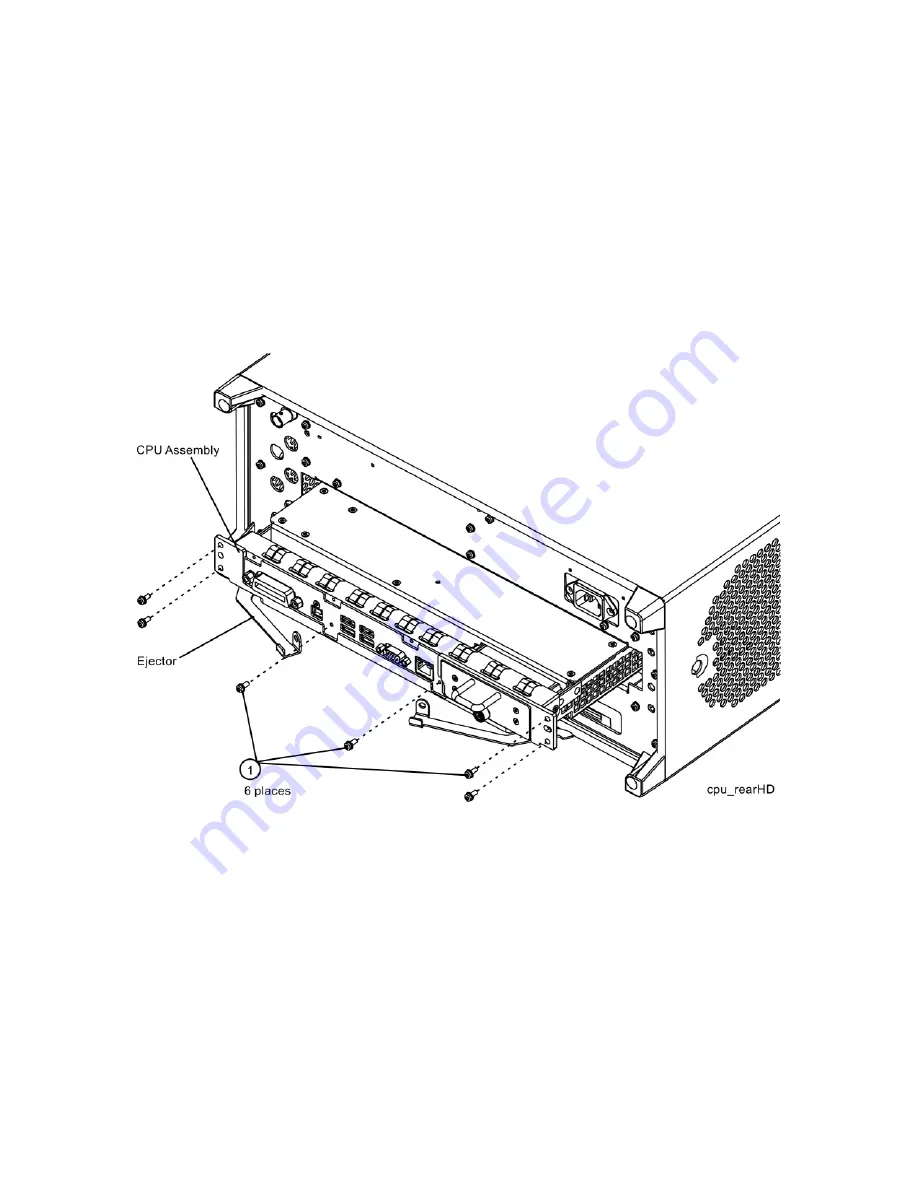
. Remove the existing CPU assembly from the instrument by removing the 6
rear panel screws
(1)
. The CPU assembly can be removed from the chassis by using the two
ejectors to pull it straight out the back.
Figure 5
CPU Assembly Removal
3.
With the ejectors pulled out, slide the new CPU assembly into the slot at the rear of the
instrument and push on the assembly to mate the connectors. Gently secure the CPU
assembly to the instrument with the ejectors.
4.
Replace the six screws
(1)
that attach the CPU assembly to the chassis. Torque to
9 inch-pounds.


