30
Keysight M9502A/M9505A AXIe Chassis User Guide
Chassis Installation
Mounting the Chassis
Installed Carry Handles and Bumpers
Both the 2-slot and 5-slot chassis are shipped with carry handles and bumpers
installed for portability and desktop use. For rackmounting, the carry handles
and bumpers must first be removed. Tool needed:
-
#2 Phillips driver for M9502A
-
#1 and #2 Phillips drivers for M9505A
To Remove the Carry Handle and Bumpers from the M9502A
1
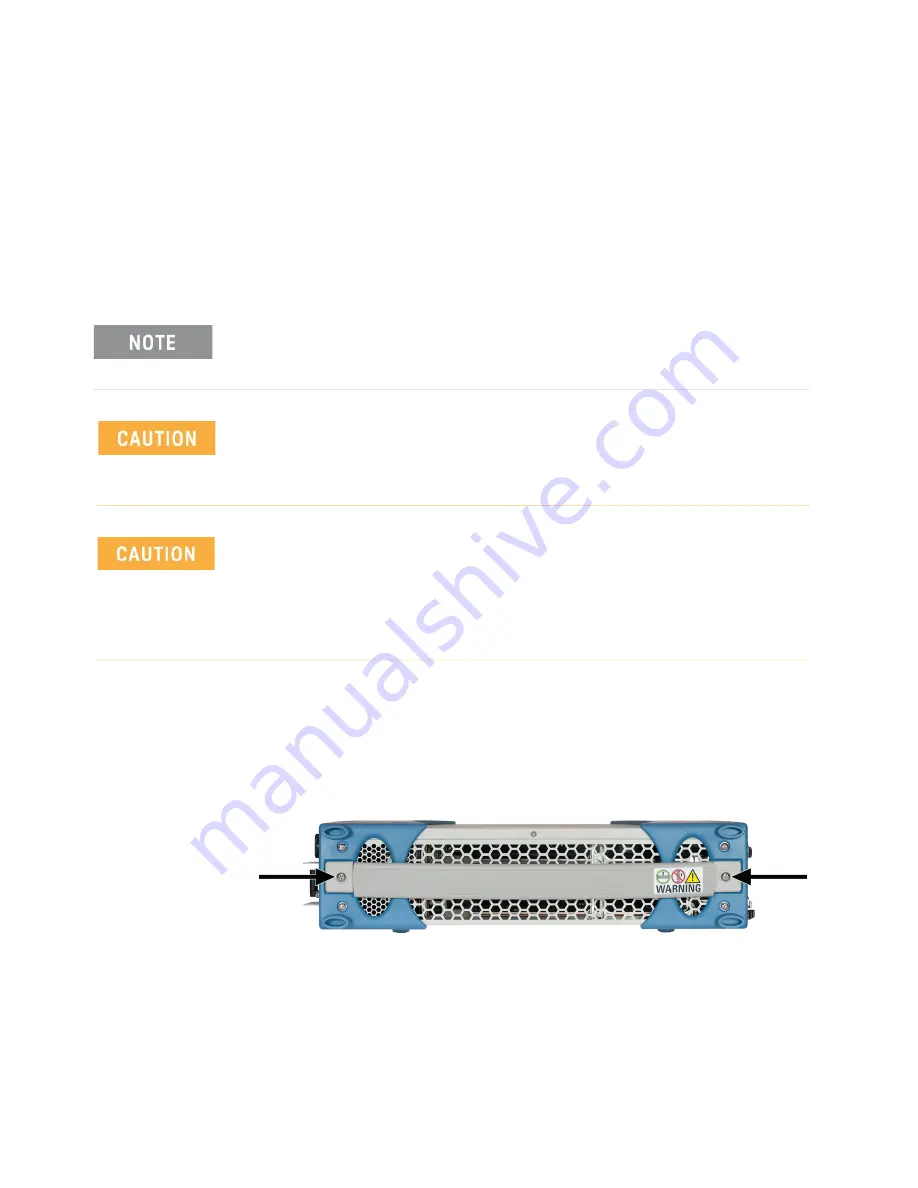
The 2-slot chassis has a single carry handle, which must be removed before
the plastic bumpers. Remove the two #2 Phillips round head screws securing
the handle.
2
Remove the two #2 Phillips round head screws from each side of both
bumpers (8 screws total)
Save all screws, bumpers and carry handles. Reinstall them if you remove the
chassis from the rack to make it portable or for desktop use or if you ever need to
ship the chassis.
If you have been using the chassis with modules and bumpers installed, you
should remove all modules (including the ESM) before removing the bumpers.
This will make handling the chassis easier and reduce chances of damaging
On both the M9502A and M9505A chassis, do not attempt to install the carry
handles without the front and rear bumpers. Do not install handle screws
without handle and bumpers installed. Handle screws are too long without the
other components installed and could result in damage to the chassis. If you
remove the chassis from a rack, you should reinstall both the front and rear
bumpers and the carry handles
Summary of Contents for M9502A
Page 1: ...Keysight M9502A 2 Slot and M9505A 5 Slot AXIe Chassis User Guide...
Page 2: ......
Page 30: ...20 Keysight M9502A M9505A AXIe Chassis User Guide Introduction Product Warranty...
Page 74: ...64 Keysight M9502A M9505A AXIe Chassis User Guide Using the Soft Front Panel SFP Screens...
Page 138: ...128 Keysight M9502A M9505A AXIe Chassis User Guide Glossary...
Page 141: ......


