INSTRUCTIONS
© 2014 Ketra. Inc. All rights reserved.
3815 South Capital of Texas Hwy, Suite 100
Austin, Texas 78704
+
1.512.347.1100
|
www.goketra.com
SALES DEMO KIT
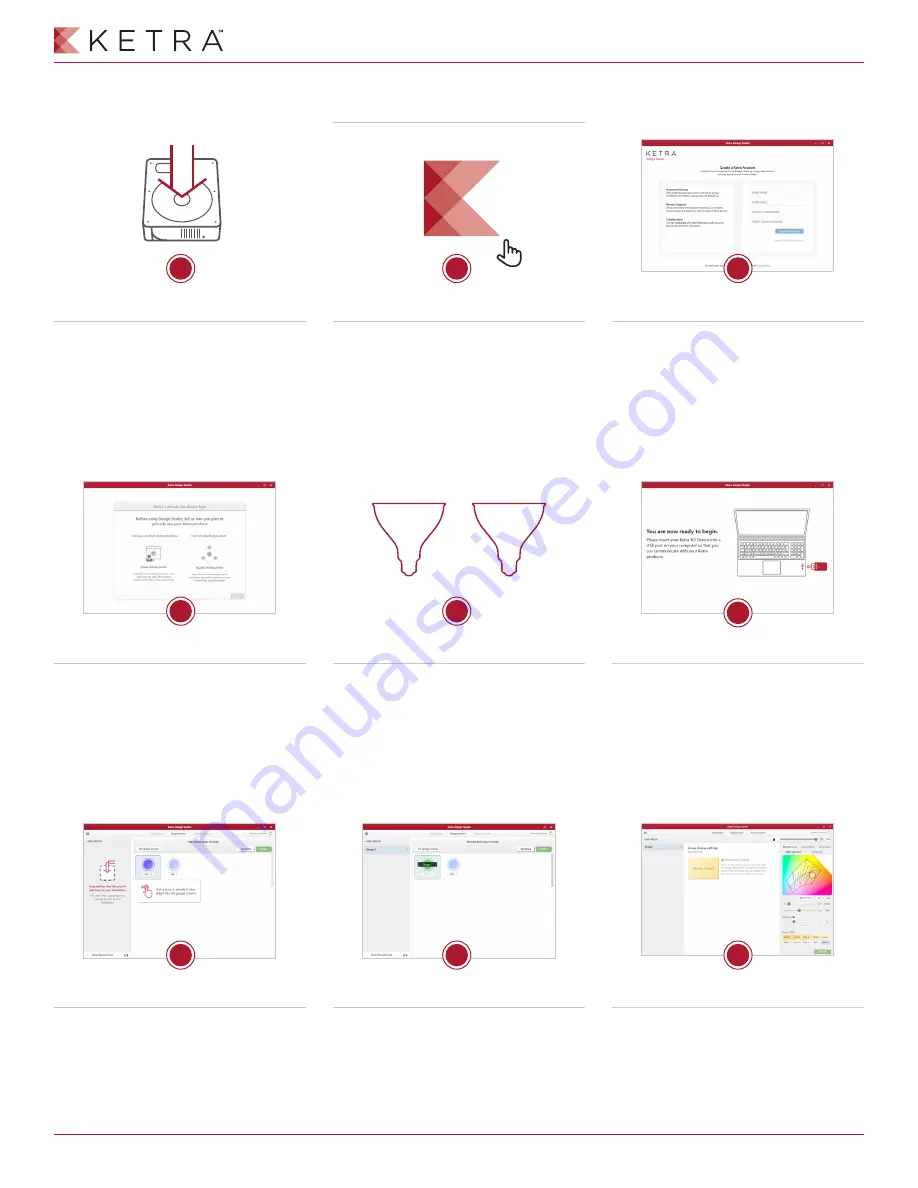
Install Design Studio Software
Double-click setup.exe and follow on-screen
prompts to install the software. If you
have not downloaded Design Studio,
visit
software.goketra.com
for most
recent software and drivers.
Open Design Studio Software
Double-click the Design Studio icon.
(Software will automatically run after installation.)
Design Studio will automatically check
for updates. If an update is available
an arrow icon will be visible.
Create a Ketra Account
I
nput name, email, and your chosen password to
create your account. This account will allow you
to back up all Design Studio work, to collaborate
with other users, and to make use of our remote
assistance program.
1
2
3
Select Installation Type
Choosing Demo Installation will always set your
lamps back to their default state after closing
the software. Choosing Secure Installation will
attach your lamps to that installation only,
until it is deleted.
Connect the Lamps
Remove lamps and cables from kit. Install one
lamp into each socket and plug into a standard
120V wall outlet. Lamps will illuminate in
the default state.
Establish Wireless Connection
Insert the Ketra N1 device into a USB port
on your computer. The indicator on the
N1 should begin to glow.
4
5
6
Discover the Lamps
Follow on screen prompts to identify and
provision your lamps.
Group Lamps
Click and drag lamps into the grouping area
to designate their groups. Once grouped,
click “Finish”. Then select Device Control to
change settings for a given group
or individual lamps.
Publish Settings
When your lamps or group of lamps is set to
your desired default, you have the option
to select “Publish.”
7
8
9


