background image

 OZG_497-BA-e-1510 


16 

5.8  Fitting and adjusting a camera


You can connect special microscope cameras to the devices in the OZG 497 series, 
so that you can digitally record images or sequences of objects being observed.  
 

The connection for this is on the top side of the microscope head


To fit a microscope camera properly, you must use an adapter with a C-mount 
thread. 


There is already an adapter fixed to the camera adapter connection (white 
varnishing), which is not suitable for C-Mount cameras. You firstly have to 
remove this adapter in order to attach an appropriate one. 


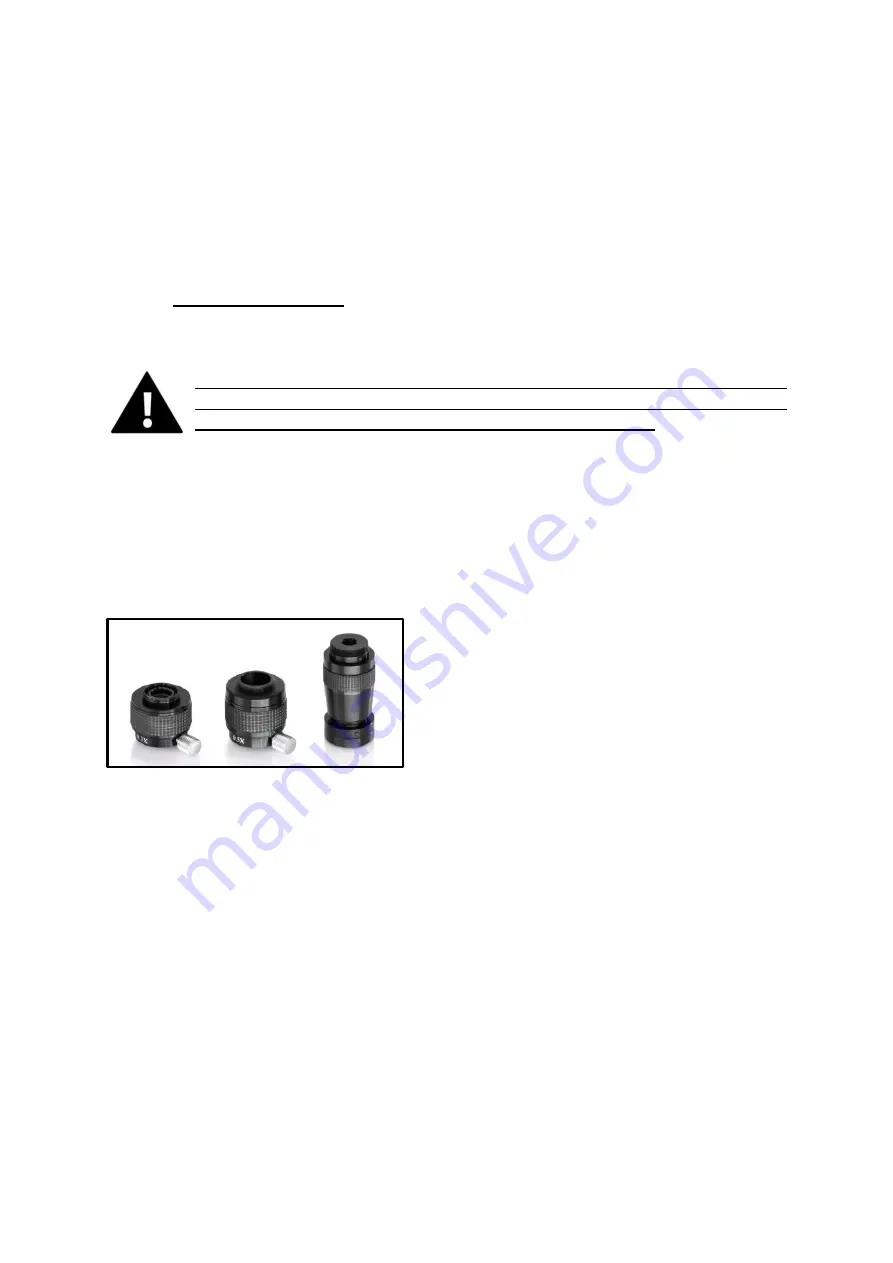
In  total  there  are  three  focusable  adapters  to  choose  from 

(see  figure  below)

.  The 

difference between these adapters is that they have different integrated magnification 
(0.3x, 0.5x, 1.0x). 

The camera and adapter are then united using the C-mount thread. 


C-mount adapter 
 
 
The image which is shown on the camera connected to the  device can often have a 
different level of focus compared with the image on the eyepiece. In order to be able 
to  bring  both  images  into  focus, 

the  focus  can  be  adjusted  by  those  adapters 

when turning the attached black plastic ring. 


Summary of Contents for OZG 497

Page 1: ...N Sohn GmbH Ziegelei 1 D 72336 Balingen E mail info kern sohn com Tel 49 0 7433 9933 0 Fax 49 0 7433 9933 149 Internet www kern sohn com User instructions Jewellery microscope stereo zoom KERN OZG 497...

Page 2: ......

Page 3: ...ssembly 9 5 Operation and functionality 11 5 1 Getting started 11 5 2 Adjust the interpupillary distance 11 5 3 Adjusting the magnification 11 5 4 Dioptre adjustment and focussing 12 5 5 Adjusting the...

Page 4: ...ting to a mains power supply you must make sure that you are using the correct input voltage The information to select the correct power supply is located on the device on the rear of the stand base Y...

Page 5: ...holder must not be rotated back too far If you do this there is a risk that the microscope could tip over When the microscope is not being used you should fit the objective cap and cover the microscop...

Page 6: ...s these are highly flammable substances You must therefore keep it away from naked flames and electrical devices which can be switched on and off and only use it in well ventilated rooms However organ...

Page 7: ...OZG_497 BA e 1510 6 2 Nomenclature...

Page 8: ...7 OZG_497 BA e 1510 Rear view...

Page 9: ...On both sides Packaging dimensions WxDxH 600x480x400 mm Product dimensions WxDxH 340x235x580 mm Gross weight 14 7 kg Net weight 11 5 kg Standard configuration Model KERN Tube Eyepiece Field of view mm...

Page 10: ...the microscope To do this there is a screw connection both on the stand as well as the bulb housing of the front light After that you should bring the front light into the correct position Now the goo...

Page 11: ...scopes can be fitted to the eyepieces see section 5 6 You can fit a C mount adapter to the appropriate connection point on the top of the microscope head This enables you to fit and use digital camera...

Page 12: ...illary distances So each time a different person uses the microscope the gap between the two eyepieces must be re adjusted While you are looking through the eyepieces use one hand to hold the righthan...

Page 13: ...ough the right eyepiece with the right eye and bring the object into focus by using the focus control dials 5 Now set the largest possible zoom factor 6 Once again still only looking through the right...

Page 14: ...unintentionally In this way you can avoid possible damage which could occur if the objective lens and the object being observed should collide Tilt function The stand of the microscope has a tilt func...

Page 15: ...ied by the glasses symbol on the side They are also marked in the item description by an additional H example HSWF 10x 23 mm When fitting the eye cups make sure that the dioptre setting is not moved W...

Page 16: ...n be used to switch it on and off It is not connected to the dimmer wheel and does not have one of its own So the light intensity does not vary at all However the advantage of the front light is that...

Page 17: ...ot suitable for C Mount cameras You firstly have to remove this adapter in order to attach an appropriate one In total there are three focusable adapters to choose from see figure below The difference...

Page 18: ...doing this please make sure that all microscope components are firmly fixed The bulb which appears inside the open lamp housing can then be simply pulled out of its socket and replaced with a new bulb...

Page 19: ...mm OZB A4119 HSWF 20x 14 5 mm OZB A4120 HWF 25x 11 7 mm OZB A4121 C Mount 1x OZB A4809 0 3x OZB A4810 0 5x OZB A4811 Dark field attachment Dark field attachment OZB A4601 Object clamp Object clamp ste...

Page 20: ...sufficient The wrong bulb has been used The input voltage is too low Optical unit Problem Possible causes You can see two images The interpupillary distance is not set correctly The magnifications of...

Page 21: ...y materials which you can dispose of at your local recycling centre Disposal of the storage box and device must be carried out by the operator in accordance with all national or regional laws in force...

Reviews: