background image

12

WARNING:

To eliminate the risk of burns from reaching over heated grill, cabinet storage space   

located above the grill should be avoided.  If cabinet storage is to be provided, the 

risk can be reduced by installing a range hood that projects horizontally a minimum

 of 5 inches beyond the bottom of the cabinets.

Before making the countertop cutout, check for clearance.  Check to see that the grill will clear the 

front and side walls of the base cabinet.  Also check for proper clearance to the back splash so 

that the lid can open fully.

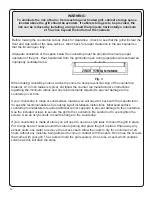
Adequate ventilation of the space below the countertop must be provided to ensure proper 

operation of the grill.  Heat transferred from the grill bottom pan during operation will overheat an 

improperly ventilated area.

2 INCH  (51MM) MINIMUM

Fig. 3

When making countertop cutout, radius the corner to help prevent cracking of the countertop 

material. A 1/4 inch radius is typical, but follow the counter top manufacturer’s instructions 

regarding the minimum radius and any reinforcements required to prevent damage to the 

countertop over time.

If your countertop is made of solid surface material you will need to check with the manufacturer 

for specific recommendations for cooktop & grill installation instructions. Most solid surface 

countertop manufacturers require additional corner supports to prevent damage to the countertop. 

Use the included screws to secure the grill to the countertop. Be careful not to over-tighten the 

screws. Use an acrylic caulk to seal the flange to the countertop.

If your countertop is made of stone you will need to use an acrylic latex to mount the grill in place. 

Put a large bead of caulk around the cutout opening and place the grill in place. Wipe away any 

excess caulk, use water to remove the excess caulk. Allow the caulk to dry for a minimum of 24 

hours without any moisture being allowed to come in contact with the caulk. Do not use the screws 

that came with your grill. The caulk will hold the grill securely. Do not use a caulk which contains 

silicone as this will stain the stone. 

Summary of Contents for All Seasons FLORIDIAN

Page 1: ...ectric Grill Kenyon International Inc P O Box 925 8 Heritage Park Road Clinton CT 06413 USA Phone 860 664 4906 Fax 860 664 4907 www kenyonappliances com Part 143355E Revised March 28 2011 kenyonengineering manuals grill 143355E Use Care Guide Installation Manual 120 and 240 V Models ...

Page 2: ...Product Specifications Installation Instructions Package Contents Electrical Requirements Countertop Installation Drain Connection Outlet Location Final Preparations Prior to Use Operation of Grill Touch Control Power Cord Grill Parts Lid Removal Warranty Information 3 4 7 8 9 10 10 13 13 13 15 18 19 20 21 2 ...

Page 3: ...n moving an appliance containing hot oil or other hot liquids 12 Always attach plug to appliance first then plug cord into the wall outlet To disconnect turn any control to off then remove plug from wall outlet 13 Do not use appliance for other than intended use 14 Always place a minimum of one 1 cup of water in disposable drip tray prior to grilling 15 Never leave children alone children should n...

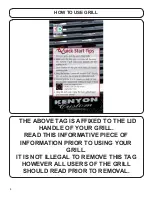
Page 4: ...IXED TO THE LID HANDLE OF YOUR GRILL READ THIS INFORMATIVE PIECE OF INFORMATION PRIOR TO USING YOUR GRILL IT IS NOT ILLEGAL TO REMOVE THIS TAG HOWEVER ALL USERS OF THE GRILL SHOULD READ PRIOR TO REMOVAL HOW TO USE GRILL 4 ...

Page 5: ...art B96000 onto the element with drip trays installed Use the griddles for foods such as eggs pancakes or my favorite stuffed french toast 6 Preheat grill for 5 to 9 minutes on high 8 bars illuminated Adjust heat setting for type of food Steak and hamburgers 8 bars Chicken pork and fish 6 bars Vegetables 5 bars 7 Close the lid s and cook Enjoy the best grilled food you have ever tasted 8 Clean up ...

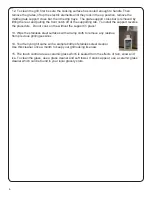
Page 6: ...ort reverse the procedure Do not cook on the without the support in place 13 Wipe the stainless steel surfaces with a damp cloth to remove any residue from previous grilling sessions 14 Your Kenyon grill came with a sample bottle of stainless steel cleaner Use this cleaner once a month to keep your grill looking like new 15 The touch control area is ceramic glass which is sealed from the effects o...

Page 7: ...riddle Preheat your All Seasons Grill on medium high heat 6 bars for approximately ten minutes Once the cream cheese has softened mix with the peach preserves Divide equally onto eight slices of bread and spread evenly Place the remaining eight slices on top to make a sandwich When your griddle has been preheated add two tablespoons of butter and move around to coat the griddle Reserve the rest of...

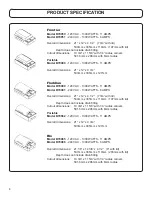
Page 8: ...81 240V AC 1300 WATTS 6 AMPS Overall dimensions 21 x 12 x 4 1 2 7 3 4 with lid 533mm x 305mm x 114mm 197mm with lid Depth does not include drain fitting Cutout dimensions 19 3 4 x 11 5 8 with 1 4 radius corners 501 6mm x 296mm with 6mm radius Portable Model B70082 120V AC 1300 WATTS 11 AMPS Overall dimensions 21 x 12 x 9 3 4 533mm x 305mm x 127mm Rio Model B70085 120V AC 1300 WATTS 11 AMPS Model B...

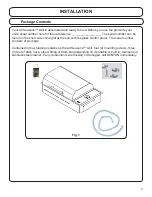
Page 9: ...f the grill at the end with the glass control panel The serial number consists of six digits Contained in the shipping container is the All Seasons Grill four 4 mounting screws three 3 feet of drain hose elbow fitting or drain plug depending on if portable or built in manual and stainless steel cleaner If any components are missing or damaged call KENYON immediately 9 INSTALLATION Package Contents...

Page 10: ...I device from the supplied power cord under any circumstances Your All Seasons Grill is supplied with a factory installed polished stainless steel flange that accepts four oval head wood screws for mounting The trim flange of the grill is designed to hold the unit firmly in place in the countertop If desired you may seal the edge of the countertop beneath the trim flange We recommend a NON ADHESIV...

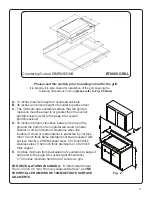
Page 11: ...op of the grill and the bottom of an unprotected wood or metal cabinet or 24 inch minimum clearance when the bottom of wood or metal cabinet is protected by not less than 1 4 inch thick flame retardant mill board covered with not less than No 28 MSG sheet steel 0 015 inch thick stainless steel 0 024 inch thick aluminum or 0 020 inch thick copper E 4 inches minimum from backsplash of countertop to ...

Page 12: ...counter top manufacturer s instructions regarding the minimum radius and any reinforcements required to prevent damage to the countertop over time If your countertop is made of solid surface material you will need to check with the manufacturer for specific recommendations for cooktop grill installation instructions Most solid surface countertop manufacturers require additional corner supports to ...

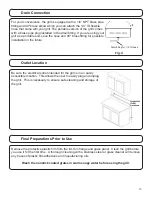
Page 13: ...sion of the grill comes with a brass pipe plug installed in the drain fitting If you are using your grill as a portable unit save the hose and 90º brass fitting for possible installation in the future Drain fitting for 1 4 ID hose Outlet Location Final Preparations Prior to Use Remove the protective plastic film from the lid trim flange and glass panel Clean the grill before you use it for the fir...

Page 14: ...y may be hot enough to cause severe burns CLEAN GRILL AFTER EACH USE This appliance is equipped with a removable disposable drip pan This pan MUST be removed and cleaned after each and EVERY use Do not allow grease to accumulate between cooking The grease pan and baffle tray MUST be used when cooking on the grill Excessive grease may spill over into the interior of the grill voiding your warranty ...

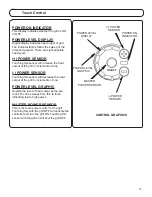
Page 15: ...NSOR Touching this sensor will decrease the heat output of the grill in increments of one POWER LEVEL GRAPHIC Depicts the level of heat output by the ele ment The line sweeps from thin to thick indicating low to high power MASTER POWER SENSOR This is the main power control for the grill Touching this with the grill OFF will activate the controller and turn the grill ON Touching this sensor with th...

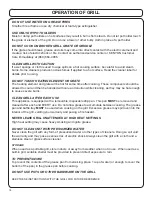
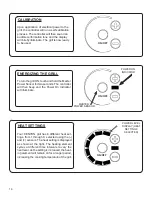
Page 16: ...econds The controller will then beep and the Power On Indicator will illuminate POWER ON INDICATOR ON OFF MASTER POWER SENSOR POWER LEVEL DISPLAY HEAT SETTING 8 SELECTED HEAT SETTINGS Your KENYON grill has 8 different heat set tings from 1 through 8 selected using the and sensors The heat setting is displayed as shown at the right The heating element cycles at different time intervals to vary the ...

Page 17: ...es TURNING OFF THE GRILL To turn off the grill simply touch and hold the Master Power Sensor for two seconds The control ler will de energize and shut off the heating element IN AN EMERGENCY THE GRILL CAN BE TURNED OFF BY PRESSING THE TEST BUTTON ON THE GFCI PREHEAT AND AUTO SHUT OFF TIME The grill will preheat at full power for the specified time and heat settings listed in the table below In the...

Page 18: ...pplied and indicates that the GFCI is working properly TEST EMERGENCY OFF BUTTON Pressing this button will test the GFCI The indicator light will go out and electrical power will not be supplied to the grill The GFCI should be tested monthly RESET BUTTON Pressing this button will reset the GFCI to its normal function The indicator lamp will illuminate and electrical power will be supplied to the g...

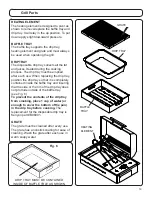
Page 19: ...tray must be emptied after each use When replacing the drip tray position the drip tray so that it is completely contained inside the baffle tray and insuring that the side or the rim of the drip tray does not protrude outside of the baffle tray see Fig 6 To prevent the contents of the drip tray from smoking place 1 cup of water or enough to cover the bottom of the pan in the drip tray before cook...

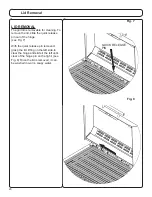
Page 20: ...e hinge see Fig 7 With the quick release pin removed grasp the lid lifting on the left side to clear the hinge and slide it the left until clear of the hinge pin on the right see Fig 8 Once the lid is removed it can be washed in warm soapy water Fig 7 Fig 8 20 QUICK RELEASE PIN Lid Removal QUICK RELEASE PIN ...

Page 21: ...ping charges to the location of the appliance home within the Continental United States and Canada Any duties express or special shipping charges are at the expense of the Buyer 5 All labor allowed by the Company under this warranty must be performed by an Authorized Kenyon International Service Center unless otherwise specified in writing by the Company 6 This warranty does not cover the cost of ...

Reviews: