background image

English


|


21

Bluetooth Audio Operation

Connecting a Bluetooth Device

Before use the Bluetooth device, you need to 
connect Bluetooth device to this unit. The following 
3 steps procedure is necessary.

Pairing (Registering from Bluetooth devices)

To make your Bluetooth Audio player usable with 
this unit, you need to register it (pairing).

Turn on this unit

Press the [SRC] button.

Start registering this unit by operating the 
Bluetooth device

By operating the Bluetooth device, register the 
audio player (pairing). Select “KENWOOD BT CD/R-
4P1”/ “KCA-BT200” from the list of connected units. 

Enter a PIN code

Input the PIN code (“0000”) in the Bluetooth 
device.

Check that registration is complete on the 
Bluetooth device. 


PIN code is set to “0000” as the default. You can 
change this code. Refer to <Registering PIN 
Code> (page 44).

By operating the Bluetooth device, start 
Bluetooth connection.

•  If pairing does not succeed, try followings.
  –  PIN code is set to “0000”. See <Registering PIN Code> 

(page 44)

  –  Turn off the power of this unit and turn it back on. And 

then try the pairing operation again.

  –  If other audio players have been registered, delete 

them. And then try the pairing operation again.  See 
<Deleting a Registered Bluetooth device> (page 45)

•  When registering from  this unit, refer to <Registering 

Bluetooth device> (page 43).

•  For details on the Bluetooth Audio player which can be 

connected, see <About the Bluetooth Audio player> 
(page 51).

Basic Operation

Selecting Bluetooth Audio source

Press the [SRC] button. Turn the [VOL] knob and 
press it when the desired item is displayed.

Select the “BT Audio” display.


SRC Select mode 2: Pressing the [SRC] button 
repeatedly switches source.

Pause and play

Press the [

38

] button.

Music Search

Press the [

4

] or [

¢

] button.

•  All or some of the operations above cannot be 

performed if the Bluetooth audio player is not ready for 
remote control.

•  Switching between Bluetooth audio sources does 

not start or stop playback automatically. Perform the 
operation for starting or stopping playback.

•  Some audio players cannot be controlled remotely or 

reconnected after Bluetooth disconnection. Operate the 
main unit of the audio player to connect Bluetooth.

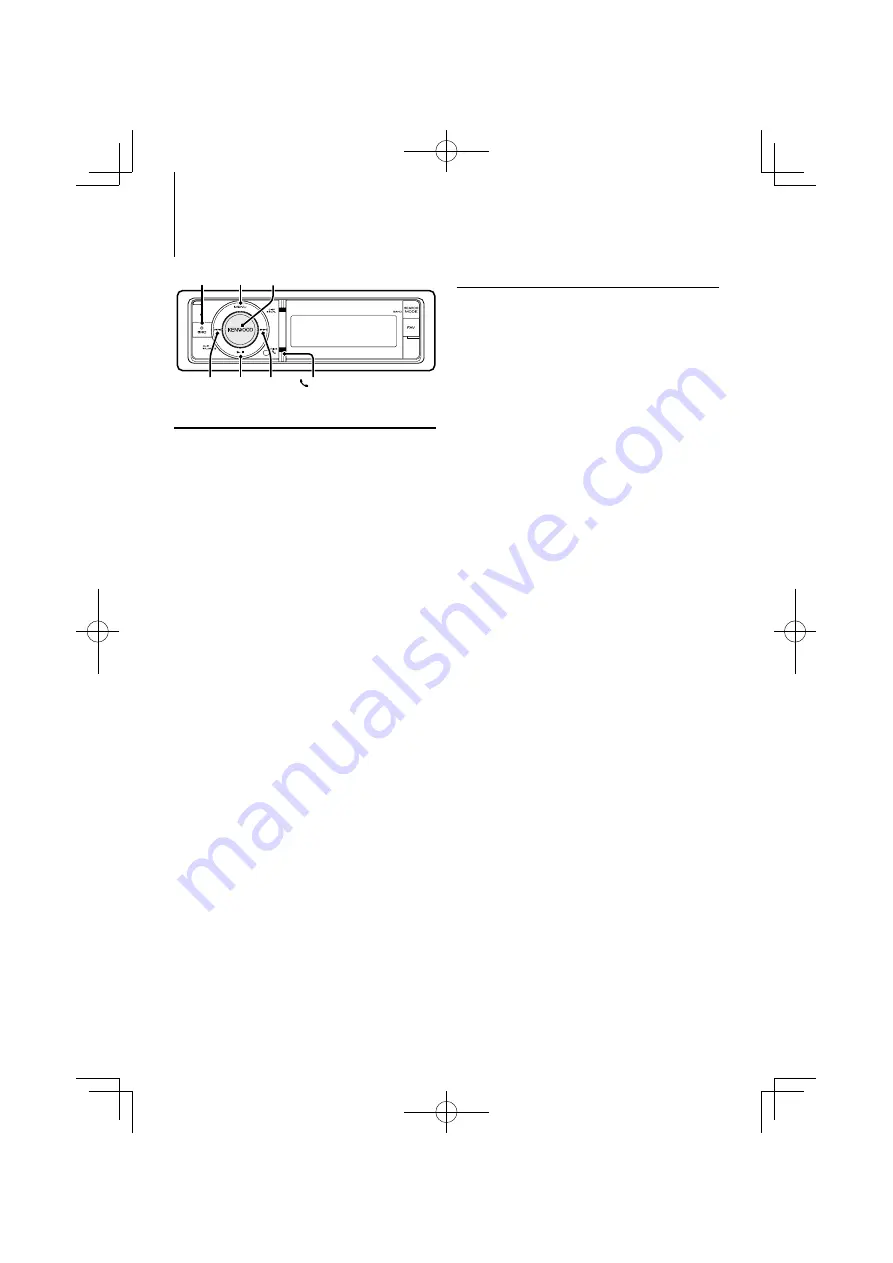
SRC

4

MENU VOL

¢

38

/PLAY MODE

Function of KDC-X8016BT/ KDC-X8016BTL
KDC-X7016/ KDC-X7016L with KCA-BT200 (Optional Accessory)


Summary of Contents for KDC-X7016

Page 1: ...CD RECEIVER KDC X8016BT KDC X8016BTL KDC X7016 KDC X7016L INSTRUCTION MANUAL B64 4520 10 02 MW M3W ...

Page 2: ... Number type category Display Settings 26 Basic Operation Display Setting Customization of 5 line Display Mode 3 line Display Mode iPod like Display Mode Customization of Spectrum Analyzer Display Mode Illumination Color Selection Auxiliary Input Display Setting Clock and Other Functions 30 Clock and Date Adjustment Initial Settings Demonstration mode Setting Muting volume upon reception of Phone ...

Page 3: ...ood dealer Notes If you experience problems during installation consult your Kenwood dealer When you purchase optional accessories check with your Kenwood dealer to make sure that they work with your model and in your area Characters that conform to GB2312 or ISO 8859 1 can be displayed Refer to MENU Chinese of Initial Settings page 30 Characters that conform to ISO 8859 1 English Windows CP 1256 ...

Page 4: ...to the low microphone volume or noises in the vehicle adjust the microphone settings by Bluetooth Setting page 42 7 Auxiliary Input Terminal Portable audio device can be connected with the mini plug 3 5 mm ø Use the mini plug cable which is stereo type and does not have any resistance 8 SRC button To turn on this unit and select the Source To turn off this unit press the button at least 1 second 9...

Page 5: ...ized the source display changes from USB to iPod Volume Turning the VOL knob adjusts the sound volume Menu List Operation The basic operating procedure for using this function is described below The individual function items are covered in the operating procedures 1 Select the source Press the SRC button Turn the VOL knob and press it when the desired item is displayed Function items vary from sou...

Page 6: ...sts Artists Artists Albums Albums Songs Songs Podcasts Podcasts Genres Genres Composers Composers 1 Select iPod source 2 Enter Menu List mode Press the MENU button 3 Turn the VOL knob and press it when the desired item is displayed Select Music 4 Select a song Operation type Operation Move between items Turn the VOL knob Select an item Press the VOL knob High Speed Search Press the DISP or PLAY MO...

Page 7: ... the PLAY MODE button Remarks All Random The time required to turn on the all random function may become longer depending on the number of songs in iPod Turning on the all random function changes the iPod browse item to Songs This browse item will not be changed even if the all random function is turned off If the browse item is changed to search for music while the all random function is on the a...

Page 8: ...ich is selected now Refer to Skip Search page 10 Register My P list Registers a song to My Playlist Refer to My Playlist page 10 1 Select iPod source Press the SRC button Turn the VOL knob and press it when the desired item is displayed Select the iPod display SRC Select mode 2 Pressing the SRC button repeatedly switches source 2 Enter Search mode Press the SEARCH MODE button 3 Select the Search m...

Page 9: ... by browsing iPod page 6 to select a song Cancelling the Related Search Press the SEARCH MODE button Related search cannot be performed while playing the Podcast When the music being played has no information on browsing items or no music was found Not Found is displayed Alphabet Search You can select a song by alphabet This function searches songs whose name contain the specified character s in t...

Page 10: ...RCH MODE button 3 Register the song Turn the VOL knob and press it when the desired item is displayed Select Register My Playlist Stored Registration number is displayed Make a Playlist from the songs stored in one iPod If you attempt to register a song stored in a different iPod No Information appears and then Delete My Playlist appears Select Yes to delete the Playlist when you want to remake it...

Page 11: ...all songs are deleted 4 Turn the VOL knob and press it when the desired item is displayed Select the song you want to delete 5 Turn the VOL knob and press it when the desired item is displayed Select Yes Complete is displayed You can also delete all songs from the Playlist by selecting Delete My Playlist described in iPod Setting page 7 If you connect the different iPod from one registered to My P...

Page 12: ...you want to listen to from the device being played now USB device Display Items Music Folder or file name list Music Editor media Display Items Music Playlists Playlists Artists Artists Albums Albums Songs Songs Genres Genres 1 Select USB source 2 Enter Menu List mode Press the MENU button 3 Turn the VOL knob and press it when the desired item is displayed Select Music 4 Select a file Operation ty...

Page 13: ... the folder randomly ON OFF File Repeat When set to ON plays the music repeatedly ON OFF Folder Repeat When set to ON plays the music in the folder repeatedly ON OFF Factory setting 4 Make a setting Press the 4 or button 5 Exit Play Mode KDC X8016BT KDC X8016BTL Press the MENU button KDC X7016 KDC X7016L Press the PLAY MODE button USB Setting You can select following USB Setting items 1 Select USB...

Page 14: ...ng Sets the ratio of skip performed Press the 4 or button Return to previous item Press the MENU button After this step see step 4 of File Search page 12 to select a song Cancelling the Skip Search Press the SEARCH MODE button This operation is effective only for the files registered in the database created with KENWOOD Music Editor Set the ratio with Skip Search in USB Setting page 13 Function of...

Page 15: ...Pause and Play Press the 38 button to pause or resume playback Function of Internal CD source Music Search Selecting the music you want to listen to from the disc being played now Display Overview Music Track list Music CD Folder or file name list Audio file 1 Select CD source 2 Enter Menu List mode Press the MENU button 3 Turn the VOL knob and press it when the desired item is displayed Select Mu...

Page 16: ...der Repeat When set to ON plays the music on the disc repeatedly ON OFF Factory setting Disc changer source Display Overview Track Scan When set to ON plays the intro of the music on the disc successively ON OFF Disc Random When set to ON plays the music on the disc randomly ON OFF Magazine Random When set to ON plays the music in the disc changer randomly ON OFF Track Repeat When set to ON plays ...

Page 17: ...T button Direct Music Search cannot be performed during playing of Random play or scan play Function of disc changer with remote control Direct Disc Search Searching the disc by entering the disc number 1 Enter Direct Disc Search mode Press the DIRECT button on the remote control 2 Enter the disc number Press the number buttons on the remote control 3 Search the disc Press the FM or AM button Canc...

Page 18: ... Preset memory Manual Normal manual tuning control Auto Memory Memorizes 6 stations with good reception automatically Refer to Auto Memory Entry page 19 Forced MONO You can reduce the noise when stereo broadcasts are received as monaural OFF ON Factory setting 5 Make a setting Press the 4 or button 6 Exit Menu List mode Press the MENU button for at least 1 second and then press it again briefly Re...

Page 19: ...dio station by entering the frequency 1 Select the radio band 2 Enter Direct Access Tuning mode Press the DIRECT button on the remote control is displayed 3 Enter the frequency Press the number buttons on the remote control Example Desired frequency Press button 92 1 MHz FM 9 2 1 810 kHz AM 8 1 0 4 Tune in to the entered frequency Press the 4 or button Cancelling Direct Access Tuning Press the DIR...

Page 20: ... Press the SRC button Turn the VOL knob and press it when the desired item is displayed Select the TV display SRC Select mode 2 Pressing the SRC button repeatedly switches source Select the TV band and Video input Press the SEARCH MODE button Each time you press the button TV bands and Video input alternate Select the TV channel Press the 4 or button Preset Memory Putting the TV channels in the me...

Page 21: ...nd then try the pairing operation again If other audio players have been registered delete them And then try the pairing operation again See Deleting a Registered Bluetooth device page 45 When registering from this unit refer to Registering Bluetooth device page 43 For details on the Bluetooth Audio player which can be connected see About the Bluetooth Audio player page 51 Basic Operation Selectin...

Page 22: ...t up Step 3 Hands free phoning You can do hand free phoning when the connection is made When registering from this unit refer to Registering Bluetooth device page 43 For details on the Bluetooth cell phone with the hands free function see About the Cell Phone page 000 Receiving a Call Answering a Phone Call Press the VOL knob The following operations disconnect the line Insert a CD Connect a USB d...

Page 23: ...r in the preset Phonebook Selecting the initial to be searched for the phone book In Call Calling a number in the incoming call list Out Call Calling a number in the outgoing call list Missed Call Calling a number in the missed calls list Number Dial Making a call by entering phone number Operation method of each mode is described below 3 Exit the dialing method mode KDC X8016BT KDC X8016BTL Press...

Page 24: ... KDC X7016 KDC X7016L Press the PLAY MODE button for at least 1 second 2 Select the call log mode Turn the VOL knob and press it when the desired item is displayed Select Out Call outgoing call In Call incoming call or Missed Call missed call 3 Select a name or phone number Turn the VOL knob and press it when the desired item is displayed Switching between Display Modes Press the DISP button Press...

Page 25: ... a Voice Command for Category page 46 Audio sound is not output during voice recognition Registering to the Preset Dial Number List 1 Select the phone number you wish to register Select the phone number with reference to the following Calling a Number in the Phone Book page 24 Calling a Number in the Call log page 24 2 Enter Preset Memory mode Press the VOL button for at least 2 seconds 3 Select t...

Page 26: ...e VOL knob and press it when the desired item is displayed Select Settings DISP ILLUMI 4 Select the Menu item Turn the VOL knob and press it when the desired item is displayed Display Overview Settings DISP ILLUMI Making Display and Illumination settings Display Select Selecting and customizing the Display type Color Select Selecting the Illumination Color of the panel Refer to Illumination Color ...

Page 27: ...OL knob When the PUSH icon is not displayed Press the 4 or button to select a setting value 6 Exit Menu List mode Press the MENU button for at least 1 second and then press it again briefly Customization of 5 line Display Mode 3 line Display Mode iPod like Display Mode You can customize the display of the 5 line display mode 3 line display mode and iPod like display mode 1 Select the source Press ...

Page 28: ...playing the iPod iPod by Hand Mode is displayed If all characters cannot be displayed while playing with iPod the file number in the list is displayed Information Display Music title TITLE Folder name FLD File name FILE Customization of Spectrum Analyzer Display Mode You can customize the display of the Spectrum analyzer display mode 1 Select the source Press the SRC button Turn the VOL knob and p...

Page 29: ... adjust color Range 0 9 Turn the VOL knob 3 Press the VOL knob Exit the detail color adjustment mode 5 Exit Menu List mode Press the MENU button for at least 1 second and then press it again briefly Auxiliary Input Display Setting Selecting the display when changing to Auxiliary input source 1 Select the AUX source Press the SRC button Turn the VOL knob and press it when the desired item is displa...

Page 30: ...age KDC X8016BT KDC X7016 only OFF ON Built in AUX When this is set to ON AUX source can be selected ON Allows AUX source to be selected Use this setting when the built in AUX terminal is connected to the external equipment all the time OFF Disable AUX source selection Use this setting when the built in AUX terminal is not used Clock and Date Adjustment You can adjust the clock and date Display Ov...

Page 31: ...it Menu List mode Press the MENU button for at least 1 second and then press it again briefly Demonstration mode Setting Turning the demonstration mode ON OFF 1 Enter Menu List mode Press the MENU button 2 Enter Demonstration mode setting Turn the VOL knob and press it when the desired item is displayed Select DEMO Mode 3 Set the Demonstration mode Turn the VOL knob and press it when the desired i...

Page 32: ...remove it The faceplate is a precision piece of equipment and can be damaged by shocks or jolts Keep the faceplate in its faceplate case while detached Do not expose the faceplate and the faceplate case to direct sunlight or excessive heat or humidity Also avoid places with too much dust or the possibility of water splashing Reattaching the Faceplate 3 Align the shaft on the unit with the depressi...

Page 33: ...English 33 ...

Page 34: ...le with music that is encoded at high bit rate variable bit rate or has minimal high frequency range The bass and vocal sound of Music CD iPod is also supplemented Dual Zone System Main source and sub source Auxiliary input output Front channel and Rear channel separately Audio Control You can adjust following Audio Setting items Display Overview SubWoofer Level You can set subwoofer level 15 0 15...

Page 35: ...ct the position from the following settings Compensation seat Display Not compensating ALL Front Left seat Front Left Front Right seat Front Right Front seat Front Factory setting Preset Equalizer curve Select You can select following Equalizer curve Display Equalizer curve Natural Natural User User Rock Rock Pops Pops Easy Easy Top 40 Top 40 Jazz Jazz Game Game iPod iPod During iPod source only T...

Page 36: ...TIAL Initialize the setting values 5 Set the value Press the 4 or button Adjust between 0 and 170 cm Press the VOL knob for at least 1 second if you want to execute the INITIAL 6 Exit Audio Control mode Press the MENU button for at least 1 second and then press it again briefly Dual Zone System The separate sources can be selected for Front channel and Rear channel Display Overview 2Zone RearVolum...

Page 37: ...ker X Over is automatically set when the position and size of each speaker are selected from the following items Speaker Item Range FRONT SIZE Speaker Size Front O E M 10cm 13cm 16cm 17cm 18cm 4x6 5x7 6x8 6x9 7x10 LOCATION Speaker Location Front Door On Dash Under Dash TWEETER Speaker SizeTweeter None Use REAR SIZE Speaker Size Rear None O E M 10cm 13cm 16cm 17cm 18cm 4x6 5x7 6x8 6x9 7x10 LOCATION...

Page 38: ...Adjusting fine tuning of the speaker position compensation value specified at Car Type Selection page 37 Display Item Range Front Front speaker 0 440 cm Rear Rear speaker 0 440 cm SW Subwoofer 0 440 cm Factory setting 1 Select the source Press the SRC button Turn the VOL knob and press it when the desired item is displayed Select a source other than STANDBY SRC Select mode 2 Pressing the SRC butto...

Page 39: ...alue which was recalled The Equalizer curve is changed to the value which was recalled by the selected source 2 Enter Audio Control mode Press the VOL knob 3 Enter X Over setting mode Turn the VOL knob and press it when the desired item is displayed Select Detailed Setup X Over 4 Select the speaker you want to set Turn the VOL knob and press it when the desired item is displayed Select Front Rear ...

Page 40: ...ite Delete 4 Enter Favorite Preset Memory Delete mode Press the VOL knob 5 Select the number you want to delete Turn the VOL knob and press it when the desired item is displayed Select preset number Delete is displayed Select ALL if you want to delete all Favorite Preset Memory Registering the operation procedure to select your favorite broadcast station or iPod Playlists Artists etc 1 Display a f...

Page 41: ...English 41 6 Turn the VOL knob and press it when the desired item is displayed Select YES Completed is displayed Exit Favorite Preset Memory Delete mode ...

Page 42: ...me interval for automatic answer OFF 0s 8s 99s Bluetooth HF Audio You can specify output speakers for hands free voice communication and Bluetooth audio sound FRONT Outputs voice from the front speakers ALL Outputs voice from the front and rear speakers Call Beep You can output a beep from the speaker when a call comes in ON Beep is heard OFF Beep is canceled BT F W Update Display the version of t...

Page 43: ...to 6 5 Input the PIN code Operation type Operation Select the numbers Turn the VOL knob Move to the next digit Press the button Delete the last digit Press the 4 button 6 Transmit the PIN code Press the VOL knob for at least 1 second If Pairing Success is displayed registration is completed If the error message appears even though the PIN code is correct try Registering Special Bluetooth device 7 ...

Page 44: ...cified A PIN code can be specified with up to eight digits Selecting the Bluetooth device You Wish to Connect When two or more Bluetooth devices have already been registered you need to select the Bluetooth device you wish to use 1 Enter Bluetooth mode KDC X8016BT KDC X8016BTL Press the button KDC X7016 KDC X7016L Press the PLAY MODE button for at least 1 second You can also select from Settings i...

Page 45: ...Y MODE button for at least 1 second You can also select from Settings in Menu List mode 2 Enter Phone book name edit mode Turn the VOL knob and press it when the desired item is displayed Select BT Settings Voice Tag PB Name Edit 3 Search for the name to register Deleting a Registered Bluetooth device You can delete a registered Bluetooth device 1 Enter Bluetooth mode KDC X8016BT KDC X8016BTL Pres...

Page 46: ...n to step 2 Select PB Name Delete Delete 5 Delete a voice tag Press the VOL knob 6 Turn the VOL knob to select YES and then press the VOL knob Exit BT Settings mode Press the PLAY MODE button for at least 1 second Audio sound is not output during voice tag registration Function of KDC X7016 KDC X7016L Setting a Voice Command for Category Add a voice tag to the phone number category type for voice ...

Page 47: ...d up to 75 SMS Short Message Service The SMS arrived at the cell phone is displayed on the receiver A newly arrived message is displayed To prevent car accidents the driver should not read the SMS while driving When a new message arrives SMS Received is displayed The display disappears with any operations Displaying the SMS 1 Enter Bluetooth mode KDC X8016BT KDC X8016BTL Press the button KDC X7016...

Page 48: ... Exit from mode EXIT Selection of item 5 Determination ENT Enter Audio Control mode AUD In Tuner source Band select FM AM Station select 4 Recall preset stations 1 6 In USB Music CD Audio file source Music select 4 Folder select FM AM Pause Play ENT Enter Menu List mode 5 Movement between folders files during Search mode 5 Return to previous folder In iPod source Enter Menu List mode 5 Movement be...

Page 49: ...CT Receiving a call Answer the call Switch between the private talk mode and the hands free talk mode ENT Call waiting Answer Another Incoming Call with the Current Call Suspended Answer another Incoming Call after Terminating the Current Call SRC Continue the Current Call 1 During a call End the call SRC CAUTION Do not set the remote control in hot places such as on the dashboard Lithium battery ...

Page 50: ...ch 1st generation iPod touch 2nd generation Works with iPhone iPhone 3G iPhone 3GS Update iPod iPhone software to the latest version Type of control available varies depending on the type of connected iPod See www kenwood com cs ce ipod for further details The word iPod appearing in this manual indicates the iPod or the iPhone connected with the iPod connection cable optional accessory Not support...

Page 51: ... Profile OPP Object Push Profile PBAP Phone Book Access Profile SYNC Synchronization Profile KDC X7016 KDC X7016L You need to register your cell phone to your Bluetooth Unit beforehand Make sure to read the instruction manual of the Bluetooth Unit as well For the cell phones verified for compatibility access the following URL http www kenwood com cs ce bt The units supporting the Bluetooth functio...

Page 52: ...uring standby Display Page Settings Clock Date DISP ILLUMI Initial Settings SRC Select 30 Beep TAG Language Chinese Built in AUX Forced CD DA Favorite Delete Built in AMP Panel Beep DSI Function items appearing when the iPod source is selected Display Page Music 6 Playlists Artists Albums Songs Podcasts Genres Composers Play Mode 7 iPod by Hand Folder Random All Random File Repeat Settings Skip Se...

Page 53: ...source is selected Display Page Settings AUX Name Set 29 Clock Date DISP ILLUMI Function items appearing when the Hands Free source is selected Display Page BT Settings Phone Selection 44 Audio Selection SMS Download 47 SMS inbox 47 VoiceTag 45 Detailed Setup Device Regist 43 SPCL DVC Select Device Delete 45 PIN Code Edit 44 Auto Answer 42 Bluetooth HF Audio Call Beep BT F W Update Mic Gain NR Lev...

Page 54: ...ell phone call in progress BT Indicates that the Bluetooth function can be used Indicates that battery level of cell phone Full Nearly dead Indicates that the battery level of cell phone cannot be obtained Indicates that signal strength of cell phone Maximum Minimum Indicates the out of coverage zone Indicates that the signal strength of cell phone cannot be obtained The marking of products using ...

Page 55: ...is unit does not support the playback of podcast files What might seem to be a malfunction in your unit may just be the result of slight misoperation or miswiring Before calling service first check the following table for possible problems General The operation check sound beep sound does not sound The preout jack is being used The Touch Sensor Tone cannot be output from the preout jack The illumi...

Page 56: ...er Bluetooth device away from this unit Another Bluetooth device or profile is used for communication The downloading of the Phone book or the SMS disconnects the sound The messages shown below display your systems condition TOC Error No disc has been loaded in the disc magazine The CD is quite dirty The CD is upside down The CD is scratched a lot ERROR 05 The disc is unreadable ERROR 77 Mecha Err...

Page 57: ...ne HF Error 07 The memory cannot be accessed Turn off the power and on again If this message still appears press the reset button on the control unit HF Error 68 The unit cannot communicate with the cell phone Turn off the power and on again If this message still appears press the reset button on the control unit Un Known The Bluetooth device cannot be detected Device Full 5 Bluetooth device have ...

Page 58: ...Profiles HFP Hands Free Profile HSP Headset Profile SPP Serial Port Profile PBAP Phone Book Access Profile OPP Object Push Profile SYNC Synchronization Profile A2DP Advanced Audio Distribution Profile AVRCP Audio Video Remote Control Profile SYNC Synchronization Profile USB Interface USB Standard USB1 1 2 0 Full speed Maximum Supply current 500 mA File System FAT16 32 MP3 decode Compliant with MPE...

Page 59: ...D3 1 kHz 9 dB BAND4 4 kHz 9 dB BAND5 16 kHz 9 dB Preout level Load CD 4000 mV 10 kΩ Preout impedance 600 Ω Auxiliary input Frequency response 1 dB 20 Hz 20 kHz Input Maximum Voltage 1200 mV Input Impedance 10 kΩ General Operating voltage KDC X8016BT KDC X8016BTL 10 5 16V allowable 14 4 V KDC X7016 KDC X7016L 11 16V allowable 14 4 V Maximum Current consumption 10 A Installation Size W x H x D 182 x...

Page 60: ...This symbol mark indicates that Kenwood manufactured this product so as to decrease harmful influence on the environment ...

Reviews: