background image

30


|


KDC-X494/ KDC-MP445U/ KMR-440U

Making a voice dialing call

1

  Enter Bluetooth mode

Press the [FNC] button for at least 1 second.

“BT MODE” is displayed.

2

  Enter voice recognize mode

Press the [AUDIO] button for at least 1 second.

3

  Have the unit recognize your spoken name

Press the [ENTER] button. If you hear a beep, 
speak a registered name within 2 seconds.

4

  Have the unit recognize the spoken category

When you hear a beep, speak the category 
within 2 seconds.

The recognized phone number (name) is displayed.
When you want to change the displayed phone 
number (name), press the [S.MODE] button.

5

  Make a call

Press the [ENTER] button.

• 

If your voice cannot be recognized, a message is displayed. 
Refer to 

<Troubleshooting Guide> (page 41)

.

Pressing the [ENTER] button allows you to retry voice input.

• 

Both the name and category requires registration of a voice 
tag. Refer to 

<Setting a Voice Command for Category> 

(page 36)

.

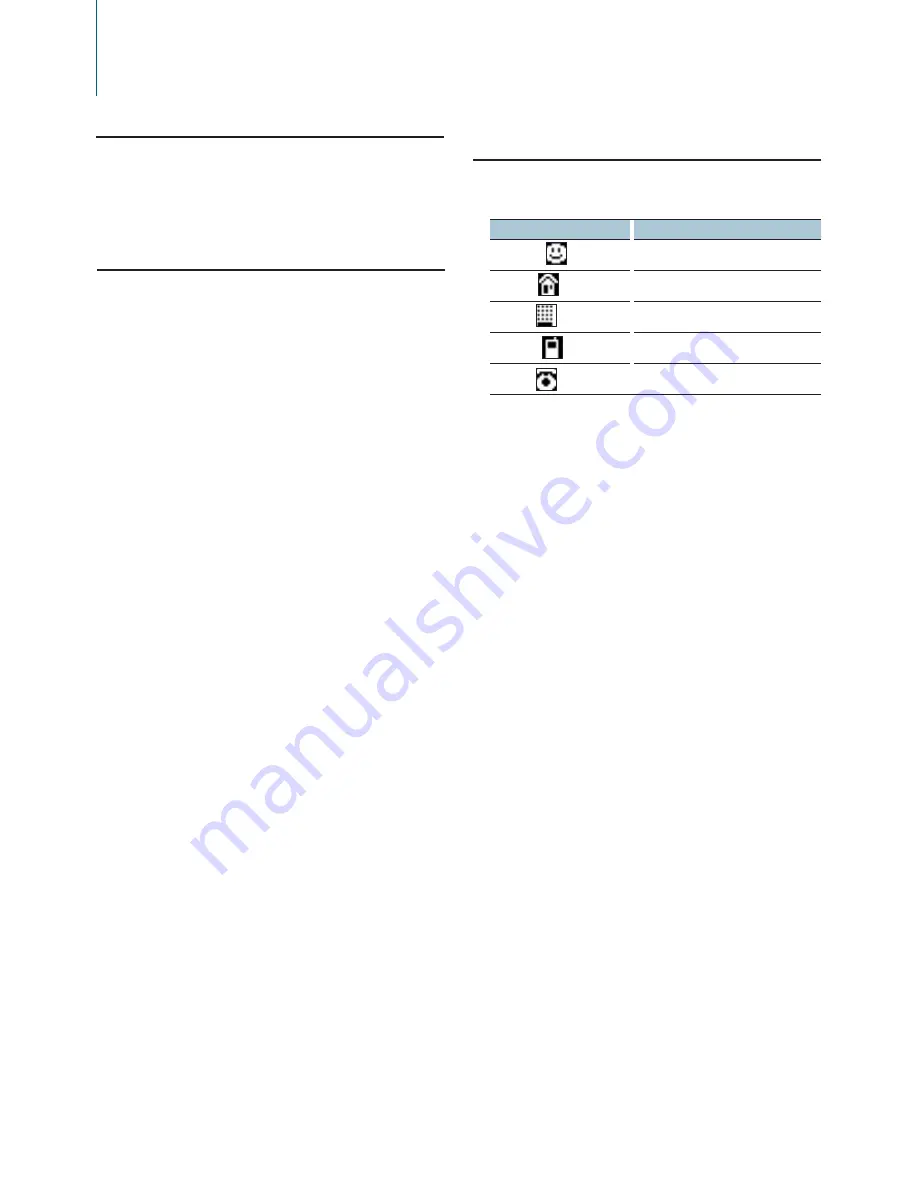
Displays of phone number type 
(category)

The category items in the Phone Book are displayed 
as follows:

Display

Information

General” / “

General

Home” / “

Home

Office” / “

Office

Mobile” / “

Mobile

Other” / “

Other

Operation of hands-free phoning

Function of KCA-BT200 (Optional Accessory)

Clearing the Disconnection Message

Press the [FNC] button for at least 1 second.

“HF Disconnect” disappears.

Summary of Contents for KDC-MP445U

Page 1: ...EIVER Quick Start Guide AMPLI TUNER LECTEUR DE CD Guide de demarrage rapide REPRODUCTOR DE DISCOS COMPACTOS RECEPTOR DE FM AM Gufa de inicio rapido Kenwood Corporation 101 Madefor iPod _ Designed for _ Windows TM Media 859 2005 00 00 KW ...

Page 2: ...c functions of this unit For functions not covered in this Guide refer to the Instruction Manual PDF file contained in the included CD ROM Instruction Manual To refer to the Instruction Manual contained in the CD ROM a PC loaded with Microsoft Windows XPNista 7 or Mac OS X 10 4 or later is required in addition to Adobe Reader 7 1 or Adobe Acrobat 7 1 or later The Instruction Manual is subject to c...

Page 3: ...and faceplate with your fingers If the terminals on the unit or faceplate get dirty wipe them with a clean soh dry cloth Lens Fogging When you turn on the car heater in cold weather dew or condensation may form on the lens in the CD player of the unit Called lens fogging this condensation on the lens may not allow CDs to play In such a situation remove the disc and wait for the condensation to eva...

Page 4: ... Clock Adjust To select the item turn the Control knob To determine the item press the ENTER button 3 Turn the Control knob to adjust the hour and then press the ENTER button 4 Turn the Control knob to adjust the minute and then press the ENTER 4 I Quick Start Guide button S Turn the Control knob to select Date Adjust and then press the ENTER button 6 Turn the Control knob to adjust the year and t...

Page 5: ...source press the ENTER button Tuner TUNER or HD RADIO USB USB or iPod ljPod CD CD Auxiliary Input AUX Standby STANDBY Tuner Volume Turn the Control knob to adjust the sound volume USB terminal USB device or iPod can be connected CA U1 EX or KCA iPl 01 optional accessories is recommended to connect a USB device or iPod Auxiliary input Portable audio device can be connected with the stereo mini plug...

Page 6: ...ontrol knob towards right or left to fast forward or fast backward the audio file containing songs tracks or files Pause and play Press the button to pause or resume playing a song track or file 6 I Quick Start Guide Music Search Searching for the song you want to play 1 Press the Q button 2 Search for music OjfatiQn tjpi o Peta f i Movement between items Turn the Control knob Selection of item Pr...

Page 7: ...ess the ENTER button Selecting the Band Push the Control knob towards up to change the band in the order of FM 1 FM2 FM3 Push the Control knob towards down to change the band to AM Selecting a Station Push the Control knob leftward and rightward to select the station you want to listen to English I 7 ...

Page 8: ...e to download it Calling a number in the Phone Book Dial the phone number in the phone book of your cell phone If the phone book has not been downloaded to this unit operate the cellphone to download it 1 Press the FNC button for at least 1 second 2 Turn the Control knob to select I nitial Search and then press the ENTER button 8 I Quick Start Guide 3 Input initial r I j Select the characters Turn...

Page 9: ...English I 9 ...

Page 10: ...tery out of reach of children and in original package until ready to use Dispose of used batteries promptly If swallowed contact physician immediately Do not leave the battery near fire or under direct sunlight A fire explosion or excessive heat generation may result Do not set the remote control in hot places such as on the dashboard Danger of explosion if Lithium battery is incorrectly replaced ...

Page 11: ...ignition key If you connect the ignition wire to a power source with a constant voltage su pplYt as with battery wirest the battery may die If the console has a lidt make sure to install the unit so that the faceplate will not hit the lid when closing and opening If the fuse blows first make sure the wires arentt touching to cause a short circuitt then replace the old fuse with one with the same r...

Page 12: ...MR optional accessory White KMR 440U only CIP Car fuse box Main fuse e Battery 12 Quick Start Guide To front left speaker White Black 8 Gray To front right speaker8 Gray Black Green To rear left speaker Green Black 8 Purple To rear right speaker8 Purple Black Ignition key switch Car fuse box ACC Ignition wire Red 0 1 Battery wire Yellow Ground wire Black 8 To car chassis ...

Page 13: ...ot supplied that matches your car is required ade do not let the wire come out from _ When using the optional power amplifier connect to its power control terminal STEERINGWHEEL I REMOTEINPUT J To Kenwood disc changer External optional accessory Q To connect these leads refer to the relevant instruction manuals h _ _ I I Fuse lOA I FM AM anten O O _ j 00000000 O oo ocoo Iring arness i AccessoryG I...

Page 14: ...ide Accessory The frame can be removed from the bottom side in the same manner o l r j 8mm Ce __ MAX e T 8mm r 1 MAX T N IT N N T I 1 T Toyota cars N Nissan cars I Bend the tabs of the mounting sleeve with a screwdriver or similar utensil and attach it in place Make sure that the unit is installed securely in place If the unit is unstable it may malfunction for example the sound may skip Japanese ...

Page 15: ...lation If this equipment does cause harmful interference to radio or television reception which can be determined by turning the equipment off and on the user is encouraged to try to correct the interference by one or more of the following measures Reorient or relocate the receiving antenna Increase the separation between the equipment and receiver Connect the equipment into an outlet on a circuit...

Page 16: ...KENWOOD ...

Page 17: ...ated on the warranty card and in the space provided below Refer to the model and serial numbers whenever you call upon your Kenwood dealer for information or service on the product Model KDC X494 KDC MP445U KMR 440U Serial number US Residence Only Register Online Register your Kenwood product at www kenwoodusa com The latest version of the Instruction Manual can be downloaded from www kenwood com ...

Page 18: ...atellite Radio tuner Optional Accessory control 26 Basic Operation Category and Channel Search Channel Preset Memory Preset Tuning Channel Scan Direct Access Tuning Operation of hands free phoning 28 Before Use Receiving a call Calling a number in the Phone Book Dialing a number Calling a number in the call log Speed dialing Preset dial Registering to the Preset Dial Number List During a call Call...

Page 19: ...to play In such a situation remove the disc and wait for the condensation to evaporate If the unit still does not operate normally after a while consult your Kenwood dealer Notes If you experience problems during installation consult your Kenwood dealer When you purchase optional accessories check with your Kenwood dealer to make sure that they work with your model and in your area Characters that...

Page 20: ...and then press the ENTER button 8 Turn the Control knob to adjust the day and then press the ENTER button 9 Turn the Control knob to select Date Mode and then press the ENTER button 10 Turn the Control knob to select Date format and then press the ENTER button 11 Press the button for at least 1 second to exit the Function setting mode Common Operation Power and source selection Turns the power ON ...

Page 21: ...ob towards right or left to select a song track or file Fast Forwards or Fast Backwards the music Push and hold the Control knob towards right or left to fast forward or fast backward the audio file containing songs tracks or files Pause and play Press the button to pause or resume playing a song track or file Removing Disc and USB device Press the 0 button to eject a disc Keeping the button press...

Page 22: ...not place the faceplate and the faceplate case in areas exposed to direct sunlight excessive heat or humidity Also avoid places with too much dust or the possibility of water splashing Muting the audio upon reception of phone call The audio system automatically mutes when a call comes in When a call comes in CALL is displayed The audio system pauses Listening to the audio during a call Press the S...

Page 23: ...stment and then press the ENTER button Press the button to return to the previous item 4 Adjust the Audio item Turn the Control knob 5 Determine the setting value Press the ENTER button The previous item is displayed 6 Exit Audio Control mode Press the button for at least 1 second Audio Control You can adjust following Audio Control items Display Audio item Range SubWoofer Subwoofer output OFF ON ...

Page 24: ...ntrol Setup the Audio Control page 7 2 Enter Audio Control mode Press the AUDIO button 3 Select Audio preset memory mode The item can be selected and determined as follows Detailed Settings Audio Preset To select the item turn the Control knob To determine the item press the ENTER button 4 Select the Audio Preset Memory Turn the Control knob to select Memory and then press the ENTER button 5 Turn ...

Page 25: ...D source Operation type Operation Movement between track Turn the Control knob Selection of track Press the ENTER Return to first track Push the Control knob towards left for at least 1 second Cancel the Music Search mode Press the button Function of iPod source Music Search for iPod Searching for the song in iPod you want to play 1 Enter Music Search mode Press the button MUSICSEARCH is displayed...

Page 26: ...me of Alphabet search may become long depending on the number of items songs in iPod To search for a character other than A to Z and 1 to 9 enter If the first character string begins with an article a an or the in the alphabet search mode it is searched for in defiance of the article Music disc Audio file Operation Function of iPod source Music Editor media Skip Search The number of songs to be sk...

Page 27: ...the ENTER button Cancelling the Music Search mode Press the button for at least 1 second Function of iPod source Related Search Browsing for music of the same artist or genre as the one being played 1 Enter Related Search mode Press the S MODE button 2 Select browsing item Turn the Control knob and press the ENTER button when the desired browse item is selected Display Browses music Search Artist ...

Page 28: ...er it delete an unnecessary song Do not register Podcasts Songs may be registered or played improperly For example unintended songs are registered Playing the playlist 1 Display the playlist Press the ENTER button My Playlist is displayed 2 Play a song in the playlist Turn the Control knob to select the song you want to play and then press the ENTER button LIST indicator is displayed To stop playi...

Page 29: ... Press the SRC button Select the CD CH display For how to select source item refer to Power and source selection page 4 Music search Push the Control knob towards right or left Disc Search Push the Control knob towards up or down Function of disc changers with remote control Direct Search in Disc Changer Optional Searching the disc or music by entering the disc or music number 1 Enter Direct Searc...

Page 30: ... Music Search Press the button on the remote control Station Preset Memory Putting a station in the memory 1 Select the frequency to put in the memory Push the Control knob towards right or left 2 Enter Preset Memory mode Press the button 3 Preset the station Turn the Control knob to select preset number P1 P6 and then press the ENTER button for at least 2 seconds Cancelling the Preset Memory mode...

Page 31: ...on Register 6 pairs of Favorite Preset Memory Register your favorite functions is displayed for numbers available for preset The memory cannot be erased by the Reset button Registering the operation procedure to an existing preset number overwrites the existing procedure The registered item can be deleted by selecting 32 Favorite Delete of Function setting page 16 If the items in the second or low...

Page 32: ...m Example No Function name Display of each function on this unit Setting value 1 Setting value 2 Provides a functional overview of the function item The source that displays this function can be found according to the numbers 00 in Function list page 21 The underscored setting value is a factory setting Music Play Mode 01 iPod Control by Hand Hands Mode ON OFF When set to ON allows you to operate ...

Page 33: ... the display part in conjunction with the light switch of the vehicle 17 Text Scroll Text Scroll Auto Manual Setting to Auto scrolls the displayed text automatically 18 Display Bluetooth device Status BT DVC Status You can display the connection status signal strength and battery level Battery level of cell phone Signal strength of cell phone Function of KCA BT200 Optional Accessory 19 Illuminatio...

Page 34: ...en set to 2 In addition audio files cannot be played when set to 2 Normally keep this set to 1 1 Automatically distinguishes between audio file disc and music CD when playing disc 2 Forces playing as music CD 32 Favorite Delete Favorite Delete Preset No All Deletes Favorite Preset Memory Refer to Deleting Favorite Preset Memory page 15 33 Built in Amp setting Built in AMP ON OFF Selecting OFF turn...

Page 35: ... phone subject to hands free connection Refer to Selecting the Bluetooth device You Wish to Connect page 34 45 Audio Selection Audio Selection Select the Bluetooth audio player to be connected Refer to Selecting the Bluetooth device You Wish to Connect page 34 46 SMS Download SMS Download Download a short message Refer to Downloading the SMS page 37 47 SMS Inbox display SMS Inbox Display the recei...

Page 36: ...es in ON Beep is heard OFF Beep is canceled 57 BT F W Update BT F W Update Displays the firmware version and update the firmware Refer to Displaying the Firmware Version page 34 The Bluetooth Function setting items can be set while in the Bluetooth mode without selecting the Function setting mode 1 Press the FNC button for at least 1 second to enter the Bluetooth mode 2 Turn the Control knob to se...

Page 37: ...udio file iPod 05 Disc Repeat CD changer Folder Repeat Audio file 06 MGZN Random Disc changer 07 Settings Skip Search iPod Music Editor media 25 My Playlist Delete iPod 26 Function items that appear when the tuner source is selected Function item list No Settings Seek Mode 22 Auto Memory 23 MONO 24 Function items that appear when the HD Radio source is selected Function item list No Settings Seek ...

Page 38: ...us Type A display only Indicator Blank Blank Selecting Display Type Shown below are examples of display types Display type Display information Type A Displays 2 lines of text Type B Displays a line of text Type C Displays the status ON OFF indicator for each function Type D Displays the clock Type E Displays the spectrum analyzer 1 Enter Function setting mode Press the FNC button 2 Select Display ...

Page 39: ... Blank Blank 1 Enter Function setting mode Press the FNC button 2 Select Display control mode Turn the Control knob to select Display Control and then press the ENTER button 3 Select the Display type Turn the Control knob to select Display type A or B and then press the ENTER button 4 Select Text display selection mode Turn the Control knob to select DISP Text Select and then press the ENTER butto...

Page 40: ... the modes can be switched to digital broadcast automatic switching analog broadcast only or digital broadcast only When Digital has been set with Receive Mode the seek time will be longer to allow a check of whether the transmission is a digital broadcast It will take few seconds to receive the digital broadcasting after selecting the frequency When Tuning up it will switch to the next frequency ...

Page 41: ...to your iPod Turn ON the 41 iTunes Tagging of Function setting page 16 when using this function Up to 50 TAGs song s information can be registered to this unit When iPod is connected the TAG information registered to this unit is transferred to the connected iPod The memory usage can be checked by selecting 40 Memory count display of Function setting page 16 Function of remote control Direct Acces...

Page 42: ...ory and Channel Search Selecting the channel and category you want to receive 1 Enter Category and Channel Search mode Press the button twice 2 Select the Category Turn the Control knob to select Category and then press the ENTER button 3 Select the Channel Turn the Control knob to select Channel and then press the ENTER button Cancelling Category and Channel Search mode Press the button for at le...

Page 43: ...r buttons on the remote control 3 Search the channel Press the 4 or button on the remote control Cancelling Direct Access Tuning Press the button on the remote control If you make no button operation for 10 seconds the Direct Access Tuning mode is automatically canceled If you cannot receive any signal in the input Channel due to bad conditions on radio wave or other such problems Acquiring Signal...

Page 44: ...pe Operation Select the characters Turn the Control knob Move the character page Push the Control knob towards up or down 4 Search for the name Press the ENTER button 5 Select the phone number Turn the Control knob Dialing a number 1 Enter Bluetooth mode Press the FNC button for at least 1 second BT MODE is displayed 2 Select the Number dial mode Turn the Control knob to select Number Dial and the...

Page 45: ...the ENTER button for at least 2 second Cancelling the Preset Memory mode Press the button During a call Disconnecting a Call Press the SRC button Switching to the Private Mode Push the Control knob towards right or left Switches between Private talk PRIVATE and Hands free talk each time this button is pressed Depending on the type of your cell phone switching to the private talk mode may select th...

Page 46: ... displayed phone number name press the S MODE button 5 Make a call Press the ENTER button If your voice cannot be recognized a message is displayed Refer to Troubleshooting Guide page 41 Pressing the ENTER button allows you to retry voice input Both the name and category requires registration of a voice tag Refer to Setting a Voice Command for Category page 36 Displays of phone number type categor...

Page 47: ...n Select the BT AUDIO EXT display For how to select source item refer to Power and source selection page 4 Pause and play Press the button Music Search Push the Control knob towards right or left All or some of the operations above cannot be performed if the Bluetooth audio player is not ready for remote control Switching between Bluetooth audio sources does not start or stop playback automaticall...

Page 48: ... knob Move to the next digit Push the Control knob towards right Delete the last digit Push the Control knob towards left 6 Transmit the PIN code Press the ENTER button If Pairing Success is displayed registration is complete 7 Return to the device list Press the ENTER button 8 Exit Bluetooth mode Press the SRC button This unit allows up to eight digits to be input for a PIN code If a PIN code can...

Page 49: ...rs can be registered for each registered cell phone Up to 32 digits can be registered for each phone number along with up to 50 characters representing a name 50 Number of alphabetic alphabetical characters Fewer characters can be input depending on the type of characters To cancel downloading of the phone book data operate the cell phone Registering PIN Code By operating the Bluetooth device spec...

Page 50: ...as follows Settings Detailed Settings Device Delete To select the item turn the Control knob To determine the item press the ENTER button Device name is displayed 4 Delete the selected Bluetooth device Turn the Control knob to select desired device name and then press the ENTER button 5 Turn the Control knob to select YES and then press the ENTER button Completed is displayed 6 Exit Bluetooth mode...

Page 51: ...voice tag Delete Delete a voice tag Displayed only when a name for which a voice tag has been registered is selected Selecting Register Regist 6 Register a voice tag first Press the ENTER button When you hear a beep speak the voice tag within 2 seconds 7 Confirm the voice tag second Press the ENTER button When you hear a beep speak the same voice tag again within 2 seconds Completed is displayed 8...

Page 52: ...button 5 Select the category type you wish to set Turn the Control knob to select desired category name and then press the ENTER button General Home Office Mobile Other 6 Select a mode Turn the Control knob Display Operation Register Register a voice tag Check Play a voice tag Delete Delete a voice tag Displayed only when a name for which a voice tag has been registered is selected 7 Register the ...

Page 53: ...age is displayed at the beginning of the list Other messages are displayed in the order of reception The SMS that are received when the cell phone is not linked with Bluetooth cannot be displayed Download the SMS The short message cannot be displayed during downloading the SMS Downloading the SMS Download the short message SMS received by the cell phone so that it can be read on this unit 1 Enter ...

Page 54: ...e Select a dialing method 5 ENT Number dial input Input a digit 0 9 Input Input FM Input AM Clear the entered phone number 4 Make a call DIRECT Receiving a call Answer the call Call waiting Answer Another Incoming Call with the Current Call Suspended During a call End the call SRC Preparing the remote control unit Pull the battery sheet out from the remote control unit to the direction of the arro...

Page 55: ...be erased depending on the operating conditions of the USB device We shall have no compensation for any damage arising out of erasure of the stored data No USB device comes with this unit You need to purchase a commercially available USB device When connecting the USB device usage of the CA U1EX option is recommended Normal playback is not guaranteed when a cable other than the USB compatible cabl...

Page 56: ...HD Radio tuner you can use the similar functions of Tuner features Refer to Tuner features for how to use the functions About the Cell Phone This unit conforms to the following Bluetooth specifications Version Bluetooth StandardVer 1 2 Profile HFP Hands Free Profile OPP Object Push Profile PBAP Phonebook Access Profile SYNC Synchronization Profile For the cell phones verified for compatibility acc...

Page 57: ...d a lot Error 05 The disc is unreadable Error 77 The unit is malfunctioning for some reason Press the reset button on the unit If the Error 77 code does not disappear consult your nearest service center Error 99 Something is wrong with the disc magazine Or the unit is malfunctioning for some reason Check the disc magazine And then press the reset button on the unit If the Error 99 code does not di...

Page 58: ...cell phone Turn off the power and on again If this message still appears press the reset button on the control unit Unknown The Bluetooth device cannot be detected Device Full 5 Bluetooth device have already been registered No more Bluetooth devices are registered PIN Code NG The PIN code is wrong Connect NG The unit cannot be connected to the device Pairing Failed Pairing error No Matching The vo...

Page 59: ...e ratio 1 kHz KDC X494 110 dB KDC MP445U KMR 440U 105 dB Dynamic range 93 dB MP3 decode Compliant with MPEG 1 2 Audio Layer 3 WMA decode Compliant with Windows Media Audio USB Interface USB Standard USB1 1 2 0 Full speed File System FAT16 32 Maximum Supply current 500 mA MP3 decode Compliant with MPEG 1 2 Audio Layer 3 WMA decode Compliant with Windows Media Audio Audio section Maximum output powe...

Page 60: ...s equipment does cause harmful interference to radio or television reception which can be determined by turning the equipment off and on the user is encouraged to try to correct the interference by one or more of the following measures Reorient or relocate the receiving antenna Increase the separation between the equipment and receiver Connect the equipment into an outlet on a circuit different fr...

Page 61: ...de Press the ISRCl button Fran ais page 36 Incorrect Desacf vaf on du mode Bluefoofh Appuyez sur la touche FNC Correct Desacfivaf on du mode Bluefoofh Appuyez sur la touche SRCI Espanol Pagina 3S Incorrecto Cance aci6n del modo Bluefoofh Pulse el boton FNC Correcto Cance aci6n del modo Bluefoofh Pulse el boton ISRCI 858 2002 00 ...

Page 62: ...KDC X494 KDC MP445U KMR 440U KDC BT50U KDC 5047U Ver 1 0 W01 1777 05 INSTRUCTION MANUAL MODE D EMPLOI VlHCTPYKCVlSI no 3KCnJlYATAu VIVI This CD ROM Data cannot be played on an audio CD player KENWOOD ...

Page 63: ...yoursalesslip orother evidenceofpurchaselorproving your eligibility tor requesting Kenwood warranty service 2 Makeyour unit available to an authorized Kenwood Service Center in the military market lor inspection and approved warranty service or ship your unit in its original carton box or equivalent fully insured and shipping charges prepaid 10 the authorized Kenwood Service Center LIMITATION OF I...

Page 64: ...OD as avalid proot 01 purchase When applying lor warranty repairs you musl present Ihe originat copy 01 your bill 01 sale and Ihis warranlycardasproofolwarranty sowerecommendlhatlheybe kepi in asale place should they be required in the tuture KENWOOD ELECTRONICS CANADA INC 6070 Kestrel Road Mississauga Ontario Canada L5T 1S8 Tel 905 670 7211 Fax 905 670 7248 KENWOOD ELECTRONICS BRASIL LTDA BRASIL ...

Reviews: