background image

17

DEUTSCH

IT

ALIANO

ESP

AÑOL

4

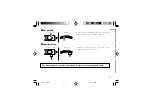
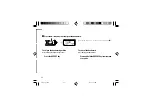
Start playback.

÷

Power comes on and playback starts from the first track.

÷

After the last track is over, playback will stop.

Main unit

Remote control

5

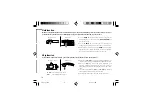
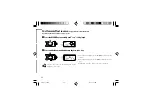
Adjust the volume.

÷

Volume level indicator (0 to 30).  (The volume level is

displayed on the remote control.)

Main unit

Remote control

This unit sometimes stops the disc rotation in order to extend the playable time.

*5378_16_24EN

03.7.3, 2:17 PM

17

Summary of Contents for DPC-X537

Page 1: ...7 DPC X537 B60 5378 00 00 MA E Y AP 0304 PORTABLE CD PLAYER INSTRUCTION MANUAL This instruction manual is for some models Model availability and features functions may differ depending on the country and sales area 5378_01_07EN 03 7 3 11 47 AM 1 ...

Page 2: ...dorfailstooperate notifyyourdealerimmediately Iftheunitwasshipped to you directly notify your shipper immediately Kenwood recommends that you retain the original carton and packing materi als in case you need to move or ship the unit in the future Keep this manual handy for future reference For your records Record the serial number found on the back of the unit in the spaces designated on the warr...

Page 3: ...repeat playback 21 Using Bookmarks 23 Menu control operations 25 Fast forward fast reverse 26 Changing the sound mode 27 Selecting Play Mode 28 Programming tracks in desired order 29 Random playback 30 Intro Scan 30 Alarm mode 31 Sleep mode 33 Sound skip guard function SHOCK GUARD 35 Convenient functions 36 Activating the operating tone Beep 36 Setting continuous playback 37 Listening through the ...

Page 4: ...TRIC SHOCK DO NOT EXPOSE THIS APPLI ANCE TO RAIN OR MOISTURE Safety precautions Caution Read this page carefully to ensure safe operation CLASS 1 LASER PRODUCT CAUTION INVISIBLE LASER RADIATION WHEN OPEN DO NOT STARE INTO BEAM OR VIEW DIRECTLY WITH OPTICAL INSTRUMENTS Inside this laser product a laser diode classified as Class 3A laser radiation is contained as alerted by the internal cautionlabel...

Page 5: ...ong shock to it Damage due to dropping the unit is not covered by the warranty 5 Ventilation Avoid hindering the ventilation of the appliance by covering it with a cloth etc 6 Abnormal smell If an abnormal smell or smoke is detected immediately turn the power OFF and pull out the power cord Contact your dealer or nearest service center 7 Heat Avoid placing the appliance under direct sunlight or ne...

Page 6: ...netic fields Keep the appliance away from sources of magnetic fields such as TV sets speaker systems radios motorized toys or magnetized objects 13 Cleaning Do not use volatile solvents such as alcohol paint thinner gasoline or benzine etc to clean the cabinet Use a clean dry cloth 14 Nonuse periods The power cord of the unit should be unplugged from the outlet when left unused for a long period o...

Page 7: ...ed in the operating instructions All other servicing should be referred to qualified service personnel 17 CAUTION TO PREVENT ELECTRIC SHOCK DO NOT USE THE AC PLUG WITH AN EXTENSION CORD RECEPTACLE OR OTHER OUTLET UNLESS THE BLADES CAN BE FULLY INSERTED TO PREVENT BLADE EXPOSURE 5378_01_07EN 03 7 3 11 47 AM 7 ...

Page 8: ...ey 5 VOLUME keys 6 HOLD 3 switch 7 0 PUSH OPEN key Use to open top cover 8 DC IN External power jack DPC X537 only 9 EXT BATT jack DPC X937 only 0 Recharging terminals DPC X937 DPC X637 only LINE OUT OPTICAL Line out Digital output jack jack DPC X937 only Headphones Remote control unit jack Rear Side Top 1 2 3 4 5 9 7 8 0 6 5378_08_15EN 03 7 3 2 11 PM 8 ...

Page 9: ...arge able batteries Alkaline batteries When the batteries is nearly exhausted When the batteries are half exhausted In a while the power will be turned off automatically Then recharge the batteries Playback is possible while the indicator is blinking Battery Type Blinking Timing Treatment The duration at which the bat tery indicator starts to blink is variable depending on the type of battery used...

Page 10: ...er stand DPC X937 DPC X637 only To DC IN jack Speakers Using the Clip Attach the clip to the headphone cord as shown below Clip the remote control unit to the edge of your bag or pocket Press and release Press and release Recharging terminals 5378_08_15EN 03 7 3 2 11 PM 10 ...

Page 11: ...ke sure the positive ª and negative poles are properly aligned Never use an alkaline battery and the re chargeable battery together When Using Commercially Sold AAA Alkaline Battery LR03 Use commercially available AAA LR03 batteries The unit may not operate normally if manganese bat teries are used Replace both batteries at the same time The battery cover may be detached when it is sub jected to a...

Page 12: ...use a battery other than a battery authorized by Kenwood Charge the battery with the power to the unit turned off The battery is not charged while the unit is in operation 1 Push the 0 PUSH OPEN key and open the top cover 2 Open the battery cover 3 Insert 2 rechargeable batteries and close the cover Make sure the positive ª and negative poles are properly aligned Never use an alkaline battery and ...

Page 13: ...ter the batteries have been charged remove the AC adapter Disconnect the AC adapter from the wall outlet when the recharger stand is not used When using a rechargeable battery which is new or which has not been used for more than 2 months the operating period may be shorter than nomal This is due to the prop erties of the battery and not a malfunction After recharg ing use the battery on the unit ...

Page 14: ...nd negative poles are properly aligned Use two commercially sold AA alkaline batteries with the external battery case The unit may not operate normally if manganese batteries are used When carrying the external battery case without attach ing it to the main unit remove the batteries from the case If the case containing batteries is put in a pocket or bag together with a metallic object such as a k...

Page 15: ...ion is present the Head phones Remote control unit jack of the unit does not out put audio signal Connect the cable to the amplifier s CD input jacks The LINE OUT volume can be adjusted using the main unit s VOLUME keys as well as using the remote s VOLUME keys The level recommends 20 This connection may be impossible with some amplifiers Connection with other components Listening through car ster...

Page 16: ...th labeled side up Cancel the HOLD function with the HOLD switch and then operate the keys When the HOLD function is engaged the unit will not respond to operation of the keys For details refer to Hold function Page18 Playback 1Connect the remote control and headphone Commercially sold headphones with stereo mini plugs φ3 5mm can also be used Continued on next page 3Insert disc and close the top c...

Page 17: ... the last track is over playback will stop Main unit Remote control 5Adjust the volume Volume level indicator 0 to 30 The volume level is displayed on the remote control Main unit Remote control This unit sometimes stops the disc rotation in order to extend the playable time 5378_16_24EN 03 7 3 2 17 PM 17 ...

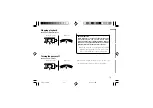
Page 18: ...n 3 Track number increases 4 Track number decreases Main unit Remote control Hold function When you are operating the unit on a train or when you are carrying it with the power off this function allows you to prevent faulty operation due to accidental key operation of the main unit and remote control unit Set the HOLD 3 switch on the main unit to engage the HOLD function for the main unit 0 PUSH O...

Page 19: ...If the top cover is opened between the stop and restart playback restarts from the first track of the disc The resume function is not engaged during program playback random playback or Intro Scan or if the power is turned off between the stop and restart Turning the power off Press during stop status The power will automatically turn off if the unit is not operated for about 2 minutes after it has...

Page 20: ...rn to normal playback is made When in the program playback random playback mode 1 Program playback Random playback Repeats program playback or ramdom playback 2 Cancel Goes off Repeat deactivated Press the REPEAT key repeatedly until or is displayed Repeated playback only by remote control operation You can repeatedly listen to a favorite track or disc Press during playback or stop status This fun...

Page 21: ...ay a specified section repeatedly Press during playback status Start point A is specified 2Press the REPEAT key at the point you want to start repeating This function cannot be used while a bookmark is set or during program playback random playback or Intro Scan A B repeat playback can be set only within a single track Continued on next page 5378_16_24EN 03 7 3 2 17 PM 21 ...

Page 22: ...top A B repeat playback Press the REPEAT key again End point B is specified and repeated playback of the section between A and B starts 3Press the REPEAT key again at the point you want to end repeating 5378_16_24EN 03 7 3 2 17 PM 22 ...

Page 23: ...uring playback status 1Press and held the REPEAT key for more than 2 seconds 2Press the REPEAT key at the position you want to set the bookmark Setting the bookmark Continued on next page This function cannot be used during A B repeat playback program playback random playback or Intro Scan The set bookmark is cleared when the top cover is opened or the power is turned off 5378_16_24EN 03 7 3 2 17 ...

Page 24: ... playback or stop status Press the REPEAT key The bookmark is set in the position selected in step 2 3Press the 3 key to actually set the bookmark To cancel the bookmark Press during playback status PressandheldtheREPEATkeyformorethan 2 seconds 5378_16_24EN 03 7 3 2 17 PM 24 ...

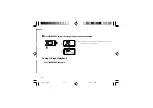
Page 25: ...r completing the menu control operation press the MENU key and select exit from menu control or leave the unit without touching any key for about 8 seconds The following operations can be controlled from the menu Forward fast reverse Page 26 Changing sound mode Page 27 Selecting play mode Pages 28 to 30 Programming of tracks for program playback in stop mode only Random playback Intro Scan Normal ...

Page 26: ...lding down the 3 key fast forwards the disc Pressing and holding down the 4 key fast reverses the disc Playback will resume when either key is released 1Press the MENU key repeatedly until is displayed 2Press and hold down either the 4 key or 3 key This function cannot be used during A B repeat playback or Intro Scan 5378_25_38EN 03 7 3 2 19 PM 26 ...

Page 27: ...FF Cancel In certain sound modes the audio may be dis torted when the volume is set too high In this case select another sound mode or lower the vol ume Changing the sound mode only by remote control operation Press during playback or stop status 1Press the MENU key repeatedly until or is displayed 2Press the 4 key or 3 key Select the sound of your liking 5378_25_38EN 03 7 3 2 19 PM 27 ...

Page 28: ...ge 29 2 Random mode RANDOM 2 lights up Page 30 3 Intro Scan mode INTRO 2 lights up Page 30 4 Return to normal playback is made When pressed during Play Random Intro Scan operation 1 Random mode RANDOM 2 lights up Page 30 2 Intro Scan mode INTRO 2 lights up Page 30 3 Return to normal playback is made 1Press the MENU key repeatedly until is displayed The program mode cannot be selected in the middle...

Page 29: ... track is added to the end of the program To check the programmed tracks press the REPEAT key Each press of the key displays the next track in the program 4 Press the MENU key 5 Press the 3 key to start the program playback Each press of the 7 key deletes the last track from the program Up to 25 tracks can be programmed in this unit but not more than 25 tracks Program playback can be repeated by c...

Page 30: ...and select normal play mode Random playback can be repeated by combining repeated playback page 20 with it Intro Scan The first 10 seconds of all tracks on the disc will be played in the recorded order Press during playback or stop status Perform the steps in Selecting Play Mode page 28 to select INTRO 2 and then press the MENU key To stop Intro Scan in the middle press the 3 key This starts norma...

Page 31: ...atedly until is displayed 2Press the 4 or 3 key to set the time period The time period can be set in the range from 1 min to 120 min Pressing the 3 increases the time period and press ing the 4 key decreases it When the alarm mode is set is displayed on the remote control The alarm mode cannot be used simultaneously with the sleep mode If the sleep mode is set page 33 cancel it before setting the ...

Page 32: ...e alarm tone is generated Press the MENU key repeatedly until is displayed together with the time left till the alarm tone To change the set time Press the MENU key repeatedly until is displayed and then perform the operation in step 2 To cancel the alarm mode after setting it To exit from the alarm mode before the set time has elapsed press the MENU key repeatedly until is dis played and then per...

Page 33: ...d can be set in the range from 1 min to 120 min Pressing the 3 increases the time period and press ing the 4 key decreases it When the sleep mode is set is displayed on the re mote control The sleep mode cannot be used simultaneously with the alarm mode If the alarm mode is set page 31 cancel it before setting the sleep mode Continued on next page After setting the sleep function press the MENU ke...

Page 34: ...ge the set time Press the MENU key repeatedly until is displayed and then perform the operation in step 2 To cancel the sleep mode after setting it To exit from the sleep mode before the set time has elapsed press the MENU key repeatedly until is displayed and then perform the operation in step 2 to select OFF The sleep mode is also exited when the power is turned off page 19 before the set time h...

Page 35: ...nitstoresmusicdatainmemorysothat evenwhenthesignalsfromthe optical pickup is interrupted due to an external impact playback of music can be continued without interruption Wide CAPTURE uses a method strong in regard to vibrations in the rotation direction in addition to the conventionalSHOCK GUARD function so that the sound skip guard function is made even stronger Press during playback or stop sta...

Page 36: ... operating tone Beep only by remote control operation The operating tones beep which are produced every time one of the keys listed below are pressed can be activated or canceled deactivated Press during playback or stop status 2Press the 4 key or 3 key Convenient functions 1Press and held the MENU key for more than 2 seconds 5378_25_38EN 03 7 3 2 19 PM 36 ...

Page 37: ...S G HI DPC X937 only Continuous playback function cannot be used when the digital output jack of the unit is connected to another audio component DPC X937 only When the continuous playback is set to CP on Even when you press the 7 key to open the top cover and change the disc the current playback continues without interruption Pressing the 7 key one more time while the top cover is open stops the ...

Page 38: ...he volume is set too high In this case select another sound mode or lower the volume The operation tone beep and alarm tone are not mixed in the speaker audio Main unit Remote control Main unit Remote control If the main unit is placed on the recharger stand im mediately after the main unit is removed from it the main unit may malfunction beginning or ending play back unintentionally After the mai...

Page 39: ...leaning If there are fingerprint marks or foreign matter found on the disc lightly wipe the disc with a soft cotton cloth or similar from the center of the disc outwards in a radial manner Storage When a disc is not to be played for a long period of time remove it from the player and store it in its case When the unit gets dirty wipe with a dry soft cloth If the unit is very dirty wipe with a dry ...

Page 40: ...use malfunction Disc accessories The disc accessories stabilizer protection sheet protec tion ring etc which are marketed for improving the sound quality or protecting discs as well as the disc cleaner should not be used with this system because they may cause malfunction Caution on condensation Condensation of dew may occur inside the unit when there is a great difference in temperature between t...

Page 41: ... the recharger stand DPC X937 DPC X637 only Sound skips or is interrupted Set the switch to off Page 18 Replace the two alkaline batteries or recharge the rechargeable batteries Place the disc with the labeled side up Leave the unit for about 1 hour before re use Connect it properly Insert the plug securely into the Head phones Remote control unit jack Insert the plug securely into the Head phones...

Page 42: ...Clean it Replace or recharge the batteries Insert the plug securely into the Head phones Remote control unit jack Install the unit away from a TV set cellular phone etc Use the exclusive rechargeable batteries NB 3A70 Turn the power off Place the main unit correctly Set continuous playback to CP OFF Page 37 This is normal and not a problem Message Meaning Action Insert a CD into the unit There is ...

Page 43: ...Battery NB 3A70 1 NB 3A70 2 LR03 Specifications DPC X937 SHOCK GUARD HI SHOCK GUARD Lo Approx 15 Hours Approx 8 Hours Approx 20 Hours Rechargeable batteries 1 Commercially available alkaline batteries 2 Rechargeable batteries Battery case Alkaline batteries Battery case KENWOOD follows a policy of continuous advancements in development For this reason specifications may be changed without notice S...

Page 44: ... oz Recharger stand DPC X637 only Power supply AC adaptor AC50040 DC 5 0 V Separately sold option part Rechargeable Nickel Metal Hydride Battery NB 3A70 1 NB 3A70 2 LR03 Specifications DPC X637 DPC X537 Approx 15 Hours Rechargeable batteries 1 Commercially available alkaline batteries 2 KENWOOD follows a policy of continuous advancements in development For this reason specifications may be changed...

Reviews: