


22
GPS Navigation Instruction Manual
Diagnostics (ecoRoute HD)
When your ecoRoute HD is connected, it can
detect select diagnostic trouble codes (DTC)
related to your vehicle's emissions system, if the
on-board diagnostic system detects a fault.
1
Touch Tools > ecoRoute > Diagnostics.
2
Touch an error code to view its meaning.
⁄
• Consult your vehicle repair technician for additional
details for DTC reported by the system.
Clearing Error Codes (ecoRoute HD)
Touch
Tools > ecoRoute > Diagnostics > Reset
to clear error codes noted by the system.
⁄
• Not all vehicles will allow you to reset error codes.
• Clearing error codes without repairing the source of the
erro may result in a return of the check engine light.
Consult your vehicle repair technician for additional
details.
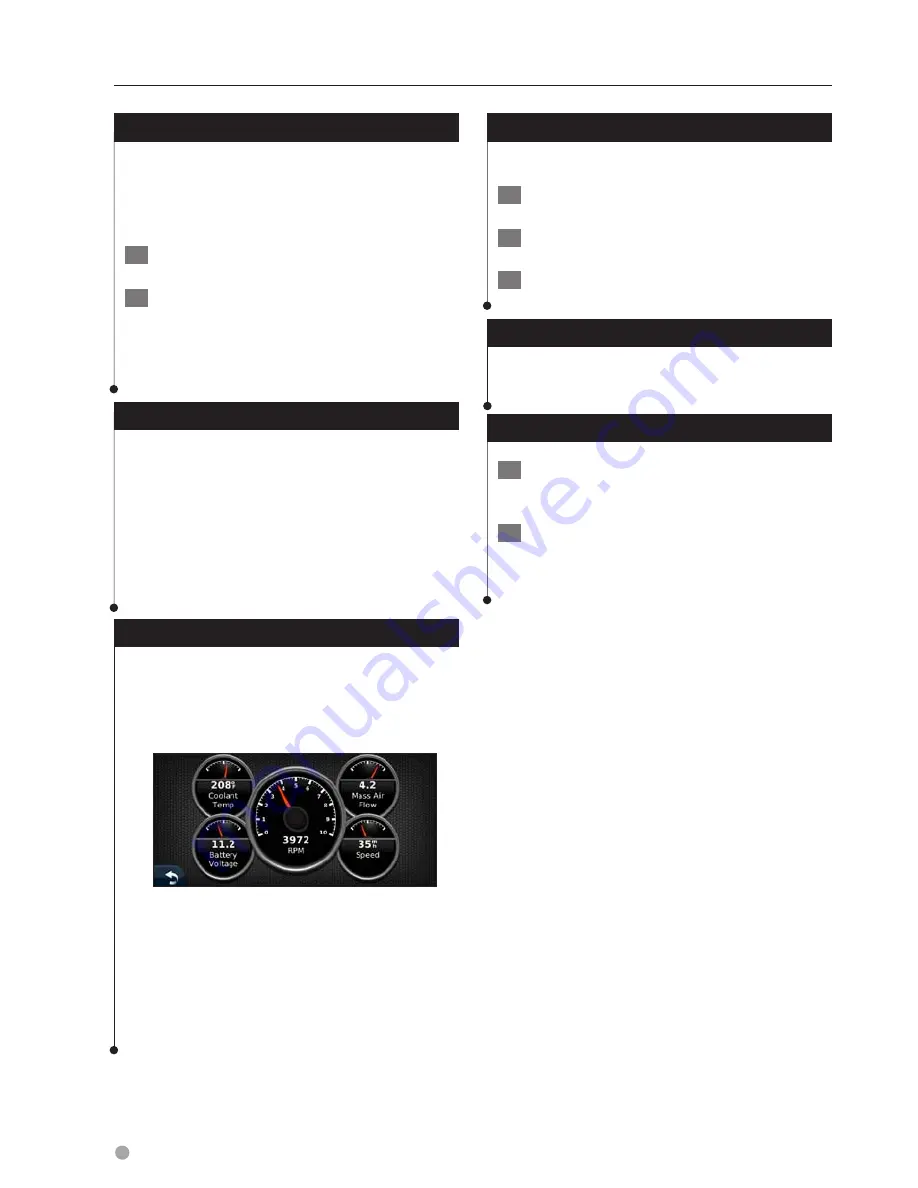
Gauges (ecoRoute HD)
View real-time information about your vehicle,
such as RPM and battery voltage.
Touch Tools > ecoRoute > Gauges.
⁄
• The information displayed on the gauges page is
collected from your vehicle. Garmin is not responsible for
the content displayed on the gauges page. The gauges
that are displayed may vary by vehicle.
Changing the Gauges (ecoRoute HD)
You can change the data displayed in the gauges.
1
Touch Tools > ecoRoute > Gauges.
2
Touch the gauge you want to change.
3
Touch a data type.
Viewing Driving Tips
Touch Tools > ecoRoute > Tips.
Setting Routes that Use Less Fuel
1
Touch Settings > Navigation > Route
Preference.
2
Select Less Fuel.
Using ecoRoute
Summary of Contents for DNX5180
Page 143: ......


