6
USB
USB
Preparation
Ñ
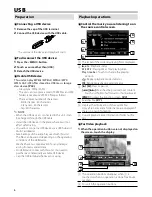
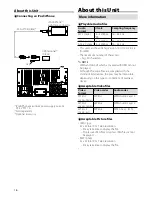
Connecting a USB device
1
Remove the cap of the USB terminal.
2
Connect the USB device with the USB cable.
The unit reads the device and playback starts.
Ñ
To disconnect the USB device:
1
Press the <MENU> button.
2
Touch a source other than [USB].
3
Detach the USB device.
Ñ
Usable USB device
This unit can play MPEG1/ MPEG2/ MPEG4/ MP3/
WMA/ AAC/ JPEG files stored in a USB mass storage
class device. (P.16)
• File system: FAT16/ FAT32
• This unit can recognize a total of 9 999 files and 999
folders (a maximum of 9 999 files per folder).
• The maximum number of characters:
– Folder names : 50 characters
– File names : 50 characters
– Tag : 30 characters
✎
NOTE
• When the USB device is connected to this unit, it can
be charged through the USB cable.
• Install the USB device in the place where it will not
affect safe driving.
• You cannot connect a USB device via a USB hub and
Multi Card Reader.
• Take backups of the audio files used with this unit.
The files can be erased depending on the operating
conditions of the USB device.
We shall have no compensation for any damage
arising from any erased data.
• No USB device comes with this unit. You need to
purchase a commercially available USB device.
• Cap the USB terminal whenever not using.
Playback operations
Ñ
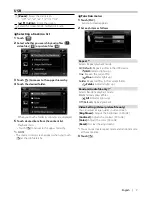
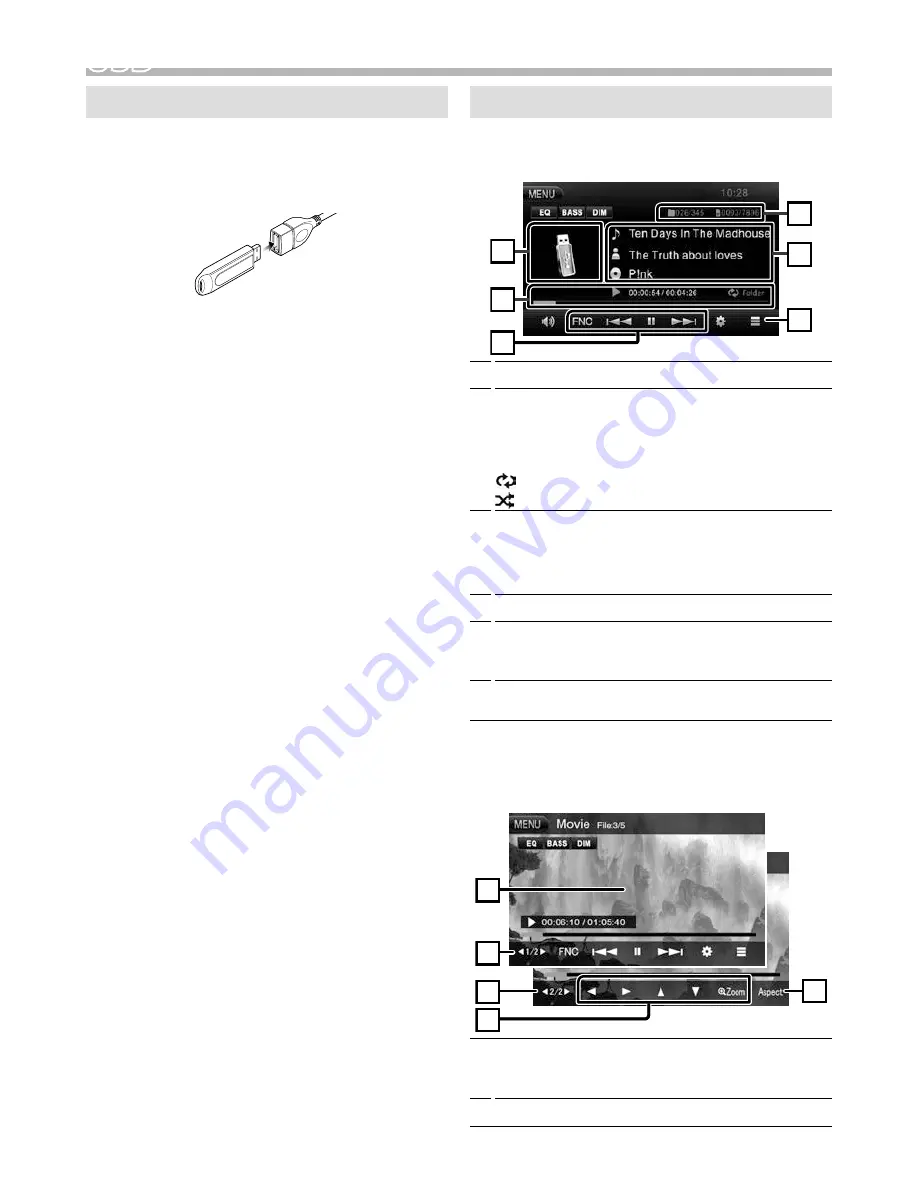
Control the music you are listening to on
the source control screen.
4
1
6
3
2
5
1
The jacket of the currently playing file is displayed.
2
D
, etc. :
Playback status
##:##:## :
Playing time/ Total playing time
Play time bar :
Touch to change the playing
position.
:
Repeat playback mode indicator
:
Random playback mode indicator
3
[
D
] [
H
] :
Plays or pauses.
[
E
]
[
F
] :
Searches the previous/next content.
Touch and hold to fast forward or fast backward.
[FNC] :
Displays the Function screen.
(P.7)
4
Searches file.
(P.7)
5
Displays the information of the current file.
Only a file name and a folder name are displayed if
there is no tag information.
6
Current playback item information (folder no./file
no.).
Ñ
For Video playback
1
When the operation buttons are not displayed on
the screen, touch the display.
4
3
2
2
1
1
The operation buttons disappear when
1
is
touched or when no operation is done for about 5
seconds.
2
To switch the operation buttons.
Summary of Contents for DMX100
Page 60: ......


