Kenwood DDX5026 Instruction Manual Download Page 95

This Product is not installed by the manufacturer of a vehicle on the production line, nor by the professional 
importer of a vehicle into an EU Member State.

Information on Disposal of Old Electrical and Electronic Equipment and Batteries 
(applicable for EU countries that have adopted separate waste collection systems)

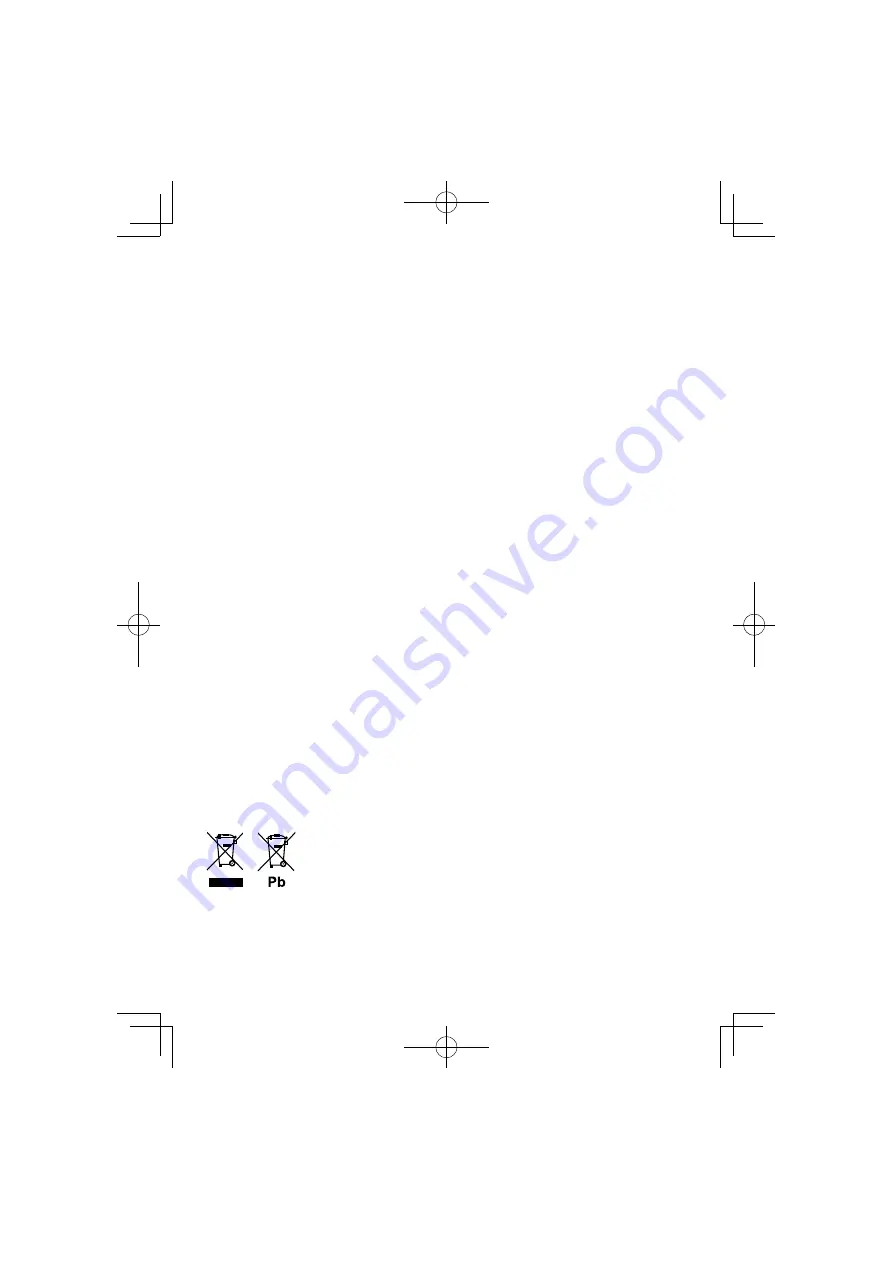
  Products and batteries with the symbol (crossed-out wheeled bin) cannot be disposed 

as household waste.
Old electrical and electronic equipment and batteries should be recycled at a facility 
capable of handling these items and their waste byproducts.
Contact your local authority for details in locating a recycle facility nearest to you.
Proper recycling and waste disposal will help conserve resources whilst preventing 
detrimental effects on our health and the environment.
Notice:  The sign "Pb" below the symbol for batteries indicates that this battery contains 

lead.

B64-4606-00̲01̲E̲En.indd   95

B64-4606-00̲01̲E̲En.indd   95

09.12.4   1:56:51 PM

09.12.4   1:56:51 PM

Summary of Contents for DDX5026

Page 1: ...N SYSTEM DNX SERIES DNX5260BT MONITOR WITH DVD RECEIVER DDX SERIES DDX5026 DDX5056 INSTRUCTION MANUAL B64 4606 00 01 EW QW B64 4606 00 01 E En indd 1 B64 4606 00 01 E En indd 1 09 12 4 1 55 50 PM 09 12 4 1 55 50 PM ...

Page 2: ...eo file Picture file 26 Easy Control Screen Video file Picture file 27 Picture Control 27 Movie Menu Control 28 iPod Control 29 Playback Screen 29 Easy Control Screen 29 Source Control Screen 30 iPod List 31 Link Search Music file 31 Radio Listening 32 Source Control Screen 32 Preset Select 33 Auto Memory 33 Manual Memory 34 Radio Text 34 Traffic Information 35 Search by Program Type 35 TV Watchin...

Page 3: ...62 Security Setup 62 Setup Memory 63 Entering Background 64 Panel Color Coordinate 65 Screen Adjustment 66 Registering Bluetooth Unit 67 Registering Bluetooth Unit PIN Code 68 Bluetooth Unit Connection 69 Bluetooth Hands Free Audio Output Setup 69 AV Input Setup 70 AV Interface Setup 70 Navigation Setup 71 Speaker Setup 72 DVD Setup 73 DVD Language Setup 74 DVD Parental Level Setup 74 Disc Setup 7...

Page 4: ...not allow discs to play In such a situation remove the disc and wait for the condensation to evaporate If the unit still does not operate normally after a while consult your Kenwood dealer Handling discs Do not touch the recording surface of the disc Do not stick tape etc on the disc or use a disc with tape stuck on it Do not use disc type accessories Clean from the center of the disc and move out...

Page 5: ... and the other surface containing music CD signals About Audio files Playable Audio file AAC LC m4a MP3 mp3 WMA wma Linear PCM WAV wav If music of normal CD and other playback systems are recorded in the same disc only the playback system recorded at the first setout is played Acceptable media CD R RW ROM DVD R RW mass storage class USB device iPod with KCA iP301V Playable disc file format ISO 966...

Page 6: ...s connected to this unit KENWOOD or is displayed on the iPod to indicate that you cannot operate the iPod About USB device In this manual the word USB device is used for flash memories and digital audio players which have USB terminals When the USB device is connected to this unit it can be charged up provided that this unit is powered Install the USB device in the place where it will not prevent ...

Page 7: ...o remove it from this unit 1 2 4 1 5 4 5 2 1 2 6 3 DVD disc marks Symbol Description ALL Indicates a region number The discs with this mark can be played with any DVD player 8 Indicates the number of audio languages recorded Up to 8 languages can be recorded in a movie You can select a favorite language 32 Indicates the number of subtitled languages recorded Up to 32 languages can be recorded 9 If...

Page 8: ...illustrations to explain its operations The displays and panels shown in this manual are examples used to provide clear explanations of the operations For this reason they may be different from the actual displays or panels used or some display patterns may be different The above operation example with the mark differs from the actual operation S S S Sh Short Press Pre Pre Pre Pre Pre P ss ss ss s...

Page 9: ...out the model groups If different functions are used in different model groups the model groups are described as shown below Names of models included in each model group are as follows DNX series DNX5260BT DDX series DDX5026 DDX5056 F F Fu Function Icon Icons representing available functions are shown below O O D D DEO E DEO O O O EO Function of DVD VIDEO playback VR VR V V VR Function of DVD VR p...

Page 10: ...isplays Tone Control screen 1 Y D Turns the power On Displays the Source Select screen 1 sec Turns the power Off Security indicator page 62 Remote control sensor Reset button page 4 1 sec Press for more than 1 second FNC SRC NAV TEL V OFF AUD AV OUT AV IN NAV MAP ATT VOL A C D B E F Disc slot page 13 For DNX series microSD card slot for upgrading the navigation system page 13 Input jack for extern...

Page 11: ...he function of the FNC button can be changed to the display off function See User Interface page 60 Screen Switching Function Switching between the navigation screen and the source control screen with one touch operation For DDX series Screen Switching fuction can be activated when an optional navigation system is connected to this unit Connecting an external device to AV IN jack DNX5260BT only Us...

Page 12: ... 36 Bluetooth Page 40 For Disc media iPod and USB the input is switched to the source as the media or the device is set How to Display the Navigation Screen DNX series DNX series NAV AUD ATT VOL The navigation screen appears DDX series DDX series TOP AUD ATT VOL The navigation screen appears For how to set up and use the navigation function see the Navigation Instruction Manual For DDX series An o...

Page 13: ...ck starts automatically after setting the media or the device DNX series DNX series 7 microSD card This microSD card slot is used to upgrade the Navigation System For how to upgrade the Navigation System refer to the instruction manual of the navigation system Inserting the microSD card Hold the microSD card with the label side facing left and the notched section up and insert it into the slot unt...

Page 14: ...n DNX series DNX series DDX series DDX series with navigation unit with navigation unit 7 While watching the navigation screen The Source Control screen appears The screen will return to the navigation screen by touching the same part of the Source Control screen DDX series DDX series TOP AUD ATT VOL The Source Control screen appears 7 While watching the Easy Control screen The Source Control scre...

Page 15: ...he Hands Free Main screen page 58 NAV SETUP Displays Navigation SETUP screen DNX series and DDX series with navigation unit only Refer to the navigation instruction manual for setting up the navigation system SRC SETUP Displays SETUP Menu screen page 58 TEL SETUP Displays Hands Free SETUP screen page 49 SRC SELECT Displays Source Select screen page 12 Displays Audio Control Menu screen page 55 Cha...

Page 16: ...control buttons sources with picture files or Zoom control buttons Video CD Switches TV band 3 Forward search 4 Displays Clears Source Information screen For the function of each touching area see the pages of each source Source Information screen 3 1 2 4 The information display is cleared automatically after approximately 5 seconds How to display the playback screen SRC The Source Select screen a...

Page 17: ...nction as follows by touching the button SCRN Displays Screen Control screen page 42 TEL Switches to the Hands Free Main screen page 45 1 4 7 8 Buttons for source control The buttons are different depending on the source See the operation pages of each source While watching the visual source FNC V OFF The Easy control screen appears Easy Control screen is hidden when you touch the central part of ...

Page 18: ...eoCD Displays the Zoom Control screen page 22 4 Displays Clears Source Information screen The information display is cleared automatically after approximately 5 seconds Easy Control Screen Displays the basic operation buttons on the screen Display the Easy Control Screen 1 See How to Display the Easy Control buttons page 17 Operation on the Easy Control Screen 2 2 2 2 1 1 1 3 3 3 1 2 Switches to t...

Page 19: ...lay 3 Play Mode Display T C R P Play Time Display Use the TIME to change play time display When appears the text display is scrolled by touching it Multi Function Closes the multi function bar Opens the multi function bar DVD VIDEO DVD VIDEO REP Switches the Repeat Play operations in the following sequence Title Repeat Chapter Repeat Repeat Off TIME Switches the play time display in the following ...

Page 20: ...screen Operation on the Highlight Control 4 Highlight control lets you control DVD Menu by touching the menu button directly on the screen Touching the central part of the monitor also turns on the Highlight Control To cancel Highlight Control press the FNC button The Highlight Control is cleared automatically after approximately 10 seconds Operation on the Menu Control 2 screen 5 Previous Display...

Page 21: ...ces page 16 Display the Menu Control screen 2 Operation on the Menu Control screen 3 Zoom Displays the Zoom Control screen SUB Switches the subtitle language Audio Switches the voice language Exit Exits the Menu Control screen Operation on the Zoom Control screen 4 Zoom Changes the zoom ratio at 4 levels 2 times 3 times 4 times or off each time you touch 2 3 5 Scrolls the screen in the direction y...

Page 22: ...urces page 16 Display the Zoom Control screen 2 Operation on the Zoom Control screen 3 Zoom Changes the zoom ratio at 2 levels 2 times or off each time you touch 2 3 5 Scrolls the screen in the direction you touch Exit Exits the Zoom Control screen Watching DVD Video CD B64 4606 00 01 E En indd 22 B64 4606 00 01 E En indd 22 09 12 4 1 56 07 PM 09 12 4 1 56 07 PM ...

Page 23: ...h it again 1 CD CD AudioFile AudioFile MPEG DivX MPEG DivX Fast Forwards or Fast Backwards 4 Selects a track file AudioFile AudioFile MPEG DivX MPEG DivX JPEG JPEG Selects a folder List AudioFile AudioFile MPEG DivX MPEG DivX JPEG JPEG Displays the folder list or play list page 24 Switches to the playback screen 1 Information display CD CD Selects the Disc Text or Track Text AudioFile AudioFile MP...

Page 24: ...information of file being played LINK AudioFile AudioFile in USB USB Searches for another song of the currently selected artist See Link Search page 26 Device USB USB Selects the connected USB device or a partition See USB Device Select page 25 List Select Folder list Searches folders and Audio Video Picture files stored in media and devices according to hierarchy Play list Lists and searches musi...

Page 25: ...e Control screen Scrolls to the position of the specified initial Scrolls to the selected initial USB device select Selects the connected USB device or a partition Display the Source 1 Control Screen See Source Control Screen page 23 Display the USB Device Select Screen 2 Select a USB device 3 1 1 1 1 Selects a device or partition UP Returns to the Device Selection screen When appears the text dis...

Page 26: ...pecified initial Scrolls to the selected initial Playback Screen Video file Picture file Basic functions are available even when the playback screen is displayed Display the Playback Screen 1 See Operation on the Playback Screen of Visual Sources page 16 Operation on the Playback Screen 2 3 1 2 4 1 3 Searches for a file 2 JPEG JPEG Displays the Picture Control screen page 27 MPEG DivX MPEG DivX Di...

Page 27: ...g the slide show of picture files touching the buttons searches the audio file 7 Disc Disc Stops playing When touched twice the disc is played from its beginning when you play it the next time 38 Plays or pauses Picture Control Adjusting the picture display Display the Playback Screen 1 See Operation on the Playback Screen of Visual Sources page 16 Display the Picture Control Screen 2 Adjust the p...

Page 28: ...ay the playback screen 1 See Operation on the Playback Screen of Visual Sources page 16 Display the Menu Control screen 2 Operation on the Menu Control screen 3 SUB Switches the subtitle language Audio Switches the voice language Exit Exits the Menu Control screen B64 4606 00 01 E En indd 28 B64 4606 00 01 E En indd 28 09 12 4 1 56 15 PM 09 12 4 1 56 15 PM ...

Page 29: ... 4 Displays Clears Source Information screen The information display is cleared automatically after approximately 5 seconds Also the information can be displayed automatically when it is updated Remove all accessories such as headphone before connecting an iPod You may not be able to control the iPod if you connect it with accessories attached When you connect an iPod to this unit playback starts ...

Page 30: ...hen VIDEO is being played Source Control Screen Switches to the source control screen to use various playback functions Display the Source 1 Control Screen See How to Display the Source Control Screen page 14 Operation on the Source Control Screen 2 1 1 1 38 Plays or pauses 1 Fast Forwards or Fast Backwards 4 Selects Music Video List Displays the iPod list page 31 Switches to the playback screen 1...

Page 31: ... the iPod Display the Source 1 Control Screen See Source Control Screen page 30 Display the iPod List 2 Select music video 3 1 1 1 1 Categories and music are listed Touch a category name to move to its lower level If music title is displayed the music is played by touching it When 38 is appeared all the music in its category is played by touching the button When appears the text display is scrolle...

Page 32: ...g operation see Remote Controller mode switch page 79 Multi Function 1 3 Switches the multi function display Closes the multi function bar Opens the multi function bar P1 P6 When P1 to P6 buttons appear you can recall the stations on memory For memory of broadcasting stations see Auto Memory page 33 or Manual Memory page 34 SEEK Switches the Seek mode The mode is switched in the following order ea...

Page 33: ...n Auto Memory Stores stations with good reception in memory automatically Display the Source 1 Control Screen See Source Control Screen page 32 Select a band you wish to store in memory 2 Select the Auto Memory mode 3 Start Auto Memory 4 Auto Memory terminates when 6 stations are stored or when all stations are tuned in The operation ends automatically if you do not operate within 10 seconds B64 4...

Page 34: ... memory number appears Radio Text You can display the radio text Only when receiving the FM broadcast Select a station 1 See Source Control Screen page 32 Display the radio text 2 1 1 1 1 Selects the Program Service Name Title Artist name Station Name Radio Text Plus or Radio Text for text display When appears the text display is scrolled by touching it 5 Scrolls the text display B64 4606 00 01 E ...

Page 35: ...fic information the adjusted volume is automatically remembered so that the next time it switches to traffic information the volume level is that from the previously adjusted and remembered level Search by Program Type A program is tuned when you set its program type Only when receiving the FM broadcast Display the Source 1 Control Screen See Source Control Screen page 32 Enter Program Type Search...

Page 36: ...You can only operate TV with the optional accessory TV Tuner connected Function During TV Screen Basic functions are available even when the TV screen is displayed Display the TV screen 1 See Operation on the Playback Screen of Visual Sources page 16 Operation on the TV screen 2 3 1 2 4 1 3 Selects a channel 2 Switches to TV1 or TV2 2 Displays Menu Control screen only with KTC D500E optional acces...

Page 37: ...s highlight in Digital TV Broadcasting menu Source Control Screen Switches to source control screen to use various functions Display the Source 1 Control Screen See How to Display the Source Control Screen page 14 Operation on the Source Control Screen 2 1 1 1 BAND Switches to TV1 or TV2 4 Select a channel Use the SEEK to change the channel tuning sequence List Display the TV Preset List screen pa...

Page 38: ...gital TV screen When using the remote control unit to operate the TV menu use the one of KTC D500E Auto Memory only with KTC V300E or KTC V301E optional accessory connected Stores stations with good reception in memory automatically Display the Source 1 Control Screen See Source Control Screen page 37 Select a band you wish to store in memory 2 Select the Auto Memory mode 3 Start Auto Memory 4 Aut...

Page 39: ...o enter a name End Name set 4 Preset Select Lists and selects memorized station Display the Source 1 Control Screen See Source Control Screen page 37 Start Preset Select 2 Select a station 3 1 1 1 1 Memorized stations are displayed Touch to tune in Switches to the TV screen CTRL Returns to the Source Control screen B64 4606 00 01 E En indd 39 B64 4606 00 01 E En indd 39 09 12 4 1 56 22 PM 09 12 4 ...

Page 40: ...l phone It is necessary to connect the optional Bluetooth unit KCA BT200 You need to register your audio player and cell phone to your Bluetooth Unit beforehand Make sure to read the instruction manual of the Bluetooth Unit as well Before Use You need to register your audio player and cell phone before using it with this unit For more details see Registering Bluetooth Unit page 67 If you have regi...

Page 41: ...pace You can enter characters only after you have applied the parking brake Muting Audio Volume upon Reception of Phone Call When a telephone call is received The Phone Call CALL screen appears and system is paused Phone Call CALL screen When the call ends Hang up the phone The system resumes playing automatically To use the TEL Mute feature you need to hook up the MUTE wire to your telephone usin...

Page 42: ... display doesn t dim SYNC Turning the Dimmer function On or Off when the vehicle light control switch is turned On or Off NAV SYNC Turning the Dimmer function On or Off according to the Navigation Day Night display setting DNX series and DDX series with navigation unit only Mode Selects a screen mode You can select any of the following screen mode Full Just Zoom Normal The Screen Control screen is...

Page 43: ...ne For more details see the instruction manual of your Bluetooth Unit and your cell phone Downloading the Phonebook Downloads the phonebook data from the cell phone to this unit so that you can use the Phonebook of this unit By operating the cell phone send the 1 phonebook data to this unit By operating the cell phone start the 2 hands free connection For the cell phones which support auto downloa...

Page 44: ... phone and speaker DTMF Outputs dial tone See Controlling Tone based Services page 48 Disconnecting a call Call Waiting Answering another incoming call with the current call suspended Switching between the current call and waiting call Each touch of this button switches the calling party Answering another incoming call after terminating the current call Answering the waiting call after terminating...

Page 45: ...age 47 Missed Calls Displays the Missed Calls screen See Making a Call Using Call Records page 47 Direct Number Displays the Dialing Display screen See Calling by Entering a Phone Number page 46 Voice Starts voice recognition See Calling by Voice Recognition page 47 BT SETUP Displays the Bluetooth SETUP screen See Registering Bluetooth Unit page 67 TEL SETUP Displays the Hands Free Setup screen Se...

Page 46: ... the cell phone For more details see the instruction manual of your Bluetooth Unit and your cell phone Initials including no corresponding name will not be displayed During search a non accent character such as u is searched for instead of an accent character such as ü Calling by Entering a Phone Number Makes a call by entering a phone number Display the Hands Free Control screen 1 See Making a ca...

Page 47: ... cell phone memory Calling by Voice Recognition Calls by recognizing the registered voice In order to perform voice recognition voice must be registered in the Phonebook data See Voice Registration page 50 Or to perform voice recognition by Phone number category Home Office Mobile etc of Phonebook data a key word voice must be registered See Key Word Voice Registration page 51 Display the Hands Fr...

Page 48: ...a Phone number category 7 Selects the Phone number category Make a call 8 A message is displayed if the voice is not recognized Read the message for the further operation Controlling Tone based Services Uses tone base service using DTMF Dual Tone Multi Frequency Display the Talking screen 1 See Calling by Entering a Phone Number page 46 Display the DTMF input screen 2 You can send tones during a c...

Page 49: ...ON ON Use SMS function OFF SMS not available Key Word Registers the voice to select phone number category with voice recognition See Key Word Voice Registration page 51 Use Phone Voice Recognition Sets whether to dial using the phone voice recognition function ON Echo Cancel Level Adjusts the level of echo cancelling function 15 Microphone Level Adjusts the sensitivity of the microphone for a tele...

Page 50: ...ys the voice registered in the selected Phonebook data Delete Deletes the voice registered in the selected Phonebook data Touch to display the confirmation screen Touch Yes to delete or No to cancel Display the voice registration screen 3 Say the name to register 1st try 4 Say within 2 seconds after the Beep Say the name to register 2nd try 5 Say within 2 seconds after the Beep End voice registrat...

Page 51: ...egory Delete Deletes the voice registered for the selected Phone number category Touch to display the confirmation screen Touch Yes to delete or No to cancel Play Delete Only for DDX5026 and DDX5056 with optional Bluetooth unit KCA BT200 connected Display voice registration screen 4 Say the phone category to register 1st try 5 Say within 2 seconds after the Beep Say the phone category to register ...

Page 52: ...sage list Registers from SMS sent message list Registers from Phonebook Registers from outgoing calls list Registers from incoming calls list Registers from missed calls list Direct Number Registers by entering phone numbers Voice Registers voice for voice recognition to preset number Memory Registers the currently displayed phone number Delete Deletes the currently displayed phone number Touch to...

Page 53: ...en See Create a message The button will be active when any message has been created after power on Download Retrieves SMS messages from the cell phone Select a message to display 4 1 1 1 1 Calls the number in the selected message DISP Displays the selected message If a large number of SMS messages are stored in the cell phone message list may not be displayed correctly SMS Message screen SMS Creat...

Page 54: ...reate SMS Message screen 2 Create a message 3 1 1 1 1 Enters characters 2 3 Moves the cursor 5 Scrolls up or down the character button display QWE ABC Sets the key layout of the character buttons ABC Alphabetical key layout QWE Qwerty key layout Clear Erases the entered character If touched more than 1 second all the input characters are erased Space Enters a space SET Saves the message and return...

Page 55: ...and rear volume balance VOL Offset Finely adjust the volume of the current source to minimize the difference in volume between different sources If you have increased the volume first then reduced the volume using the VOL Offset the sound generated if you suddenly switch to another source may be extremely loud Subwoofer Level Adjusts the subwoofer volume The setting is available when subwoofer is ...

Page 56: ...isplay the Equalizer screen 1 Touch Equalizer page 55 Display the Tone Control screen 2 Set the Tone 3 Bass Bass adjustment items are displayed Middle Middle adjustment items are displayed Treble Treble adjustment items are displayed Flat Tone level becomes 0 flat FREQ Sets the Center frequency Level Sets the level Q Factor Sets the Q factor Only Bass and Middle can be set Bass DC EXT Bass DC Exte...

Page 57: ...urce Sets the rear audio source When the rear speaker sound is switched the audio source that is output at the AV OUTPUT terminal is also switched to the same source Rear VOL Adjusts the volume of the rear channel There are following limitations when zone function is set to ON There is no output from the subwoofer Equalizer Control page 56 and Speaker Setup page 72 are not available B64 4606 00 01...

Page 58: ...ocked The key mark is displayed in reverse video for the locked option See Setup Memory page 63 You can set up various receiver parameters Item Page Information DivX R 59 Software 59 System User Interface 60 Touch 61 Clock 62 Security 62 SETUP Memory 63 Display Background 64 Color 65 Screen Adjust 66 Bluetooth SETUP 67 TUNER SETUP 77 DVD SETUP 73 iPod SETUP 76 USB SETUP 76 TV SETUP 77 AV IN SETUP ...

Page 59: ...th this unit Remaining number of viewing is displayed when playing a DivX VOD file with the viewing restriction When the remaining number of viewing reached 0 a warning message appears and the file cannot be played Software Information Checks the software version of this unit Display the Software Information screen 1 Touch Information Software page 58 Displays the software version For how to updat...

Page 60: ...imation Sets whether to display animation ON Language Setting You can select the display language for the control screen and audio file tags Display the User Interface screen 1 Touch System User Interface page 58 Display the Language Setting screen 2 Select a language 3 Select Mode Selects language select mode DNX series only Easy Easy Language to display text and tag information and language for ...

Page 61: ...the touch panel operations Display the Touch panel Adjustment screen 1 Touch System Touch page 58 Adjust the Touch panel 2 Follow the instruction on the screen and touch the center of Cancel Cancels the adjustment and returns to the Touch Panel Adjust screen Reset Resets to the initial status B64 4606 00 01 E En indd 61 B64 4606 00 01 E En indd 61 09 12 4 1 56 34 PM 09 12 4 1 56 34 PM ...

Page 62: ...ity code to protect your receiver system against theft When the Security Code function is activated the code cannot be changed and the function cannot be released Note the Security Code can be set as the 4 digit number of your choice Display the Security screen 1 Touch System Security page 58 Setup the SI Security Indicator 2 Security Code Set Displays the Security code input screen SI Turns the S...

Page 63: ...d Audio SETUP settings can be memorized The memorized settings can be recalled at any time For example even when the settings are cleared due to replacement of the battery the settings can be restored Display the SETUP Memory screen 1 Touch System SETUP Memory page 58 Start Setup Memory 2 Lock Locks the AV IN SETUP Navigation and Audio SETUP settings When Lock is selected you cannot change the AV ...

Page 64: ...tings 5 Entering Background Loads a image from the connected USB device and sets it for the background image Connect the device which has the image 1 to load Display the Background screen 2 Touch Display Background page 58 Display the Background Memory screen 3 Change Selects a image for background Delete Deletes the background image Touching the screen displays a confirmation message Touch Yes To...

Page 65: ...1 1 1 1 Returns to the initial background Set the image as the background 3 Panel Color Coordinate Sets the button illumination color Display the Color screen 1 Touch Display Color page 58 Display the Panel Color Coordinate screen 2 Initialize Initialization resets the settings made using the Panel Color to the default settings made at the factory Panel Color Scan When set to ON the illumination c...

Page 66: ...splay Screen Adjust page 58 Set each item 2 Bright Brightness Control Contrast Contrast Control Black Black Level Adjustment Dimmer Dimmer Mode Setup ON The display dims OFF The display doesn t dim SYNC Turning the Dimmer function On or Off when the vehicle light control switch is turned On or Off NAV SYNC Turning the Dimmer function On or Off according to the Navigation Day Night display setting ...

Page 67: ...nit to register 4 1 1 1 1 Displays the searched Bluetooth unit Search Searches for a Bluetooth unit Cancel Cancels searching of Bluetooth unit Enter PIN code 5 1 1 1 1 Enters a code number using the keypad Enter Confirms the entered PIN code Enter the PIN code specified for the Bluetooth unit you are registering This button will not be active until at least four PIN code digits have been entered C...

Page 68: ...procedure of Registering 4 Bluetooth Unit and complete the registration pairing Registering Bluetooth Unit PIN Code Sets the PIN code of the Bluetooth unit to enter when registering pairing from the cell phone or audio player side Display the Bluetooth Setup screen 1 Touch Bluetooth SETUP page 58 Display the Receiver PIN Code screen 2 Enter PIN code 3 1 1 1 1 Enters a code number using the keypad ...

Page 69: ... Audio Remove Deletes registration pairing Touching the screen displays a confirmation message Touch Yes To cancel clearing touch No Audio A2DP Only for DDX5026 and DDX5056 with optional Bluetooth unit KCA BT200 connected Bluetooth Hands Free Audio Output Setup Selects speakers to output the sound of hands free phoning such as phone call voice and ringing tone and Bluetooth audio Display the Bluet...

Page 70: ... unconnected AV IN Name One AV IN name is displayed when iPod is selected in iPod AV Interface Use and two are displayed when not selected AV Interface Setup You can set audio and visual AV interface parameters Display the AV Interface screen 1 Touch AV Interface page 58 Set each item 2 AV OUT Selects an AV source to be output at the AV OUTPUT port AV IN1 R CAM Interrupt Sets a method to switch to...

Page 71: ...igation system ON When turned ON the volume level drops for voice guidance Navigation Input Selects a navigation system connection RGB DDX series only RGB Allows the Kenwood s Navigation System to connect via its interface cable AV IN Allows a third party navigation system to connect via the AV INPUT1 port OFF Must be used if no navigation system is connected The navigation display is cancelled wh...

Page 72: ...r cannot be setup when in STANDBY source mode Crossover Network Setup You can set a crossover frequency of speakers Select the speaker to set the crossover 1 2 2 2 1 1 1 3 3 3 1 Sets the High Pass Filter of the front speaker 2 Sets the High Pass Filter of the rear speaker 3 Sets the Low Pass Filter of the sub woofer Display the Crossover setup screen 2 Set the crossover 3 Phase Sets the phase of s...

Page 73: ...sten to the movie s dialog more clearly This is effective only when you are using a Dolby Digital software The operation is available during the play stop mode Angle Mark Sets an angle mark display ON Screen Ratio Selects the screen display mode 16 9 16 9 Displays wide pictures 4 3 LB Displays wide pictures in the Letter Box format having black stripes at the top and bottom of screen 4 3 PS Displa...

Page 74: ...uage only when setting an audio language Clear Clears the language code Set the language you use 4 DVD Parental Level Setup Sets a parental level Display the DVD Setup screen 1 Touch DVD SETUP page 58 Display the Parental Level code number 2 screen Enter the code number 3 1 1 1 1 Enters a code number Cancel Cancels the current setup and returns to the DVD SETUP screen Level Indicates the present p...

Page 75: ...icture is changed Short Middle Long CD Read Sets a music CD playback 1 1 Automatically recognizes and plays back an Audio file disc a DVD or a music CD 2 Forcibly plays back a disc as a music CD Select 2 if you wish to play a music CD having a special format or if you cannot play a disc in the 1 position On Screen DVD Sets an on screen display of the DVD Playback screen Manual Auto Information is ...

Page 76: ...s displayed when you touch on the screen iPod Setup Performs setup when using iPod Display the iPod Setup screen 1 Touch iPod SETUP page 58 Set each item 2 AudioBook Speed Sets the Audio book playback speed Normal Wide Screen Sets Wide Screen on or off OFF On Screen iPod Sets an on screen display of the iPod Playback screen Auto Auto Information is displayed for 5 seconds when updated Manual Infor...

Page 77: ... Language Select Selects a display language for the PTY function TV Setup The TV signal receiving areas can be set Display the TV SETUP screen 1 Touch TV SETUP page 58 Set each item 2 TV1 Area TV2 Area Sets the TV receiving area only when KTC V300E KTC V301E optional accessory connected On Screen TV Sets an on screen display of the TV screen Auto only when the optional accessory TV tuner connected...

Page 78: ...Remote Controller in a place where it will not move during braking or other operations A dangerous situation could result if the Remote Controller falls down and gets wedged under the pedals while driving Do not leave the battery near fire or under direct sunlight A fire explosion or excessive heat generation may result Do not recharge short break up or heat the battery or place it in an open fire...

Page 79: ... is not integrated in the unit select AUD mode Common operations AUD mode Source switching Switches to the source to be played V SEL MENU MODE FNC PBC DISP AUDIO ANGLE ZOOM RETURN SRC TOP MENU DVD SETUP SUBTITLE Volume control Adjusts the volume 1 2ABC 3DEF OPEN 2ZONE VOL FM AM D Y O O O Volume attenuator Press the key once to lower the volume Press again to restore the previous volume R VOL 7 PQR...

Page 80: ...file search Selects the track or file to be played 1 2ABC 3DEF OPEN 2ZONE VOL FM AM D Y 1 O O O Play Pause Pauses the track Press again to resume playing MENU ENTER DVD T V AUD AUDIO ANGLE ZOOM RETURN O O O TOP MENU DVD SETUP SUBTITLE Stop Memorizes the last point where the disc stopped When pressed again the last point is deleted MENU ENTER DVD T V AUD AUDIO ANGLE ZOOM RETURN O O O TOP MENU DVD S...

Page 81: ...NU DVD SETUP SUBTITLE DVD Menu Displays the DVD menu Turns the playback control on or off while playing VCD V SEL MENU MODE FNC PBC DISP AUDIO ANGLE ZOOM RETURN SRC TOP MENU DVD SETUP SUBTITLE SUBTITLE Switches the subtitle language V SEL MENU MODE FNC PBC DISP AUDIO ANGLE ZOOM RETURN SRC TOP MENU DVD SETUP SUBTITLE ZOOM Switches the zoom ratio each time you press this key V SEL MENU MODE FNC PBC ...

Page 82: ...ITLE Direct search R VOL 4GHI 7 PQRS 5JKL 8TUV 0 9WXYZ 6MNO CLEAR ATT DIRECT Pressing this key switches the features that can be searched directly Music Disc Track number Play time Cancel Audio files in DVD CD disc Folder number File number Cancel Once you have switched to the direct search feature specify the search number from the numeric keypad and then press 38 key Remote Controller Numeric ke...

Page 83: ...O CLEAR ATT DIRECT 2ZONE Y 1 To use preset tuning press the number of a programmed broadcast station 1 6MNO Press the direct tuning key first then specify the frequency of the station to receive iPod AUD mode Music Video search Selects the music video to be played 1 2ABC 3DEF OPEN 2ZONE VOL FM AM D Y 1 O O O Play Pause Pauses the music video Press again to resume playing MENU ENTER DVD T V AUD AUD...

Page 84: ...on The TV channel to receive is selected 1 2ABC 3DEF OPEN 2ZONE VOL FM AM D Y 1 O O O Numeric keypad R VOL 1 2ABC 3DEF 4GHI 7 PQRS 5JKL 8TUV 0 9WXYZ 6MNO CLEAR ATT DIRECT 2ZONE Y 1 The number of the memorized station is selected 1 6MNO Press the direct tuning key first then specify the channel of the station to receive B64 4606 00 01 E En indd 84 B64 4606 00 01 E En indd 84 09 12 4 1 56 49 PM 09 1...

Page 85: ...r camera video display when Reverse gear is engaged OFF The monitor does not switch to the rear view camera video display even when engaging the shift knob of car to Reverse Color Sets the screen and button illumination color page 65 End initial setup 3 The settings above can be changed in Setup Menu page 58 When pressing the Reset button or turning on the unit for the first time the Initial SETUP...

Page 86: ...e Status bar Source Display Overview General ATT Indicates that the attenuator is active DUAL Turns on the Dual zone function TEL Indicates the connection state of the Bluetooth hands free unit Orange Connected White Not connected DVD CD MEDIA FO REP Indicates that the Folder repeat function is ON IN Indicates that a disc is inserted White A Disc is inside the unit Orange Error at the disc player ...

Page 87: ...ri ku Kurdish ky Kirghiz la Latin lb Luxembourgish ln Lingala lo Laotian lt Lithuanian lv Latvian Lettish mg Malagasy mi Maori mk Macedonian ml Malayalam mn Mongolian mo Moldavian mr Marathi ms Malay mt Maltese my Burmese na Nauru ne Nepali nl Dutch no Norwegian oc Occitan om Afan Oromo or Oriya pa Punjabi pl Polish ps Pashto Pushto pt Portuguese qu Quechua rm Rhaeto Romance rn Kirundi ro Romanian...

Page 88: ... unit is set to STANDBY source What might seem to be a malfunction in your unit may just be the result of slight misoperation or miswiring Before calling service first check the following table for possible problems General The Touch Sensor Tone doesn t sound The preout jack is being used The Touch Sensor Tone can t be output from the preout jack Tuner source Radio reception is poor The car antenn...

Page 89: ... no iPod Bluetooth audio player is connected Change the source to any source other than iPod Bluetooth Connect an iPod Bluetooth audio player and change the source to iPod Bluetooth again No Media File The connected USB device contains no playable audio file Media was played that doesn t have data recorded that the unit can play USB Device Error The connected USB device is rated a current capacity...

Page 90: ...Hz Total Harmonic Distortion 0 010 1 kHz S N Ratio dB 98 dB DVD Video 96 kHz Dynamic Range 98 dB DVD Video 96 kHz Disc Format DVD Video VIDEO CD CD DA Sampling Frequency 44 1 48 96 kHz Quantifying Bit Number 16 20 24 bit USB interface section USB Standard USB 2 0 File System FAT 16 32 Maximum Power Supply Current 500 mA D A Converter 24 Bit Video Decoder MPEG1 MPEG2 DivX Audio Decoder MP3 WMA AAC ...

Page 91: ... Usable Sensitivity 25 μV Video section Color System of External Video Input NTSC PAL External Video Input Level mini jack 1 Vp p 75 Ω External Audio Max Input Level mini jack 2 V 25 kΩ Video Output Level RCA jacks 1 Vp p 75 Ω Audio Output Level RCA jacks 1 2 V 10 kΩ Audio section Maximum Power Front Rear 50 W x 4 Full Bandwidth Power Front Rear 30 W x 4 PWR DIN 45324 B 14 4V Preout Level V 2 V 10...

Page 92: ... antenna General Operating voltage 14 4 V 10 5 16 V allowable Maximum Current Consumption 15 A Installation Dimensions W H D 182 112 160 mm 7 3 16 x 4 7 16 x 6 5 16 inch Operational Temperature Range 10 C 60 C Storage Temperature Range 20 C 85 C Weight DNX series 1 9 kg 4 1 lbs DDX series 1 8 kg 4 0 lbs Although the effective pixels for the liquid crystal panel is given as 99 99 or more 0 01 of pi...

Page 93: ...sory has been designed to connect specifically to iPod and has been certified by the developer to meet Apple performance standards Works with iPhone means that an electronic accessory has been designed to connect specifically to iPhone and has been certified by the developer to meet Apple performance standards Apple is not responsible for the operation of this device or its compliance with safety ...

Page 94: ...senciais e outras disposições da Directiva 1999 5 CE Polska Kenwood niniejszym oświadcza że DNX5260BT spełnia zasadnicze wymogi oraz inne istotne postanowienia dyrektywy 1999 5 EC Český Kenwood timto prohlasuje ze DNX5260BT je ve shode se zakladnimi pozadavky a s dalsimi prislusnymi ustanoveni Narizeni vlady c 426 2000 Sb Magyar Alulírott Kenwood kijelenti hogy a jelen DNX5260BT megfelel az 1999 5...

Page 95: ... be disposed as household waste Old electrical and electronic equipment and batteries should be recycled at a facility capable of handling these items and their waste byproducts Contact your local authority for details in locating a recycle facility nearest to you Proper recycling and waste disposal will help conserve resources whilst preventing detrimental effects on our health and the environmen...

Page 96: ...B64 4606 00 01 E En indd 96 B64 4606 00 01 E En indd 96 09 12 4 1 56 51 PM 09 12 4 1 56 51 PM ...

Reviews: