background image

2


C-717DV

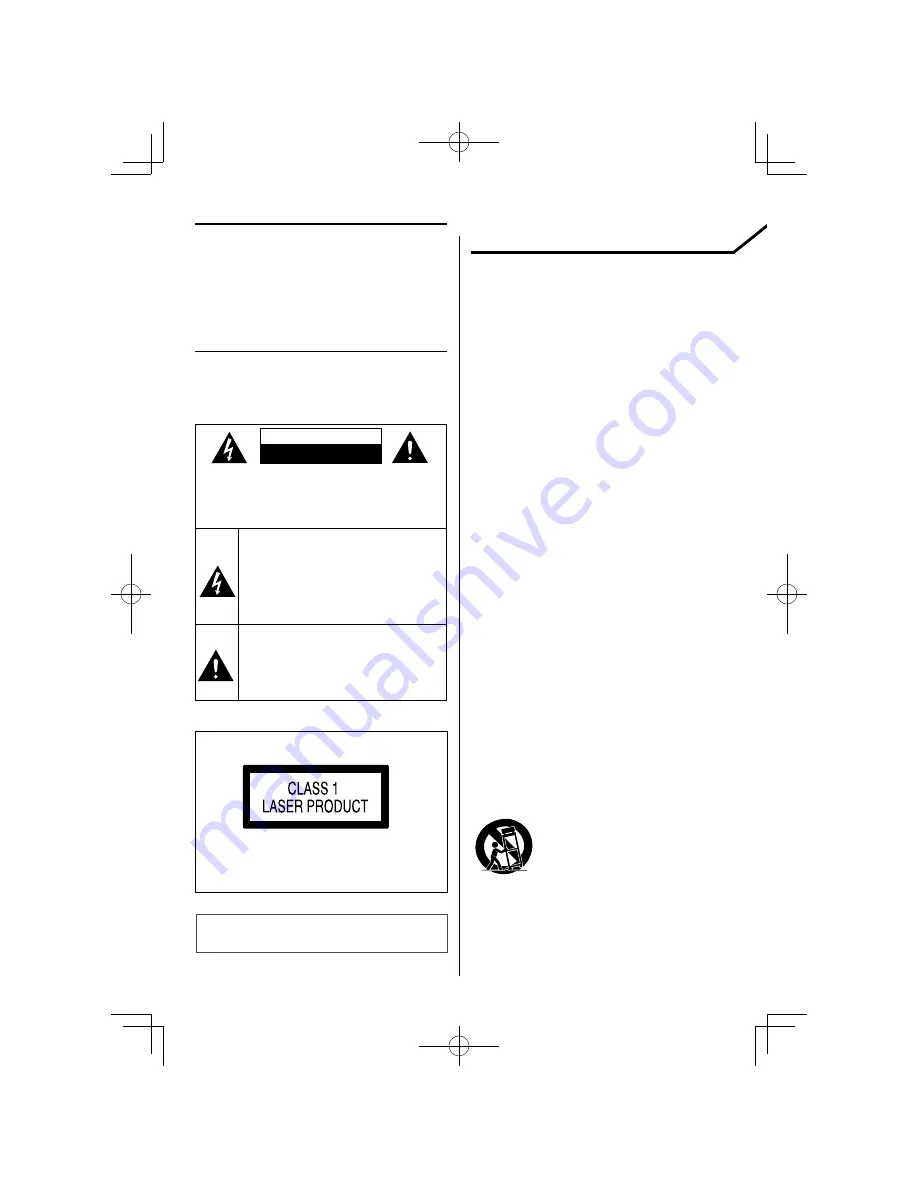
THE EXCLAMATION POINT WITHIN AN EQUI-

LATERAL TRIANGLE IS INTENDED TO ALERT 
THE USER TO THE PRESENCE OF IMPORTANT 
OPERATING AND MAINTENANCE (SERVICING) 
INSTRUCTIONS IN THE LITERATURE ACCOMPA-
NYING THE APPLIANCE.

Before applying power

¤

 Caution :  Read this page carefully to 

ensure safe operation.

Units are designed for operation as follows.

Europe  .............................................................. AC 230 V only

Safety precautions

WARNING : 

TO PREVENT FIRE 

OR ELECTRIC SHOCK, DO NOT 

EXPOSE THIS APPLIANCE TO 

RAIN OR MOISTURE.

CAUTION: TO REDUCE THE RISK OF ELECTRIC SHOCK, 
DO NOT REMOVE COVER (OR BACK). NO USER-
SERVICEABLE PARTS INSIDE. REFER SERVICING TO 
QUALIFIED SERVICE PERSONNEL.

THE LIGHTNING FLASH WITH ARROWHEAD 
SYMBOL, WITHIN AN EQUILATERAL TRIANGLE, 
IS  INTENDED TO  ALERT THE  USER TO THE 
PRESENCE OF UNINSULATED "DANGEROUS 
VOLTAGE" WITHIN THE PRODUCT’S ENCLOSURE 
THAT MAY BE OF SUFFICIENT MAGNITUDE TO 
CONSTITUTE A RISK OF ELECTRIC SHOCK TO 
PERSONS.

IMPORTANT SAFETY 

INSTRUCTIONS

¤ 

Caution :  Read this page carefully to 

ensure safe operation.

Read These Instructions


– All the safety and operating instructions should be 
read before the product is operated.

Keep These Instructions


– The safety and operating instructions should be 
retained for future reference.

Heed All Warnings


– All warnings on the product and in the operating 
instructions should be adhered to.

Follow All Instructions


– All operating and use instructions should be 
followed.

1.  Clean only with dry cloth


– Unplug this product from the wall outlet before 
cleaning. Do not use liquid cleaners or aerosol 
cleaners. Use a damp cloth for cleaning.

2. Attachments

– Only use attachments/accessories specifi ed by the 
manufacturer.

3.  Do not use this apparatus near water

– This product shall not be exposed to dripping and 
splashing – for example, near a bath tub, wash bowl, 
kitchen sink, or laundry tub; in a wet basement; or 
near a swimming pool; and the like. Do not place an 
object containing liquid, such as a fl ower vase, on 
the appliance.

4. Accessories


– Use only with the cart, stand, tripod, bracket, or 
table specifi ed by the manufacturer, or sold with the 
apparatus. When a cart is used, use caution when 
moving the cart/apparatus combination to avoid 
injury from tip-over.

The marking of products using lasers

The marking this product has been classified as 
Class 1. It means that there is no danger of hazard-
ous radiation outside the product.

Location: Back panel

CAUTION

RISK OF ELECTRIC SHOCK

DO NOT OPEN

The markings of products' certifi cations.
Rating label location : Back panel


Summary of Contents for C-717DV

Page 1: ... B60 5860 08 00 E COMPACT Hi Fi COMPONENT SYSTEM C 717DV INSTRUCTION MANUAL ...

Page 2: ... safety and operating instructions should be retained for future reference Heed All Warnings All warnings on the product and in the operating instructions should be adhered to Follow All Instructions All operating and use instructions should be followed 1 Clean only with dry cloth Unplug this product from the wall outlet before cleaning Do not use liquid cleaners or aerosol cleaners Use a damp clo...

Page 3: ...ous voltage points or short out parts that could result in a fire or electric shock Never spill liquid of any kind on the product 12 Servicing Do not attempt to service this product yourself as opening or removing covers may expose you to dangerous voltage or other hazards Refer all servicing to qualified service personnel 13 Damage Requiring Service Refer all servicing to qualified service personnel...

Page 4: ...by mode 14 Volume control 14 Sound control 14 Headphones 14 Using the DVD USB device SD card 15 Preparation 15 Playing a DVD Video CD 16 Playing a CD audio file video file 16 Time Search For DVD Video CD CD audio file only 17 File Select For audio file video file picture file only 17 Programming chapters tracks files 18 Random play except picture file 18 Repeat play 18 Zoom 19 Changing the display informa...

Page 5: ...rescent lamp may cause a malfunction In such a case change the location of the system installation to prevent malfunction CAUTION Lithium battery Danger of explosion if the battery is incorrectly replaced Replace only with the same or equivalent type The battery pack or batteries shall not be exposed to excessive heat such sunshine fire or the like Keep battery out of reach of children and in orig...

Page 6: ...turned off Install the equipment so that the wall outlet is easily accessible and in case of emergency immediately unplug the power plug from the wall outlet Mains plug is used as the disconnect device It shall remain readily operable and should not be obstructed during intended use AM loop antenna FM indoor antenna iPod applied part Right speaker Left speaker To AC wall outlet Insert the plug fir...

Page 7: ...tion that provides the best reception Connecting the iPod applied part 1 Connect the iPod applied part to iPod applied part connector 2 Insert the Dock adapter into unit 3 Connect your iPod iPhone To remove Dock adapter Insert a thin object such as the tip of a flat blade screwdriver into the slit on the dock adapter and lift it to remove Connect an iPod dock adapter which is provided with your iP...

Page 8: ...ic side is not compatible with the Compact Disc CD standard playback on this unit is not assured This unit can play back DVD R and DVD RW discs recorded in the DVD VIDEO format and DVD R and DVD RW discs but de pending on the recording unit the disc manufacturer etc playback sometimes may not be possible This unit may also be incapable of playing certain CD R RW discs depending on their properties...

Page 9: ...D discs Always use a CD carrying the marking A disc without this marking may be unable to be played back correctly The disc rotates at a high speed during playback Never use a cracked chipped or greatly warped disc Otherwise damage or malfunction of the player may result Also do not use a disc with a non circular shape as this may result in malfunction Contact the sales agent as to whether your US...

Page 10: ...ia DVD R RW DVD ROM CD ROM CD R CD RW USB device USB version 1 1 2 0 SD SDHC mini SD micro SD SDHC card CD RW discs which are quick formatted by the writing software cannot be used When recording to the maximum CD R RW media capacity at once the writing software is set to Disc at once For details on the available USB devices refer to About USB device page 9 For details on the available SD SDHC car...

Page 11: ...registration code locate the DivX VOD section in your device setup menu Go to vod divx com for more information on how to complete your registration When buying DRM enabled contents check the Registration Code in the DIVX R VOD page 21 Registration Code changes each time a file with the displayed Registration Code is played to protect against copying About Picture file Acceptable picture files Play...

Page 12: ...m on or to standby mode STANDBY TIMER indicator Red lighting Ordinary standby mode Orange lighting Timer standby mode 13 14 15 16 17 7 6 8 9 10 11 12 1 2 3 4 5 DISPLAY SLEEP USB SD DVD STOP D BASS VOLUME MUTE D AUDIO iPod AUX SOUND EQ BAND TUNER AUDIO SUBTITLE DVD SETUP RESOLUTION STEREO MONO ANGLE P MODE FOLDER P CALL TIMER SET ZOOM RANDOM REPEAT TIMER ON OFF SEARCH MEMORY PTY CLEAR BACKLIGHT CON...

Page 13: ...rry out PTY search To delete the track file number entered during track 15 digit 0 9 buttons To select a track file number for CD and audio file To select a preset radio station for TUNER 16 SEARCH MEMORY button To select a desired title chapter track file or time with on screen bar To auto manual preset radio stations for TUNER 17 TIMER ON OFF button To switch the timer on off 18 TIMER SET button To s...

Page 14: ...ound effect DTS Envelo ON 1 ON 2 or OFF When an effect other than OFF is selected the DTS appears on the display To switch on preset equalizer settings Press EQ button to select the desired sound effect POP CLASSIC ROCK JAZZ GAME or FLAT off When an effect other than FLAT is selected the icon EQ appears on the display To switch on the bass enhancement For Remote control unit Press D BASS button Pres...

Page 15: ...device 1 Press button to select standby mode 2 Remove the USB device Inserting an SD card 1 Press button to select standby mode 2 Insert the SD card into the SD card slot until it clicks Insert the SD card so that the label side faces up and the side with a cut comes on the right 3 Press DVD USB SD button once or more to select SD The total album number and total file number will appear on the disp...

Page 16: ...s blinked press ANGLE button Select the camera angle with press ANGLE button 1 Slow motion playback in reverse is not possible with Video CDs 2 Slow motion playback in reverse only DVD disc menu Operation type Operation To View the title menu Press TOP MENU button to display the disc s title menu if available To View the DVD menu Press MENU button to display the disc menu if available To select a ...

Page 17: ... display Folder column Track column File type Audio file Picture file Video file Folder1 File2 mp3 01 File1 02 File2 03 File3 01 Folder1 02 Folder2 03 Folder3 04 Folder4 05 __________ __________ 06 04 File4 05 File5 06 File6 ALBUM SONG Folder1 File2 A TI 1 During playing of video file picture file press STOP 7 button to stop The list display is remained during the playback of audio files 2 Press MU...

Page 18: ... file number using digit buttons 0 to 9 on the remote control unit If you press REPEAT button during programmed playback the current track or all programmed tracks files is are played repeatedly The icon REP or REP ALL and the icon PGM appear on the display To clear the program Press P MODE button The icon PGM disappears from the display P represents PROGRAM The program is automatically cleared as...

Page 19: ...t title remaining time REMAIN C The whole disc elapsed time TOTAL T The whole disc remaining time TOTAL REMAIN T On screen is clear For CD Video CD Information Icon Display The current track elapsed time C The current track remaining time REMAIN C The whole disc elapsed time TOTAL T The whole disc remaining time TOTAL REMAIN T On screen is clear For audio file video file Information Icon Display T...

Page 20: ...LTI CONTROL 2 or 3 button to select the menu 4 Press MULTI CONTROL 5 or button to move to select the item 5 Press ENTER button 6 Press MULTI CONTROL 5 or button to select the options and then Press ENTER button Menu Item Contents SCREEN SAVER You can set the screen saver function ON or OFF If no operation is done for about 3 minutes starts the screen saver TV TYPE 4 3 PS Pan Scan conversion Select...

Page 21: ...ccording to the TV connected to the HDMI MONITOR OUT terminal PCM Select this if no sound is reproduced on the TV with the AUTO setting The system converts the audio signal into PCM and emits the signal from the HDMI MONITOR terminal BRIGHTNESS You can adjust the brightness 0 to 12 CONTRAST You can adjust the contrast 0 to 12 HUE You can adjust the hue 6 to 6 SATURATION You can adjust the color de...

Page 22: ...4 or button To select a album 1 Press FOLDER P CALL A or B button 1 The operation varies depending on the model of iPod iPhone Model other than iPod touch iPhone iPod touch iPhone Theoperationisavailablewhenone ofthefollowingitemsisselected Browse item Selection Artists Composers All Albums Albums Compilations All Songs Genres All Artists Thealbumisswitchedtothenext albumfoundbyfollowingthealpha b...

Page 23: ...onal cable or adapter Also read the instruction manual for the connected component Optional cable Kenwood digital audio player 2 Press D AUDIO iPod button once or more to select D AUDIO 3 Turn the connected player ON and start playing it Basic operations Operation type Operation To stop playback Press STOP 7 button To interrupt playback Press 6 button Press again to resume playback To search for a...

Page 24: ...number and radio frequency appear on the display Press the digit buttons as shown below To select 1 1 and ENTER To select 2 2 and ENTER To select 10 1 0 and ENTER Tuning in radio stations 1 Press TUNER BAND button to select the desired waveband FM or AM 2 Press and hold 4 or button to tune in to the desired frequency To tune to a weak station briefly press 4 or button repeatedly until the display ...

Page 25: ...ce name display PTY Program TYpe display RT Radio Text display Frequency display and preset number display Tuning by Program Type PTY search This function lets you set the tuner to automatically search for stations which are currently broadcasting the type of program genre you want to listen to 1 Press TUNER BAND button to select FM 2 Press PTY button If the current station is with Radio Data Syst...

Page 26: ...I CONTROL 5 or button to set volume level and press ENTER button to store the setting 7 Press MULTI CONTROL 2 or 3 button to select the play mode and press ENTER button to store the setting Play mode Function PLAY The playback begins at the level set with VOLUME AI PLAY The volume is increased gradually until the level set with VOLUME When the setting completes COMPLETE is displayed and the unit e...

Page 27: ...tem setup Adjusting the display brightness BACKLIGHT The brightness of the display backlight can be adjusted and how the display backlight and illuminations of this unit are lit can be selected 1 Press BACKLIGHT CONTRAST button 2 Press MULTI CONTROL 2 or 3 button to select BACKLIGHT and press ENTER button 3 Press MULTI CONTROL 5 or button to select the backlight setting and press ENTER button to s...

Page 28: ...rocomputer may malfunction unit cannot be operated or shows an erroneous display if the power cord is unplugged while the power is ON or due to some other external factor If this happens execute the following procedure to reset the microcomputer and return the unit to its normal operating condition When the NO DISC mode DVD source without a disc in the unit press the SOUND button on the main unit ...

Page 29: ...cleared NO picture Place the disc on the disc tray correctly inside the guide Clean the disc Select the appropriate video input model on the TV so the picture from the unit appears on the TV USB operation NO USB is displayed Press button again after pressing button Insert the USB device properly NOT SUPPORT is displayed Press button again after pressing button Cannot play Check if the USB mass sto...

Page 30: ... the following circumstances When this unit is carried from one place to another across a large difference in temperature when the humidity in the room where this unit is installed increases etc To install speakers on a wall Prepare commercially available wood screws 9 mm 16 mm 1 On a stable pillar or wall attach a pair of wood screws at the same interval as the interval between the wall mount hol...

Page 31: ...DHC card File system FAT 16 32 General Provided AC adapter DC 18 V AC 230 240 V 50 Hz Power consumption Incl AC adapter 30 W Power consumption in standby mode 1 W or less Dimensions W 190 mm with iPod applied part W 286 mm H 240 mm D 142 mm Weight net 1 4 kg Speakers Enclosure Bass reflex type Speaker configuration Woofer 86 mm cone type Tweeter 36 mm cone type Impedance 8 Ω Maximum input 20 W Dimen...

Page 32: ...e is not responsible for the operation of this device or its compliance with safety and regulatory standards Please note that the use of this accessory with iPod or iPhone may affect wireless performance iPhone iPod iPod classic iPod nano and iPod touch are trademarks of Apple Inc registered in the U S and other countries Manufactured under license from DTS Licensing Limited DTS is a registered tr...

Reviews: