background image

11

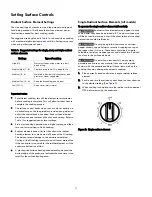
Setting Surface Controls

Radiant Surface Element Settings

The size and type of utensil used, and the amount and type of 
food being cooked will influence the surface element power 
level setting needed for best cooking results.

The suggested settings found in 

Table 1

 are based when cooking 

with medium-weight aluminum pans with lids. Settings may vary 
when using other types of pans.

Important notes:

For efficient cooking, turn off the element several minutes 
before cooking is complete. This will allow residual heat to 
complete the cooking process.

The surface control knobs do not have to be set exactly on 
a particular spot. Use the graphics provided as a guide and 
adjust the control knob as needed. Each surface element 
provides a constant amount of heat at each setting. Refer to 

Table 1

 for suggested power level settings.

Start most cooking operations on a higher setting and then 
turn to a lower setting to finish cooking.

Radiant elements have a limiter that allows the radiant 
heating element to cycle on and off, even at the HI setting. 
This helps prevent damage to the ceramic smoothtop. 
Cycling at the HI setting is normal and will occur more often 
if the cookware is too small for the radiant element or if the 
cookware bottom is not flat.

A glowing red surface heating area extending beyond the 
bottom edge of the cookware indicates the cookware is too 
small for the surface heating area.

Single Radiant Surface Elements (all models)

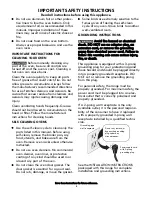
To operate the single radiant element (all models):

Radiant surface elements may appear to have 

cooled after they have been turned off. The glass surface may 
still be hot and burns may occur if the glass surface is touched 
before it has cooled sufficiently.

Do not place plastic items such as salt and 

pepper shakers, spoon holders or plastic wrappings on top of 
the range when it is in use. These items could melt or ignite. 
Potholders, towels or wooden spoons could catch fire if placed 
too close to the surface elements.

Do not allow aluminum foil, empty glass/

porcelain cookware or any material that can melt to make 
contact with the ceramic cooktop. If these items melt on the 
cooktop they may damage the ceramic cooktop.

1.

Place correctly sized cookware on single radiant surface 
element.

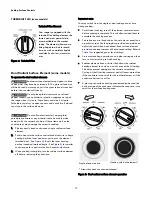
2. Push in and turn the surface control knob in either direction 

to the desired setting (See 

Figure 3

).

3. When cooking is complete, turn the radiant surface element 

OFF before removing the cookware.

Table 1:  Suggested settings for single, dual, and triple radiant 
surface elements

Settings

Type of cooking

High (HI)

Start most foods, bring water to a boil, 
pan broiling

Medium high (7 - 8)

Continue a rapid boil, fry, deep fat fry

Medium (5 - 6)

Maintain a slow boil, thicken sauces and 
gravies or steam vegetables

Medium Low (2 - 4)

Keep foods cooking, poach, stew

Low (LO - 1)

Keep warm, melt, simmer

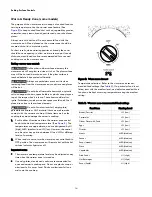
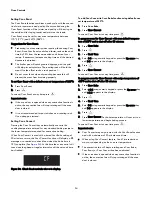
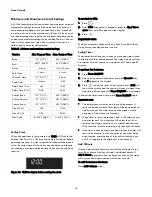
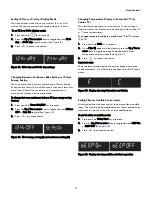
Figure 3:  Single radiant element

Summary of Contents for 970C6531 Series

Page 1: ...ère électrique color number numéro de couleur Use Care Guide Guide d utilisation et d entretien English Français Model Modèles 970C6531 6533 6535 6537 P N 316902151 Rev C Sears Canada Inc Toronto Ontario Canada M5B 2C3 www sears ca ...

Page 2: ...is product if it is not installed operated or maintained according to all instructions supplied with the product 7 Damage to or failure of this product resulting from accident abuse misuse or use for other than its intended purpose 8 Damage to or failure of this product caused by the use of detergents cleaners chemicals or utensils other than those recom mended in all instructions supplied with th...

Page 3: ... Call 1 800 4 MY HOME TM Sears ca parts_ MAJOR APPLIANCES And a whole lot more We have access to over 1 million parts and accessories REFRIGERATORS Water Air Filters Ice Maker Stainless Steel Water Line Thermometers Environmentally Friendly Appliance Cleaners VACUUMS Bags Belts Hoses Wands Brushes Nozzles Filters LAWN GARDEN Tune up Kits Oil Fuel Stabilizers Filters Blades Belts Spark Plugs Shear ...

Page 4: ... bottom of this page for the serial plate location Model Number _970 ______________________________ Serial Number ________________________________________ Date of Purchase ________________________________________ Save your sales receipt for future reference Serial Plate Location To locate the serial plate open the storage drawer or warming drawer The serial plate is attached to the lower right ove...

Page 5: ... Stepping leaning or sitting on the door or drawers of an oven can result in serious injuries and also cause damage to the appliance Do not allow children to climb or play around the oven The weight of a child on an open over door may cause the oven to tip resulting in serious burns or other injury Never cover any slots holes or passages in the oven bottom or cover an entire oven rack with materia...

Page 6: ...nough cause burns such as the oven door windows and the oven vent Proper Installation Be sure your appliance is properly installed and grounded by a qualified technician in accordance with the National Electrical Code ANSI NFPA No 70 latest edition and local electrical code requirements In Canada install in accordance with CSA Standard C22 1 Canadian Electrical code Part 1 and local electrical cod...

Page 7: ...n changes in temperature Check the cookware manu facturer s recommendations for cooktop use When you are flaming foods under a ventilating hood turn on the fan IMPORTANT INSTRUCTIONS FOR CERAMIC GLASS COOKTOPS Do not cook on a broken cooktop If the cooktop is broken cleaning solutions and spills may penetrate the cooktop and create a risk of electric shock Contact a qualified technician immediatel...

Page 8: ...t use oven cleaners No commercial oven cleaner oven liner or protective coating of any kind should be used in or around any part of the oven Do not clean the oven door gasket The door gasket is essential for a good seal Do not rub damage or move the gasket Some birds are extremely sensitive to the fumes given off during the self clean cycle of any oven Move birds to another well ventilated room GR...

Page 9: ... If the cookware melts it will damage the cooktop Be sure to follow all the cookware manufacturer s suggestions when using any type of cookware on the ceramic cooktop About the ceramic glass cooktop The ceramic cooktop has radiant surface elements located below the surface of the glass The design of the ceramic cooktop outlines the area of the surface element underneath Be sure to match the pan si...

Page 10: ...and Before You Call sections of this Use Care Guide Types of Cooktop Surface Elements The ceramic glass cooktop has radiant surface elements located below the surface of the glass The patterns on the ceramic glass will outline the size and type of element available The single radiant element or elements will have one round outline pattern shown on the cooktop The warmer zone feature on some models...
Page 11: ...dge of the cookware indicates the cookware is too small for the surface heating area Single Radiant Surface Elements all models To operate the single radiant element all models Radiant surface elements may appear to have cooled after they have been turned off The glass surface may still be hot and burns may occur if the glass surface is touched before it has cooled sufficiently Do not place plasti...
Page 12: ...ngle or dual settings at any time during cooking For efficient cooking turn off the element several minutes before cooking is complete This will allow residual heat to complete the cooking process The surface control knobs do not have to be set exactly on a particular spot Use the graphics provided as a guide and adjust the control knob as needed Each surface element provides a constant amount of ...

Page 13: ...all three element portions will adjust to the same power level Important note You may switch from the single dual or triple settings at any time during cooking 3 When cooking is complete turn the radiant surface element off before removing the cookware Important notes For efficient cooking turn off the element several minutes before cooking is complete This will allow residual heat to complete the...

Page 14: ...glass porcelain cookware or ANY material that can melt to make contact with the ceramic cooktop If these items melt on the cooktop they may damage the ceramic cooktop 1 Push in either direction and turn the warmer zone control knob to the desired temperature level See Figure 8 The temperatures are approximate and are designated by HI high MED medium and LO low However the control can be set at any...

Page 15: ...f heat at each setting Start most cooking operations on a higher setting and then turn to a lower setting to finish cooking Radiant elements have a limiter that allows the radiant heating element to cycle ON and OFF even at the HI setting This helps prevent damage to the ceramic smoothtop Cycling at the HI setting is normal and will occur more often if the cookware is too small for the radiant ele...

Page 16: ...ing results allow 2 4 5 10 cm around the cookware for proper air circulation and be sure pans and cookware do not touch each other the oven door sides or back of the oven cavity Hot air must be able to circulate around the cookware in the oven for even heat to reach around the food Types of Oven Racks The flat oven rack some models or flat handle oven rack some models may be used for most cooking ...

Page 17: ...fic amount of time needed for cooking Automatically cancels cooking process at end of set time 16 Delay Start Use with Bake Conv Bake Conv Concert and Self Clean functions to program a delayed start time 17 Self Clean Use to select 2 3 or 4 hr Self Clean cycle 18 Oven Lock Use to lock oven door and oven functions 19 LIGHT Use to turn internal oven light on and off 20 CLOCK Use to set time of day I...

Page 18: ... show in the display and the control will sound a beep three times every 30 seconds until Timer ON OFF key is pressed To cancel the timer when active press Timer ON OFF again Important note The timer does not start or stop the cooking process It serves as an extra minute timer that will beep when the set time has run out The timer may be used alone or while using any of the other oven functions Wh...

Page 19: ...c oven control is set to display F when shipped from the factory The display may be changed to show either F or ºC oven temperatures To change temperature display mode from F to C or from C to F 1 Press and hold Broil for 6 seconds 2 Once F or C appears in the display press the Up Down arrow keys to toggle between Fahrenheit and Celsius temperature display modes See Figure 17 3 Press to accept the...

Page 20: ...rtant note To avoid damage to the oven door latching mechanism do not attempt to open or close the oven door whenever the word DOOR with a lock icon is displayed If a control key is pressed when oven lockout is active the control will triple beep indicating the key action is not available when the oven lockout feature is active Operating Oven Lights The interior oven lights will automatically turn...

Page 21: ... shiny bakeware resulting in dark or overbrowning of foods It may be necessary to reduce the oven temperature or cook time to prevent overbrowning of some foods Dark pans are recom mended for pies Shiny pans are recommended for cakes cookies and muffins Glass cookware is a slow heat conductor May require reducing oven temperature Minimize opening of the oven door Opening the door will reduce the t...

Page 22: ...until is pressed Setting Delay Start Delay Start sets a delayed starting time to oven cooking or cleaning functions Prior to setting a delay start be sure the time of day is set correctly To program oven for a Delay Start beginning at 5 30 to shut off automatically after 50 minutes and for baking at 375 F Food Poisoning Hazard Do not let food sit for more than one hour before or after cooking Doin...

Page 23: ...nvec Bake is active the convection fan will stop rotating until the oven door is closed When using Convec Bake cook time reductions may vary depending on the amount and type of food being cooked Baking tips Fully preheat the oven before cooking items like cookies biscuits and breads When using any single rack position the rack so that the food is in the center of the oven Dark or dull bakeware abs...

Page 24: ...utes or more the Conv Convert function will display a CF message as a reminder to check food when the bake time is 75 complete See Figure 24 At this time the oven control will sound one long beep at regular intervals until the set cook time has finished To add Conv Convert to Conv Bake function using default oven set temperature of 350 F 1 Press Conv Bake 2 Press Conv Convert To cancel Conv Conver...

Page 25: ...our satisfaction 6 When finished broiling press 7 To cancel Broil at any time press STOP Always use pot holders or oven mitts when using the oven When cooking the oven interior oven racks and cook top will become very hot which can cause burns Should an oven fire occur close the oven door and turn the oven off If the fire continues use a fire extin guisher Do not put water or flour on fire Flour m...

Page 26: ...efore cooking begins and should be removed promptly when finished cooking 1 Position bakeware in oven and close oven door 2 Press Slow Cook HI will appear in the display indicating the default temperature setting is for high 3 If a low setting is needed press the Down arrow key to select the low setting 4 Press to activate Slow Cook To cancel Slow Cook at any time press Warm Hold Warm Hold should ...

Page 27: ...Food poisoning hazard Do not let food sit for more than one hour before or after cooking Doing so can result in food poisoning or sickness Foods that can easily spoil such as milk eggs fish meat or poultry should be chilled in the refriger ator first Even when chilled they should not stand in the oven for more than 1 hour before cooking begins and should be removed promptly when finished cooking T...

Page 28: ...35 F 19 C or decreased 35 F 19 C from the factory calibrated settings To increase or decrease the oven temperature by 20 F 1 Press and hold Bake until the control produces an audible tone about 6 seconds The factory offset temperature of 0 zero should appear in the display 2 Enter 2 0 using numeric keypad 3 To offset the oven by 20 F press the Down arrow key until the display reads 20 4 Press to a...

Page 29: ... See Figure 29 to allow low profile food items to be placed both under and on top of the rack for example rolls or biscuits on top of the rack and a casserole dish underneath In the downward position See Figure 30 to allow for light weight food items and empty cookware for example rolls pastries and dinner plates on the rack Setting Warmer Drawer To set warmer drawer Food Poisoning Hazard Do not l...

Page 30: ...nce To replace the warmer drawer 1 Pull the bearing glides to the front of the outer compart ment glide channels until they snap into place See Figure 32 2 Carefully line up both sides of the warmer drawer glide rails to the outer compartment glide channels located inside the empty warmer drawer compartment See Figure 33 3 While holding the warmer drawer level and square using the warmer drawer ha...

Page 31: ... any soil from the oven frame the door liner outside the oven door gasket and the small area at the front center of the oven bottom See Figure 34 These areas heat sufficiently to burn soil on Clean using soap and water prior to starting Self Clean This model comes with lubricated porcelain oven racks which can remain in the oven during the self clean cycle Do not clean this vegetable oil lubricati...

Page 32: ...completely cooled wipe away any residue or powdered ash with a damp cloth or paper towel Setting Delay Start Self Clean To start a delay Self Clean with default clean time of 3 hours and a start time of 9 00 o clock 1 Be sure the clock is set with the correct time of day the oven is empty and all oven racks are removed Be sure oven door is completely closed 2 Press Delay Start 3 Using numeric keyp...

Page 33: ...10 minutes to allow for a cool down period Do not attempt to wipe out the oven before a 10 minute cool down period 10 An alert will sound when the timer is finished Press Timer ON Off to stop the timer 11 Stand to the side of the range out of the way of escaping vapor when opening the oven door 12 Wipe oven cavity and bottom Do not clean oven door gas ket See Figure 36 To stop the steam cleaning c...

Page 34: ...ith lubricated porcelain oven racks which can remain in the oven during the self clean cycle Do not clean this vegetable oil lubrication off the racks It is important that the sides of the oven racks always have a light coating of vegetable oil To maintain optimal rack performance re apply a thin layer of vegetable oil to the sides of the rack after every self clean cycle or when the rack becomes ...

Page 35: ...us to your health and can chemically damage the ceramic glass surface Before cleaning the cooktop be sure the controls are turned to OFF and the cooktop is COOL The glass surface could be hot and burns may occur if the glass surface is touched before it has cooled sufficiently For light to moderate soil Apply a few drops of CookTop Cleaning Creme directly to the cooktop Use a paper towel or use a ...

Page 36: ...il linings may trap heat causing a fire hazard Protective Liners DO NOT USE ALUMINUM FOIL to line the oven bottom Only use aluminum foil as recom mended in this manual Improper installation of these liners may result in risk of electric shock or fire Aluminum foil Use of aluminum foil on a hot cooktop can damage the cooktop Do not use thin aluminum cooking utensils or allow aluminum foil to touch ...

Page 37: ...Figure 42 2 Holding the oven door at the same angle as the removal position See Figure 42 seat the hook of the hinge arm over the roller pins located on each side of the oven door frame See Figure 43 The hook of the hinge arms must be fully seated onto the roller pins 3 Fully open the oven door horizontal with floor See Figure 40 4 Push the door hinge locks up toward and into the oven frame on bot...

Page 38: ... temperature before placing food in the oven Use proper rack position for baking needs Set oven temperature 25 F 13 C lower than recommended Cakes not done in center Oven too hot Incorrect pan size Pan not centered in oven Set oven temperature 25 F 13 C lower than recommended Use pan size suggested in recipe Use proper rack position and place pan so there is 5 1 cm to 10 2 cm 2 to 4 of space on al...

Page 39: ... 25 Self clean does not work Oven control not set properly Review Setting Self Clean on page 32 Oven racks discolored or do not slide easily Oven racks left in oven cavity during self clean Always remove oven racks from oven cavity before starting a self clean cycle Clean using a mild abrasive cleaner following manufac turer s instructions Rinse with clean water dry and replace in oven Oven smokes...

Page 40: ...424712 10 20 08 SR Printed in the U S A 02488 ...

Reviews: