background image

7

flat handle

oven rack

offset

oven rack

flat
oven rack

Before Setting Oven Controls

 Always use pot holders or oven mitts when

using the oven. 

 When cooking, the oven interior and

exterior, oven racks and cooktop will become very hot
which can cause burns.

Arranging -

 always arrange

the oven racks when the oven
is cool (prior to operating the
oven).

To remove -

 pull the rack

forward until it stops. Lift up
front of rack and slide out.

To replace -

 fit oven rack

onto the rack guides on both
sides of oven walls. Tilt the
front of oven rack upward
and slide the rack back into
place. Be sure oven racks are
level before using.

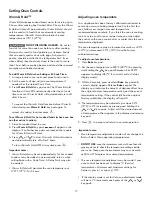
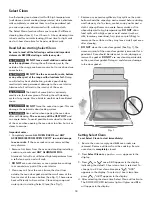
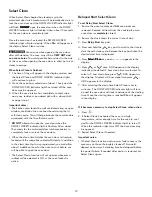
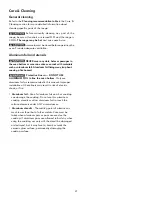
Removing, replacing and arranging racks

Fig. 3

Recommended oven rack positions by food type:

Food type

Position

Broiling

See broil

Cookies, cakes, pies, biscuits & muffins

4 or 5

Frozen pies, angel food cake, yeast, bread

and casseroles

2 or 3

Small cuts of meat or poultry

1 or 2

Turkey, roast or ham

1 or 2

Types of oven racks

Air circulation in the oven

For best baking results allow 2-4" (5-10 cm) around the
cookware for proper air circulation and be sure pans and
cookware do not touch each other, the oven door, sides or
back of the oven cavity. Hot air must be able to circulate
around the cookware in the oven for even heat to reach
around the food (See Fig. 3 ).

some
models

Fig. 2

2

3

4

5

6

1

7

The 

flat oven rack

 (some models) or 

flat handle oven rack

(some models) may be used for most cooking needs.

The 

offset oven rack

 (some models) is designed to place

the base of the rack about 1/2 of a rack position lower
than flat oven racks. This design provides several additional
possible positions between the flat rack positions.

To maximize oven cooking space place the 

bottom oven

rack

 (on some models) in the lowest rack position for

roasting large cuts of meat.

bottom

oven rack

Baking layer cakes with 1 or 2 oven racks

For best results when baking cakes or cookies using 2 oven
racks, place cookware on rack positions 2 and 5 (6 using
the offset oven rack on some models). For best results when
baking cakes or cookies using a single oven rack, place
cookware on rack in positions 2, 3 or 4 (See Fig. 2).

  Protective Liners — DO NOT USE

ALUMINUM FOIL to line the oven bottom.

     Only use

aluminum foil as recommended in this manual. Improper
installation of these liners may result in risk of electric
shock, or fire.

oven vent

Fig. 1

Oven vent location

The oven vent is located 

under the left rear surface

under the left rear surface

under the left rear surface

under the left rear surface

under the left rear surface

element

element

element

element

element

 (See Fig. 1).  When the oven is on, warm air passes

through this vent. This venting is necessary for proper air
circulation in the oven and good baking results. Do not
block oven vent.

Summary of Contents for 970-5574 Series

Page 1: ... Guide d utilisation et d entretien English Français Model Modèles Electric Range Cuisinière électrique color number numéro de couleur 970 5574 P N 316902114 Rev B Sears Canada Inc Toronto Ontario Canada M5B 2B8 www sears ca ...

Page 2: ...ed herein Implied warranties including warranties of merchantability or fitness for a particular purpose are limited to one year or the shortest period allowed by law Sears shall not be liable for incidental or consequential damages Some states and provinces do not allow the exclusion or limitation of incidental or consequential damages or limitation on the duration of implied warranties of mercha...

Page 3: ... children to play with packaging material Proper installation Be sure your appliance is properly installed and grounded by a qualified technician in accordance with the National Electrical Code ANSI NFPA No 70 latest edition and local electrical code requirements Install only per installation instructions provided in the literature package for this range Ask your dealer to recommend a qualified te...

Page 4: ...om steam Do not let potholders touch hot heating elements Do not use a towel or other bulky cloth instead of a potholder Important Safety Instructions Important Safety Notice The California Safe Drinking Water and Toxic Enforcement Act requires the Governor of California to publish a list of substances known to the state to cause cancer birth defects or other reproductive harm and requires busines...

Page 5: ...be positioned so that it is turned inward and does not extend over adjacent surface units Never leave surface elements unattended at high heat settings Boilovers cause smoking and greasy spillovers that may ignite or a pan that has boiled dry may melt Glazed cooking utensils Only certain types of glass glass ceramic ceramic earthenware or other glazed utensils are suitable for cook top service wit...

Page 6: ...Do not allow grease to accumulate Kitchen cleaners and aerosols Always follow the manufacturer s recommended directions for use Be aware that excess residue from cleaners and aerosols may ignite causing damage and injury Clean ventilating hoods frequently Grease should not be allowed to accumulate on the hood or filter Follow the manufacturer s instructions for cleaning hoods Before manually clean...

Page 7: ...See Fig 3 some models Fig 2 2 3 4 5 6 1 7 The flat oven rack some models or flat handle oven rack some models may be used for most cooking needs The offset oven rack some models is designed to place the base of the rack about 1 2 of a rack position lower than flat oven racks This design provides several additional possible positions between the flat rack positions To maximize oven cooking space pl...

Page 8: ...will influence the radiant element power level setting needed for best cooking results Be sure to follow the recommendations for using proper cookware as illustrated in both Figs 1 2 Fig 1 Check for flatness by rotating a ruler across the bottom of the cookware See Fig 1 Cookware should have flat bottoms that make good contact with the entire surface heating element See Fig 2 For more detailed inf...

Page 9: ...y result in risk of electric shock or fire Do not place aluminum foil or ANY material that could melt on the surface elements Make sure reflector pans or drip bowls are in place Absence of these pans or bowls during cooking may subject wiring or components underneath to damage Home Canning Be sure to read and observe all the following points when home canning with your appliance Check with the USD...

Page 10: ...e sure all surface controls are turned OFF Surface elements may appear to have cooled after they have been turned off The surface element may still be hot and burns may occur if the surface element is touched before it has cooled sufficiently Do not place plastic items such as salt and pepper shakers spoon holders or plastic wrappings on top of the range when it is in use These items could melt or...

Page 11: ... keypads 1 Oven Light Use to turn the oven lights ON and OFF and activate COOKTOP LOCKOUT feature 2 Clock Use to set the time of day 3 Cook Time Use to enter length of cook time desired 4 Select Clean Use to set a 2 3 or 4 hour self clean cycle 5 Timer Set Off Use to set or cancel Timer 6 Delay Start Use with Bake and Select Clean functions to program a delay start time or delay start self cleanin...

Page 12: ... will beep when the set time has run out The timer may be used alone or when any other oven function is active The indicator light located above the Timer Set Off key pad will glow when the timer is active The timer will display hours and minutes until 1 hour remains When less than 1 hour remains the display will count down in minutes and seconds Once the timer has less than 1 minute remaining onl...

Page 13: ...d information Dark or dull pans absorb more heat than shiny bakeware resulting in dark or overbrowning of foods It may be necessary to reduce the oven temperature or cook time to prevent overbrowning of some foods Dark pans are recommended for pies Shiny pans are recommended for cakes cookies and muffins Always use pot holders or oven mitts when using the oven When cooking the oven interior oven r...

Page 14: ...the display 7 The oven will turn ON and begin heating When the oven temperature reaches the set temperature the PREHEAT indicator light will turn off and the oven control will beep 3 times To cancel at anytime press Always use pot holders or oven mitts when using the oven When cooking the oven interior oven racks and cooktop will become very hot which can cause burns When the cook time runs out En...

Page 15: ...f the control is set to display Celsius 9 The oven will automatically turn ON at the set delayed starting time and begin heating When the oven temperature reaches the set temperature the PREHEAT indicator light will turn off and the oven control will beep 3 times To cancel at anytime press FOOD POISONING HAZARD Do not let food sit for more than one hour before or after cooking Doing so can result ...

Page 16: ... the oven interior exterior oven racks and cooktop will become very hot which can cause burns Fig 2 Use the broil function to cook meats that require direct exposure to flame heat for optimum browning results The Broil function is factory preset to broil at 550 F The suggested broil settings table See Fig 1 is provided for recommendations only Increase or decrease broiling times or move to a diffe...

Page 17: ...ey pads Adjust until the desired amount of temperature offset appears in the display and release key pad 5 Press to accept and return to normal operation Setting Oven Controls Warm Hold To set Warm Hold for hot cooked foods when oven has no other active function 1 Place hot cooked food in oven 2 Press Warm Hold key pad will appear in the display If no further key pads are touched the request for W...

Page 18: ...erior Aluminum foil will melt to the interior of the oven The health of some birds is extremely sensitive to the fumes given off during the self cleaning cycle of any range Move birds to another well ventilated room DO NOT force the oven door open This can damage the automatic door locking system Use caution when opening the oven door after self cleaning The oven may still be VERY HOT and can caus...

Page 19: ...e clean time that was programmed you must allow about 1 additional hour for the oven to cool before you will be able to open the oven door The Select Clean function will not operate whenever a radiant surface element is ON or the oven lockout is active When Select Clean is finished 1 The time of day will appear in the display window and the Select Clean and DOOR LOCKED indicator lights will contin...

Page 20: ...ch cleaning pad Rinse and wipe dry with a clean cloth Do not allow food spills with high sugar or acid content milk tomatoes sauerkraut fruit juices or pie filling to remain on the surface they may cause a dull spot even after cleaning For oven interior remove excessive spillovers from oven cavity bottom before starting Select Clean Clean any soils from oven frame and door liner outside the oven d...

Page 21: ...tances Aluminum utensils The melting point of aluminum is much lower than that of other metals Care must be taken when aluminum pots or pans are used on the cooktop If aluminum pans are allowed to boil dry when using the cooktop not only will the utensil be damaged or destroyed but it may fuse to break or mark the ceramic glass surface permanently damaging the cooktop surface Protective Liners DO ...

Page 22: ...o remove burned on soil can be removed by soaking the drip bowls for about 20 minutes in a lightly diluted liquid cleanser or a solution of ammonia and water 1 2 cup ammonia to 1 gallon of water A no scratch scrubbing pad may be used after soaking DO NOT use abrasive cleaners or steel wool they will scratch the surface Always rinse with clean water and polish dry with a soft cloth To replace drip ...

Page 23: ...lowering the cooktop some models Fig 1 Replacing oven light some models Be sure the range is unplugged and all parts are COOL before replacing oven light Wear a leather faced glove for protection against possible broken glass The oven light is located at the rear of the oven cavity and is covered with a glass shield held by a wire holder The glass shield protects the light bulb and must be in plac...

Page 24: ...Fig 4 The hook of the hinge arms must be fully seated onto the roller pins 3 Fully open the oven door horizontal with floor Fig 1 4 Push the door hinge locks up towards and into the oven frame on both left and right oven door hinges Fig 2 to the locked position then close the oven door Special door care instructions Most oven doors contain glass that can break Read the following recommendations Re...

Page 25: ...ion Service wiring is not complete Call 1 800 4 MY HOME for assistance See back cover The time of day is not set The time of day must first be set in order to operate the oven See Setting clock in Setting Oven Controls section Be sure the oven controls are set properly for the desired function See Setting Oven Controls section and review instructions for the desired cooking function in this manual...

Page 26: ...e meat the element Preheat the broil element for searing Meat not properly prepared Remove excess fat from meat Cut remaining fatty edges to prevent curling but do not cut into lean Grease has built up on oven surfaces Regular cleaning is necessary when broiling frequently Old grease or food spatters cause excessive smoking Select Clean does not work Oven control not set properly Review instructio...

Page 27: ... should be matched to the size of the element Replacement drip bowls may be purchased from your appliance dealer Drip bowls are pitting or rusting Foods with acids such as tomatoes if allowed to stand in on bowls will cause corrosion Remove and wash drip bowls as soon as possible after a spill over Normal environment Along coastal areas houses are exposed to high salt content in air Protect bowls ...

Page 28: ...28 Notes ...

Page 29: ...énéficier du soutien téléphonique d un représentant Sears pour tous les produits Nous sommes votre guide d utilisation parlant Une protection contre les surtensions pour les dommages électriques causés par des fluctuations électriques Une couverture annuelle de 250 pour la perte d aliments à la suite de toute détérioration d aliments résultant d une défaillance mécanique d un réfrigérateur ou d un...

Page 30: ......
Reviews: