background image


10 


Filter Replacement and Care  


WARNING:


To reduce the risk of 

shock or injury from moving parts, 
always unplug humidifier before 
removing or replacing any parts. 

CAUTION:


To help retard bacteria 

growth and keep maximum 
efficiency, the filter should be 
replaced at least once per season, 
or more often under hard water 
conditions. Use Kenmore 15508 
replacement filter. 

Replace the evaporative wicking filter 
at least once per humidification season 
or more depending on water conditions 
in your area. 


Filter Replacement 

1. Unplug humidifier. Before removing 
the filter, move the humidifier to an 
area not susceptible to water damage. 
(i.e. kitchen or bath areas). 

2. Remove the water bottle and set 
aside. Be sure not to bump or damage 
the fill valve. 

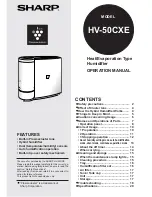
3. The upper housing and the base are 
held together by two hooks at the front 
of the housing and a flexible snap in 
the rear. To remove the housing, press 
in on the triangular shaped snap at the 
rear of the humidifier, below the cord 
exit, while lifting upward, tilting the 
upper housing forward to clear the 
hooks at the front of the base. 

4. Set the upper housing aside.  
The filter is now accessible. 

5. Take note of the filter position. 
Remove the filter. You may want 
to clean the base at this time. See 
the “Cleaning and Maintenance” 
section of this manual. 

6. Install a new filter (15508) into 
the base. Position the filter 
between the uprights in the bottom 
of the base. The filter should be 
resting on the floor of the base. 

7. Return the upper housing to the 
base by first placing the hooks 
located near the front of the base 
into the mating holes in the upper 
housing. Then tilt the upper 
housing down towards the base 
until the rear snap engages the 
main housing. 

8. Reposition the humidifier to its 
operating position. 

9. The humidifier is now ready to 
be filled for operation. 


23 

Cuando la 

temperatura 

exterior es de: 

La humedad relativa 

interior recomendada 

es del: 

 -10˚F -24˚C 

  20%


    2˚F -18˚C 

  25%


  10˚F -12˚C 

  30%


>20˚F    -6˚C 

  35% 

Paso 4. Configuración de los controles 

Los niveles de humedad 
deseados que establezca 
dependerán de su nivel de 
comodidad personal, 
temperatura exterior y 
temperatura interior. Se 
recomienda un punto de 
ajuste inicial del 30%- 40% 
de humedad del 
AMBIENTE, pero pueden 
existir condiciones que  
requieran un valor diferente. 
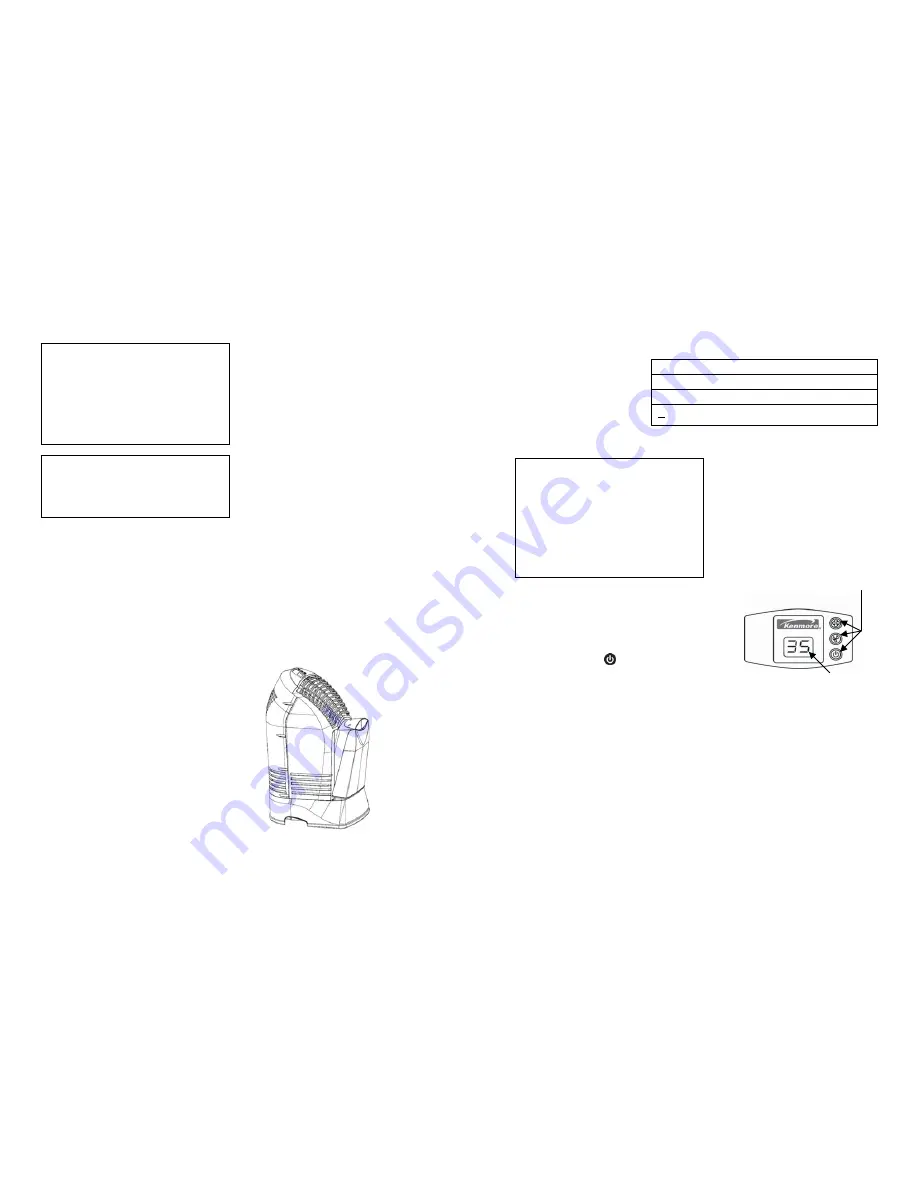


Botones 
de funciones 

Visor digital 

Funcionamiento de los 
controles 

Visor digital 

Presione el botón de encendido una vez para 
encender la unidad* 

. Al principio hay una 

leve demora mientras se calibran los 
dispositivos electrónicos. Aparecen dos 
barras (--) durante este periodo. 


Una vez que se complete la calibración, se 
mostrará una lectura de humedad del 
AMBIENTE de entre 20% - 95%. El visor 
mostrará un 20 parpadeando que


indica que 

la humedad del ambiente es inferior


al 20%.


OBSERVACIÓN:

 los valores 

predeterminados en el arranque inicial son F1 

(BAJO)

 para la velocidad del ventilador y 

65%

 de la humedad de 

AJUSTE

. Después 

de que el usuario elija los valores deseados, 
permanecerán mientras la unidad siga 
enchufada y no haya ninguna interrupción de 
la energía. Si se desenchufa la unidad, se 
utilizan los valores predeterminados 

originales.


IMPORTANTE:

 El agua puede 

producir daños si se comienza a 
formar condensación en las 
ventanas o paredes. Se debe 
disminuir el punto de AJUSTE de 
humedad hasta que no se forme 
más condensación. Recomendamos 
que los niveles de humedad del 
ambiente no excedan el 50%. 

*El ventilador del 
humidificador debe 
funcionar en el arranque 
inicial. Si no lo hace, 
consulte “No funciona el 
ventilador (el visor digital 
está iluminado)” en la 
sección de “Solución de 
problemas” en la página 13 
de este manual.

Summary of Contents for 758.17006

Page 1: ...e TOWER HUMIDIFIER 6 Gallon Output with Digital Readout Model 758 17006 CAUTION Before using this product read this manual and follow all its Safety Rules and Operating Instructions Safety Assembly Operation Maintenance Parts Español pg 17 Sears Roebuck and Co Hoffman Estates IL U S A ww sears com Part No 1B71756 Printed in China ...

Page 2: ...so de un año desde la fecha de compra devuélvalo a cualquier tienda Sears Repuestos Sears y Centro de Servicios de Reparación u otra tienda de Kenmore para que lo reparen gratuitamente Si se utiliza alguna vez este aparato con fines que no sean familiares esta garantía tendrá validez sólo por 90 días desde la fecha de compra Esta garantía cubre solamente defectos de los materiales y mano de obra S...

Page 3: ...mblaje del control o el motor puede provocar un peligro a menos que la reparación sea realizada por un técnico de servicios calificado El servicio de reparaciones está disponible en la tienda Sears más cercana u otra tienda de Kenmore para que lo reparen gratuitamente 3 KNOW YOUR HUMIDIFIER Based on an area with average insulation and an 8 foot ceiling height Description Gallon Output 24 hrs Capac...

Page 4: ... de AJUSTE es del 65 El nivel de humedad del AMBIENTE no alcanzó el 1 o más por encima del nivel de humedad de AJUSTE Un porcentaje de humedad de ajuste del 65 hace que el ventilador funcione continuamente Regule el nivel de AJUSTE entre el 25 y el 60 Déjelo funcionar hasta que se alcance el nivel de humedad deseado Esto puede tardar hasta 48 horas inicialmente Escasa evaporación de agua Se encien...

Page 5: ...rada OBSERVACIÓN también se recomienda el procedimiento de Mantenimiento quincenal si no va a utilizar el humidificador durante una semana o más 5 Positioning the Unit The humidifier should be positioned with the back cord exit side and sides at least 2 inches away from the wall Air needs to enter through all of the louvers in the housing assembly in order for the humidifier to operate at peak eff...

Page 6: ...ra reducir el riesgo de lesiones incendios o daños al humidificador utilice solamente limpiadores recomendados específicamente para humidificadores Nunca utilice materiales inflamables combustibles ni venenosos para limpiar su humidificador Para reducir el riesgo de quemaduras y daños al humidificador nunca coloque agua caliente en el humidificador ADVERTENCIA para reducir el riesgo de descarga si...

Page 7: ...la base primero colocando los ganchos ubicados cerca de la parte frontal de la base en los orificios de contacto en el alojamiento superior y luego inclinando el alojamiento superior hacia la base hasta que la traba de la parte trasera se conecte al alojamiento principal 8 Vuelva a colocar el humidificador en su posición de funcionamiento 9 El humidificador está ahora listo para ser llenado para s...

Page 8: ...moho Si no se desea el MODO DE SECADO llene el humidificador con agua y el ventilador volverá a la velocidad determinada OBSERVACIÓN el ventilador cambiará automáticamente a la velocidad más baja durante el MODO DE SECADO Humidistato El humidistato ubicado en el cable detecta el porcentaje de humedad en el aire Hace que el humidificador se encienda y se apague para mantener el punto de AJUSTE de h...

Page 9: ...cionando a la velocidad más baja hasta que el filtro se seque 9 NOTE During this time the room humidity level will continue to be monitored and the humidifier will cycle the fan on and off until the filter is completely dry The fan will shut off leaving you with a dry humidifier that is less prone to mold and mildew growth If DRY OUT MODE is not desired refill the humidifier with water and the fan...

Page 10: ...ousing 8 Reposition the humidifier to its operating position 9 The humidifier is now ready to be filled for operation 23 Cuando la temperatura exterior es de La humedad relativa interior recomendada es del 10 F 24 C 20 2 F 18 C 25 10 F 12 C 30 20 F 6 C 35 Paso 4 Configuración de los controles Los niveles de humedad deseados que establezca dependerán de su nivel de comodidad personal temperatura ex...

Page 11: ... que el humidificador termine el agua de la botella y de la base antes de llenarlo PRECAUCIÓN Utilice solamente el bactericida registrado 32 14900 EPA de Sears Bajo ninguna circunstancia utilice productos de tratamiento de agua diseñados para humidificadores Rotobelt o Ultrasonic 11 Cleaning and Maintenance WARNING To reduce the risk of injury fire or damage to humidifier use only cleaners specifi...

Page 12: ...l enchufe de ninguna manera OBSERVACIÓN debido a que el humidificador libera aire húmedo frío es mejor dirigir el flujo de aire lejos del termostato y de las fuentes de calor y colocar los humidificadores junto a una pared interior La unidad no se debe colocar donde el aire frío proveniente de paredes externas o el aire tibio proveniente de una fuente de aire caliente la alcancen directamente Para...

Page 13: ... not illuminated No Power Power button has not been depressed Check 120 volt power source Press power button once to turn on Fan not operating digital display is illuminated ROOM humidity level is not 3 more below SET humidity level Reservoir is empty Raise SET humidity level if desired Increase fan speed Fill humidifier with water Fan running continuously SET humidity level is 65 ROOM humidity le...

Page 14: ... is done by a qualified service technician Repair service is available at your nearest Sears store or Sears Parts Repair Service Center 19 SOBRE SU HUMIDIFICADOR Basado en una superficie con aislamiento promedio y una altura de cielorraso de 8 pies Descripción Rendimiento de galones durante 24 horas Capacidad de la botella Capacidad de la base Cobertura en pies cuadrados Velocidades del ventilador...

Page 15: ...reducir el riesgo de incendio no lo utilice cerca de una fuente de fuego abierta como una vela u otra fuente 12 Preste atención a la etiqueta de advertencia que aparece adjunta 15 One Year Limited Warranty When installed operated and maintained according to all instructions supplied with the product if this appliance fails due to a defect in material and workmanship within one year from the date o...

Page 16: ...____________ _________________________________________ _________________________________________ _________________________________________ _________________________________________ _________________________________________ 17 LEA Y GUARDE ESTAS INSTRUCCIONES Guía de uso y cuidado HUMIDIFICADOR TIPO TORRE Rendimiento de 6 galones con lector digital Modelo 758 17006 PRECAUCIÓN antes de usar este pro...

Reviews: