background image

9

DISHWASHER LOADING

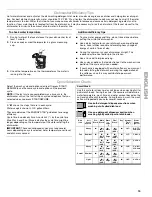
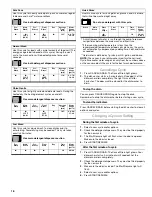
Loading Suggestions

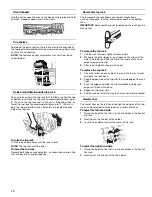
Remove leftover food, bones, toothpicks and other hard 
items from the dishes. To conserve water and energy and 
save time, it is not necessary to rinse dishes before putting 
them into the dishwasher.

NOTE: Prerinsing dishes soiled with tomato-based products 
is recommended to avoid staining the dishware.  

The wash module removes food particles from the water. The 
module contains a triple action filtration system that 
intermittently filters soil from the water.

NOTE: If hard items such as fruit seeds, nuts, and eggshells 
enter the wash module, you might hear grinding, crunching, 
or buzzing sounds. These sounds are normal when hard 
items enter the module. Do not let metallic items (such as pot 
handle screws) get into the wash module. Damage can occur.

For best drying, water must be able to drain from all surfaces.

It is important for the water spray to reach all soiled surfaces.

Load dishes so they are not stacked or overlapping if 
possible. 

Use special care when loading heavy pots and pans. Heavy 
items can damage the interior of the door if they are dropped 
or bumped.

Make sure pot lids and handles, pizza pans, cookie sheets, 
etc., do not interfere with the spray arm rotation.

Conserve water and energy and save time over hand rinsing 
by running a rinse cycle to keep dishes moist if you do not 
plan to wash them soon. Foods such as eggs, rice, pasta, 
spinach, and cooked cereals may be hard to remove if they 
are left to dry over a period of time.

Place items so open ends face down for best cleaning and 
draining.

Quiet operating tips

To avoid thumping/clattering noises during operation:

Make sure lightweight load items are secured in the racks.

Make sure pot lids and handles, pizza pans, cookie sheets, 
etc., do not touch interior walls or interfere with the rotation of 
the spray arm(s).

Load dishes so they do not touch one another.

NOTE: For built-in models, keep sink drain plugs closed during 
dishwasher operation to avoid noise transfer through drains.

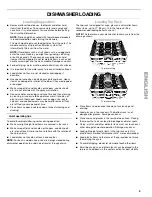
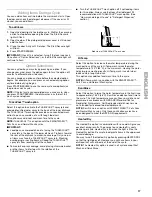
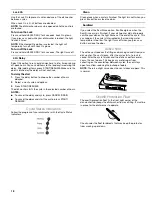
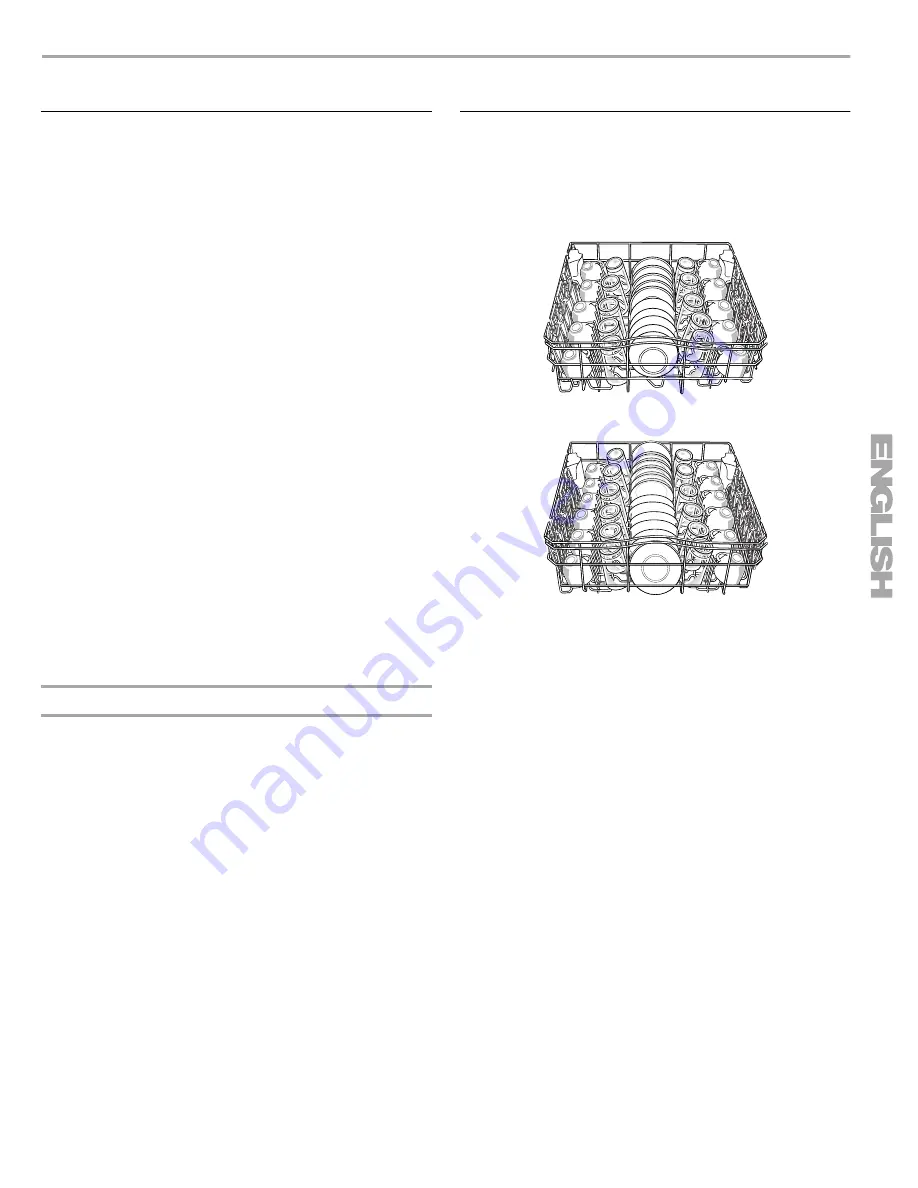
Loading Top Rack

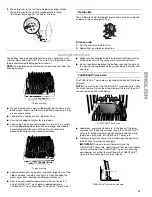
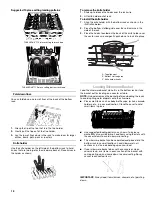
The top rack is designed for cups, glasses, and smaller items. 
Many items, up to 11" (28 cm), fit in the top rack. (See 
recommended loading patterns shown.)

NOTE: The features on your dishwasher rack may vary from the 
drawings shown.

Place items so open ends face down for cleaning and 
draining.

Load glasses in top rack only. The bottom rack is not 
designed for glasses. Damage can occur.

Place cups and glasses in the rows between tines. Placing 
them over the tines can lead to breakage and water spots.

China, crystal, and other delicate items must not touch each 
other during dishwasher operation. Damage may occur.

Load lightweight plastic items in the top rack only. Only 
plastic items marked “dishwasher safe” are recommended.

Load plastic items so the force of the spray does not move 
them during the cycle.

To avoid chipping, do not let stemware touch other items.

Small bowls, pans, and other utensils can be placed in the 
top rack. Load bowls in the center section for best stability.

10 place setting

12 place setting

Summary of Contents for 665.1378

Page 1: ...Lave vaisselle ULTRA WASH Guide d utilisation et d entretien Models Modelos Modèles 665 1378 665 1388 color number número de color numéro de couleur Sears Roebuck and Co Hoffman Estates IL 60179 U S A www sears com W10040740A Sears Canada Inc Toronto Ontario Canada M5B 2B8 www sears ca ...

Page 2: ...nse The Master Protection Agreement also helps extend the life of your new product Here s what s included in the Agreement Expert service by our 12 000 professional repair specialists Unlimited service and no charge for parts and labor on all covered repairs No lemon guarantee replacement of your covered product if four or more product failures occur within twelve months Product replacement if you...

Page 3: ...e of purchase THIS WARRANTY COVERS ONLY DEFECTS IN MATERIAL AND WORKMANSHIP SEARS WILL NOT PAY FOR 1 Expendable items that can wear out from normal use including but not limited to filters belts light bulbs and bags 2 A service technician to instruct the user in correct product installation operation or maintenance 3 A service technician to clean or maintain this product 4 Damage to or failure of ...

Page 4: ...injury and tell you what can happen if the instructions are not followed Your safety and the safety of others are very important We have provided many important safety messages in this manual and on your appliance Always read and obey all safety messages This is the safety alert symbol This symbol alerts you to potential hazards that can kill or hurt you and others All safety messages will follow ...

Page 5: ...s size and use Remove all shipping plugs from hoses and connectors such as the cap on the drain outlet before installing See Installation Instructions for complete information Tip Over Hazard Do not use dishwasher until completely installed Do not push down on open door Doing so can result in serious injury or cuts Electrical Shock Hazard Electrically ground dishwasher Connect ground wire to green...

Page 6: ... F Model and serial number label G Fold down tines H Knife holder not shown I Bottom rack J Water inlet opening in tub wall K Heating element L Detergent dispenser M Active vent N Cup shelves O No flip clips P Top spray arm Q ULTRA FLOW water feed tube R TURBOZONE spray jets S Silverware basket T Lower spray arm U Overfill protection float V ULTRA WASH module W Rinse aid dispenser A B C D E F G H ...

Page 7: ...ery first wash cycle after installation in your home will be adjusted to include an additional 2 rinses for optical soil sensor calibration For proper calibration the first cycle should not be interrupted If this calibration cycle is canceled or stopped before the Clean light comes on at the end of the cycle the next wash cycle will repeat this sensor calibration How the TURBOZONE wash option work...

Page 8: ...d surfaces Make sure nothing keeps the spray arm s from spinning freely 4 Add detergent Always use a quality brand detergent See Dishwasher Use 5 Push door firmly closed The door latches automatically 6 Run hot water at the sink nearest your dishwasher until the water is hot See Dishwasher Efficiency Tips Turn off water 7 Press the recessed area near the desired cycle and option selections See Dis...

Page 9: ...d cereals may be hard to remove if they are left to dry over a period of time Place items so open ends face down for best cleaning and draining Quiet operating tips To avoid thumping clattering noises during operation Make sure lightweight load items are secured in the racks Make sure pot lids and handles pizza pans cookie sheets etc do not touch interior walls or interfere with the rotation of th...

Page 10: ...ts roasters and cookie sheets in the bottom rack IMPORTANT Remove dishes prior to removing the rack from the dishwasher To remove the top rack 1 Pull the rack forward slightly to access clips 2 While pressing the ridges in push back on the clip until the outer side releases Slide the clip to the inside of the track edge to remove the clip 3 After removing both clips pull rack out To replace the to...

Page 11: ...ms in front can keep the water spray from reaching the detergent dispenser Secure heavily soiled cookware face down in the rack If using TURBOZONE wash option load cookware in TURBOZONE wash area See TURBOZONE wash area Make sure pot handles and other items do not stop rotation of the spray arm s The spray arm s must move freely Do not load items between the bottom rack and the side of the dishwas...

Page 12: ...e LoadingSilverwareBasket Load the silverware basket while it is in the bottom rack or take the basket out for loading on a counter or table NOTE Unload or remove the basket before unloading the racks to avoid spilling water droplets onto the silverware Place small items such as baby bottle caps jar lids corncob holders etc in a covered section Close the cover to hold small items in place Use sugg...

Page 13: ...hing performance Add detergent just before starting cycle Store tightly closed detergent in a cool dry place Fresh automatic dishwasher detergent results in better cleaning NOTE Do not use detergent with a Quick Rinse cycle Filling the dispenser 1 If the dispenser cover is closed open the cover by moving the cover latch to the right 2 Add the correct amount of detergent to the Main Wash section of...

Page 14: ...pilled rinse aid with a damp cloth 5 Place the knob back into the opening and turn to the Lock position Rinse aid setting The amount of rinse aid released into the final rinse can be adjusted For most water conditions the factory setting of 2 will give good results If you have hard water or notice rings or calcium spots on your glasses or dishes try a higher setting To adjust the setting 1 Remove ...

Page 15: ...ibute to poor wash performance CycleSelectionCharts Select the wash cycle and options desired Or press START RESUME to use the same cycle and options as the previous cycle NOTE If the last cycle you completed was a rinse cycle the dishwasher will run the last full wash cycle and options that you selected when you press START RESUME A shows the steps that are in each cycle Water usage is shown in U...

Page 16: ...dishwasher drain completely 2 Check the detergent dispensers They must be filled properly for the new cycle 3 Make sure the door is closed The Start Resume light will flash 4 Select a new cycle and or options 5 Press START RESUME Pots Pans Use this cycle for heavily soiled pots pans casseroles regular tableware and hard water conditions Use both detergent dispenser sections Pre Wash Main Wash Pre ...

Page 17: ...ONE spray jets Stacking overlapping or nesting items will keep the TURBOZONE spray jets from reaching all of the surfaces To maximize spray coverage avoid placing silverware basket or other items to interfere with the rotation of the TURBOZONE spray jets Turn the TURBOZONE wash option off if not loading items for this option Always use the Heavy Soil detergent fill recommendation with TURBOZONE wa...

Page 18: ...ress START RESUME CycleStatusIndicators Follow the progress of your dishwasher with the Cycle Status indicators Clean Clean glows when a cycle is finished The light turns off when you press any button or close the door Sanitized If you select the Sani Rinse option Sanitized glows when the Sani Rinse cycle is finished If your dishwasher did not properly sanitize your dishes the light flashes at the...

Page 19: ...Knives No Handles of some knives are attached to the blade with adhesives which can loosen if washed in the dishwasher Material Dishwasher Safe Comments Pewter Brass Bronze No High water temperatures and detergent can discolor or pit the finish Disposable Plastics No Cannot withstand high water temperatures and detergents Plastics Yes Always check manufacturer s recommendations before washing Plas...

Page 20: ...ain air gap between a built in dishwasher and the home drain system If a house drain is clogged the drain air gap protects your dishwasher from water backing up into it The drain air gap is usually located on top of the sink or countertop near the dishwasher To order a drain air gap please call 1 800 4 MY HOME Ask for Part Number 300096 NOTE The drain air gap is an external plumbing device that is...

Page 21: ...ck if necessary White residue on the front of the access panel Was too much detergent used Refer to the Detergent Dispenser section Is the brand of detergent making excess foam Try a different brand to reduce foaming and eliminate buildup Odor in the dishwasher Are dishes washed only every 2 or 3 days Run a rinse cycle once or twice a day until you have a full load Does the dishwasher have a new p...

Page 22: ...imum amount of detergent per load Refer to the Detergent Dispenser section Use a liquid rinse aid and underload the dishwasher to allow thorough rinsing Silica film and etching are permanent and cannot be removed Do not use heated drying White spots on cookware with nonstick finish Has the dishwasher detergent removed cookware seasoning Reseason cookware after washing in the dishwasher Brown stain...

Page 23: ...23 Notes ...
Page 24: ... Trademark SM Service Mark of Sears Brands LLC Marca Registrada TM Marca de comercio SM Marca de Servicio de Sears Brands LLC Marque déposée TM Marque de commerce SM Marque de service de Sears Brands LLC 2 06 Printed in U S A Impreso en EE UU Imprimé aux É U ...

Reviews: