background image

8

CAUTION

Damp objects stick to cold metal surfac-

es. Do not touch interior metal surfaces 

with wet or damp hands. 

Care & Cleaning

Between Defrostings

To avoid frequent defrosting, occasionally 

use a plastic scraper to remove frost. Scrape 

with a pulling motion. Never use a metal 

instrument to remove frost. 

CAUTION

Freezer must be unplugged (to avoid 

electrical hazard) from power source 

when defrosting unit.

Defrosting

WARNING

DO NOT use a sharp or metallic instru-

ment to remove frost from the refrigerator 

interior, as damage to refrigerant tubing 

(located behind interior walls) may occur. 

Tubing damage may allow flammable 

refrigerant gas leakage, which can result 

in personal injury.

It is important to defrost and clean the 

freezer when ¼ to ½ inch of frost has 

accumulated. Frost may tend to accumulate 

faster on the upper part of the freezer due 

to warm, moist air entering the freezer when 

the lid is opened. Always unplug the freezer, 

remove food and leave the lid open when 

defrosting the freezer.
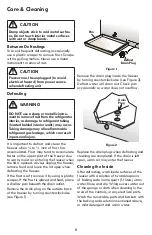
If the frost is soft, remove it by using a plastic 

scraper. If the frost is glazed and hard, place 

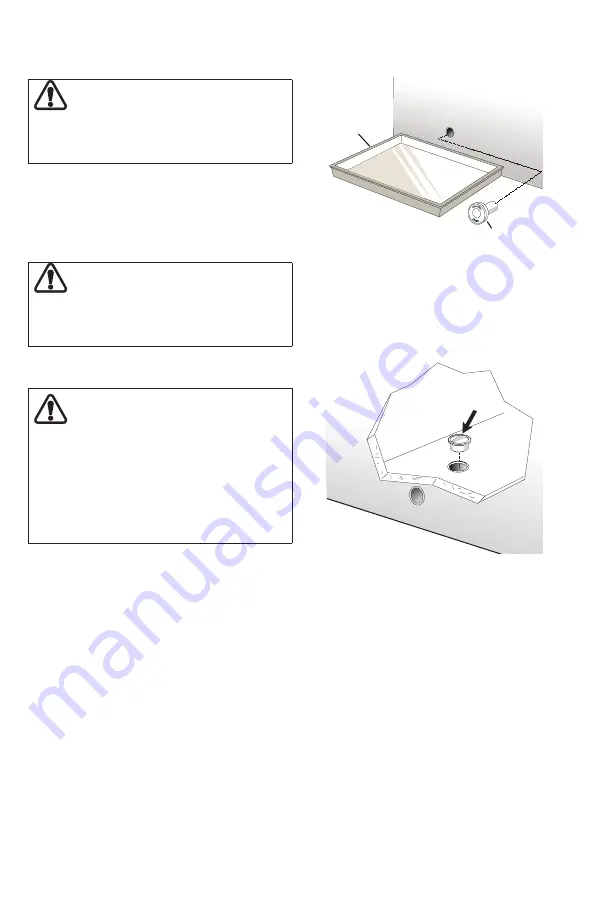
a shallow pan beneath the drain outlet.

Figure 2

Drain

Plug

Defrost

Drain Plug

Pan

Figure 1

Cleaning the Inside

After defrosting, wash inside surfaces of the 

freezer with a solution of two tablespoons 

of baking soda in one quart (1.1 liters) warm 

water. Rinse and dry. Wring excess water out 

of the sponge or cloth when cleaning in the 

area of the controls, or any electrical parts.
Wash the removable parts and baskets with 
the baking soda solution mentioned above, 
or mild detergent and warm water. 

Remove the drain plug on the outside back 

of the freezer by turning counterclockwise 

(see Figure 1). 

Remove the drain plug inside the freezer 

by turning counterclockwise (see Figure 2). 

Defrost water will drain out. Check pan 

occasionally so water does not overflow.

Replace the drain plugs when defrosting and 

cleaning are completed. If the drain is left 

open, warm air may enter the freezer.

Summary of Contents for 17602 Series

Page 1: ... de Uso y Cuidado English Español P N A10948603 1808 Sears Brands Management Corporation Hoffman Estates IL 60179 U S A www kenmore com Kenmore Freezer Congelador Models Modelos 253 17502 17602 Color number número de color ...

Page 2: ...e and caution must be practiced when installing operating and maintaining any appliance Please record your model and serial numbers below for future reference This information is found either on the upper left wall inside the freezer upright models or the left exterior wall chest models Model Number or Serial Number Purchase Date 253 Safety Precautions Do not attempt to install or operate your uni...

Page 3: ... from the carton Staples can cause severe cuts and also destroy finishes if they come in contact with other appliances or furniture DANGER DANGER Risk of fire or explosion Flam mable refrigerant used Do not use me chanical devices to defrost refrigerator Do not puncture refrigerant tubing DANGER Risk of fire or explosion Flamma ble refrigerant used To be repaired only by trained service personnel ...

Page 4: ...accordance with local codes and ordinances Consult a qualified elec trician Do not use an extension cord or adapter plug Immediately repair or replace any power cord that becomes frayed or damaged Never unplug the appliance by pulling on the power cord Always grip the plug firmly and pull straight out from the re ceptacle to prevent damaging the power cord Unplug the appliance before cleaning and ...

Page 5: ...stallation not performed by Sears authorized service agents or to repair problems with house fuses circuit breakers house wiring and plumbing or gas supply systems resulting from such installation 4 Damage to or failure of this appliance resulting from installation not performed by Sears authorized service agents including installation that was not in accord with electrical gas or plumbing codes 5...

Page 6: ...s efficient Organize and label food to reduce lid openings and extended searches Remove as many items as needed at one time and close the lid as soon as possible First Steps This Use Care Guide provides specific operating instructions for your model Use the unit only as instructed in this Use Care Guide Before starting the appliance follow these important first steps Installation Choose a place th...

Page 7: ...isfaction If a colder temperature is desired turn the temperature control knob toward MAX Adjust the temperature gradually in small increments and allow the temperature to stabilize For warmer temperatures adjust the knob toward MIN Allow several hours for temperatures to stabilize between adjustments MIN MAX OFF IMPORTANT Setting the temperature control to the OFF position turns the cooling syste...

Page 8: ...en the lid is opened Always unplug the freezer remove food and leave the lid open when defrosting the freezer If the frost is soft remove it by using a plastic scraper If the frost is glazed and hard place a shallow pan beneath the drain outlet Figure 2 Drain Plug Defrost Drain Plug Pan Figure 1 Cleaning the Inside After defrosting wash inside surfaces of the freezer with a solution of two tablesp...

Page 9: ...he freezer Secure all loose items such as base panel baskets and shelves by taping them se curely in place to prevent damage In the moving vehicle secure freezer in an upright position to prevent movement Also protect outside of freezer with a blanket or similar item WARNING If leaving the freezer lid open while on vacation make certain that children cannot get into the freezer and become entrappe...

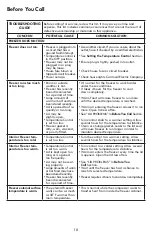
Page 10: ...n completely Warm food will cause freezer to run more until the desired temperature is reached Warm air entering the freezer causes it to run more Open lid less often See LID PROBLEMS in Before You Call Section Turn control knob to a warmer setting Allow several hours for the temperature to stabilize Clean or change gasket Leaks in the lid seal will cause freezer to run longer in order to maintain...

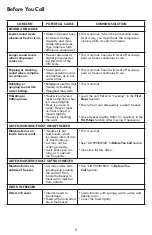
Page 11: ... noise Freezer is not level It rocks on the floor when it is moved slightly Floor is uneven or weak Freezer rocks on floor when it is moved slightly Freezer is touching the wall Level the unit Refer to Leveling in the First Steps Section Ensure floor can adequately support freezer Move freezer slightly Refer to Leveling in the First Steps Section after moving if necessary WATER MOISTURE FROST INSI...

Page 12: ...s on the floor when it is moved slightly Floor is uneven or weak Freezer rocks on floor when it is moved slightly This condition can force the cabinet out of square and misalign the lid and lid seal Refer to Leveling in the First Steps Section Refer to Leveling in the First Steps Section Before You Call ...

Reviews: