3
ENFRIADOR DE BOTELLAS
FUNCIONAMIENTO
PRECAUCIÓN: NO ARROJE OBJETOS A LA ZONA DE ALMACENAMIENTO. EL
INCUMPLIMIENTO DE ESTAS RECOMENDACIONES PUEDE DAR COMO
RESULTADO DAÑOS EN EL INTERIOR DEL ARMARIO.
CICLO REFRIGERADO
Durante el ciclo de refrigeración, los ventiladores del evaporador funcionan
continuamente incluso con una o más puertas abiertas. El interruptor de la puerta
activa las luces al abrirla.
1. La unidad se apaga cada 6 horas para que el serpentín de evaporación se
descongele. El controlador mostrará el símbolo de descongelación. Cuando
el serpentín alcanza 41 °F (5 °C) o al cabo de 20 minutos de descongelación,
la unidad se enciende de nuevo.
2. Los calefactores anticondensación de los marcos de las puertas funcionan
conjuntamente con el compresor.
3. El ajuste de fábrica de la escala de temperatura es de 34 °F (1 °C) a 38 °F (3 °C).
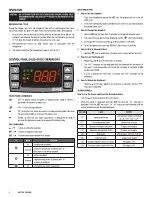
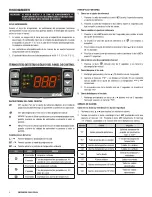
TERMOSTATO DE ESTADO SÓLIDO DEL PANEL DE CONTROL
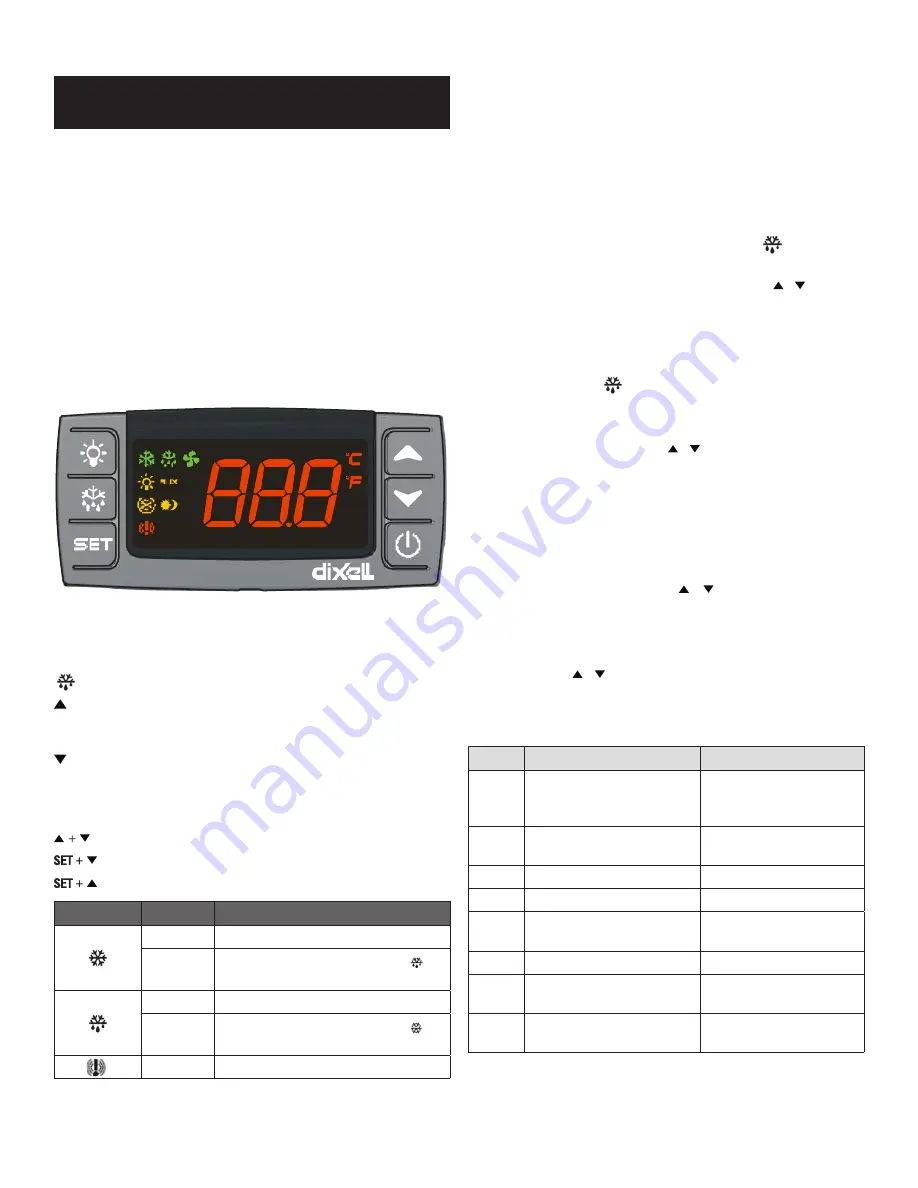
INSTRUCCIONES DEL PANEL FRONTAL
SET
SET (ajuste): Para ver el ajuste de referencia objetivo; en el modo de
programación permite elegir un parámetro o confirmar una operación.
DEF (descongelación): Para iniciar la descongelación manual
ARRIBA: Para ver el último caso de alarma; en el modo de programación,
permite examinar los códigos de parámetros o aumentar el valor en
pantalla.
ABAJO: Para ver el último caso de alarma; en el modo de programación,
permite examinar los códigos de parámetros o aumentar el valor en
pantalla.
Combinaciones de teclas:
Permite bloquear y desbloquear el teclado
Permite acceder al modo de programación
Permite volver a la pantalla de temperatura ambiente
LED
MODO
FUNCIÓN
Encendido
Compresor activado
Parpadeo
Fase de programación (parpadeo con )
Retardo de ciclo anticortocircuito activado
Encendido
Descongelación activada
Parpadeo
Fase de programación (parpadeo con )
Goteo en curso
Service and Installation Manual
8
1.1 Function of LEDS
2. MAIN FUNCTIONS
2.1 HOW TO SEE THE SETPOINT
1. Push and immediately release the
SET
key: the display will show the set point value.
2. Push and immediately release the
SET
key or wait for 5 seconds to display the
sensor value again.
2.2 HOW TO CHANGE THE SETPOINT
1. Push the
SET
key for more than 2 seconds to change the set point value.
2. The value of the set point will be displayed and the
LED starts blinking.
3. To change the set value push the
or
key within 10s.
4. To set new point value, push the SET key again or wait 10s.
2.3 HOW TO START A MANUAL DEFFROST
Push the
key for more than 2 seconds and a manual defrost will start
2.4 HOW TO LOCK THE KEYBOARD
1. Hold the
and
keys for more than 3s.
2. The “POF” message will be displayed and the keyboard will be locked. At this point, it will be possible only
to see the set point or the MAX or Min temperature stored.
3. If a key is pressed more than 3s the ”POF” message will be displayed.
2.5 HOW TO UNLOCK THE KEYBOARD
Hold the
and
keys together for more than 3s, till the “POF” message is displayed.
3. ALARM SIGNALS
HOW TO SEE THE ALARM AND
RESET THE RECORDED ALARM
1. Hold the
or
key to
display the alarm signals.
2. When the signal is displayed, hold
the
SET
key until the “rst” message
is displayed. Push the
SET
key
again. The “rst” message will start
blinking and the normal temperature
will be displayed again.
Encendido
Se produjo una alarma de temperatura
PRINCIPALES FUNCIONES
1. Cómo ver el ajuste de referencia
1. Presione y suelte de inmediato la tecla
SET
(ajuste); la pantalla muestra
el ajuste de referencia.
2. Presione y suelte de inmediato la tecla
SET
o espere 5 segundos para
que se vuelva a mostrar el valor del sensor.
2. Cómo cambiar el ajuste de referencia
1. Presione la tecla
SET
durante más de 2 segundos para cambiar el valor
del ajuste de referencia.
2. Se muestra el valor del ajuste de referencia y el
LED empieza a
parpadear.
3. Para cambiar el ajuste de referencia, presione la tecla o en un plazo
de 10 segundos.
4. Para fijar el nuevo ajuste de referencia, vuelva a presionar la tecla
SET
o
espere 10 segundos.
3. Cómo iniciar una descongelación manual
1. Presione la tecla
durante más de 2 segundos y se iniciará la
descongelación manual.
4. Cómo bloquear el teclado
1. Mantenga presionadas la teclas y durante más de 3 segundos.
2. Aparece el mensaje “POF” y se bloquea el teclado. En ese momento
solo es posible ver el ajuste de referencia o la temperatura MAX o MIN
almacenada.
3. Si se presiona una tecla durante más de 3 segundos, se muestra el
mensaje “POF”.
5. Cómo desbloquear el teclado
1. Mantenga presionadas las teclas y durante más de 3 segundos,
hasta que aparezca el mensaje “POF”.
SEÑALES DE ALARMA
Cómo ver la alarma y restablecer la alarma registrada
1. Presione la tecla o para mostrar las señales de alarma.
2. Cuando se muestre la señal, mantenga la tecla
SET
presionada hasta que
aparezca el mensaje “rst”. Presione la tecla
SET
nuevamente. El mensaje
“rst” empieza a parpadear y se muestra otra vez la temperatura normal.
MENSAJE
CAUSA
SALIDAS
“P1”
Sonda ambiente defectuosa
Salida de compresor de
acuerdo con parámetros
"Con" y "COF"
“P2”
Fallo de sonda del evaporador
Final de descongelación
temporizado
“HA”
Alarma de temperatura máxima
Salidas sin cambios
“LA”
Alarma de temperatura mínima
Salidas sin cambios
“dA”
Puerta abierta
Reinicio de compresor y
ventiladores
“EA”
Alarma externa
Salida sin cambios
“CA”
Alarma externa grave (i1F=bAL)
Todas las salidas
desactivadas
“CA”
Alarma de presostato (i1F=PAL)
Todas las salidas
desactivadas


