EN
OWNER'S
MANUAL
EBIKE
10
NOTICE
The disc brake hydraulic system is filled with standard brake fluid or mineral oil. These brake fluids
must not mix with each other. To add or replace brake fluid in the hydraulic brake system, only use
the type of brake fluid recommended by the manufacturer! Changing the brake fluid, or replacing
the hydraulic brake hose, requires skill and the right tools, so have this work carried out by qualified
mechanics in a professional workshop.
NOTICE
Brake fluids can cause skin irritation, so we recommend that you do not open a closed hydraulic
brake system.
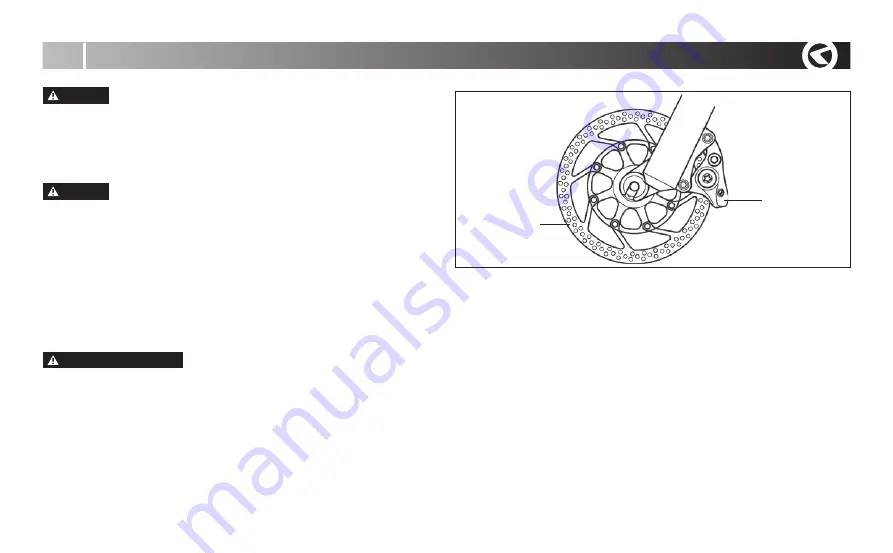
CLEANING OF DISC BRAKES
Keep the brake disc, brakes, and brake pads clean. In case of contamination with oil or other lubricants,
degrease the brake disc immediately (preferably with a product designed for degreasing brake discs).
When degreasing the discs, make sure that the degreaser does not come into contact with other parts
of the e-bike (especially the frame, tyres and fork – this can damage the paintwork or rubber and thus
reduce the service life of these components). If the brake pads are contaminated with brake fluid, they
must be replaced with new ones!
IMPORTANT NOTICE
1. Always check that the braking system is working perfectly before every ride. Press the brake lever
several times to make sure the brake system is working properly.
2. Periodically check that all brake system bolts are tightened securely. Loose bolts can cause the
brake system to fail.
3. The brake disc and brakes heat up under braking. Do not touch them – you can burn yourself!
4. Learn how to use the brakes on your e-bike properly. Braking too hard with the front brake can
mean a fall and injury. Serious injuries can occur if the brakes are not set correctly or are used
incorrectly.
5. Disc brakes are factory set so that the discs fit perfectly on the disc, however the disc brakes must
be run in for best braking performance. Run in the brakes with several short cycles of gentle to
moderate braking. Do this procedure only on a safe, flat surface with no traffic.
FRONT AND REAR WHEEL
Always check that the wheel is securely mounted by the quick-release lock before riding, i.e. the
quick-release lever must be in the CLOSE position. When clamping the wheel to the frame or fork,
proceed as follows: Insert the axle of the quick-release mechanism into the wheel hub. Pay attention
to the correct orientation of the springs (the wider ends of the springs point outwards, i.e. towards the
nut/lever. The narrow ends point towards each other). Screw the axis of the quick-release mechanism
onto the clamping nut clockwise. The quick-release mechanism allows easy and quick assembly and
disassembly of the wheels without the use of tools. Before riding, check that the wheel is centred in
the fork. Tighten the nut of the quick-release mechanism so that the locking lever offers resistance
when closing. When the quick-release mechanism closes to the secured position, it must squeeze the
ends of the fork. Move the lever of the quick-release mechanism only sideways, in the OPEN or CLOSE
positions. Do not turn the closed quick-release switch under any circumstances, you may damage it!
If the wheels of your e-bike are secured by fixed axles (type: thru axle), make sure these axles are
tightened sufficiently. In the case of this wheel locking design, it is first necessary to unscrew and pull
out this axle completely to remove the wheel.
Check the wheel hubs regularly, especially after riding in wet and muddy conditions. The hub axis
DISC BRAKE
rotor
brake caliper
Summary of Contents for THEOS F100
Page 1: ...OWNER S MANUAL E BIKE...
Page 2: ...EXTENDWARRANTY OF YOUR KELLYS FRAME...
Page 41: ...EN OWNER S MANUAL EBIKE 41...
Page 53: ......


