
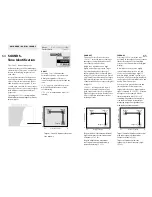

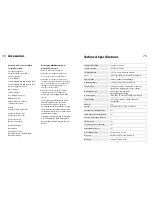

50
51
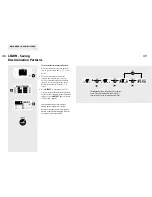
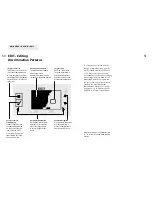
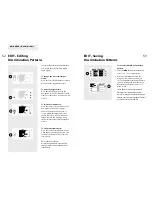
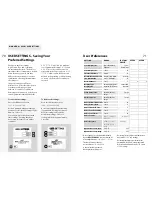
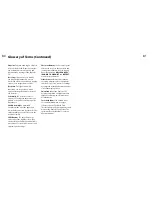
EDIT - Editing
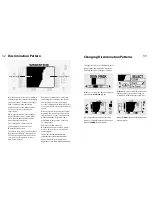
Discrimination Patterns
EDIT
enables you to make manual
changes to individual areas (specific
pixels) of the Discrimination Pattern.
LEARN
may not provide the exact
discrimination result you wanted (even
when using a different-sized cursor).
Rather than start all over again, you
can just ‘touch up’ your learn results.
Similarly, you may find that the
Discrimination Pattern for a specific
target type (e.g. foil) may need to be
modified to suit your requirements.
Make sure Pinpoint is OFF before using
EDIT
to customize your Discrimination
Pattern.
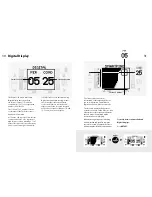
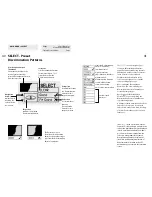
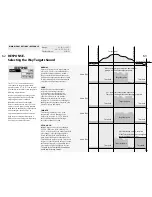
Target Frame
Any area of the screen
enclosed by this frame
may be excluded from
or become part of your
preferred target Pattern.
MAIN MENU > DISCRIM > EDIT
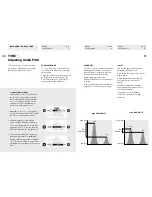
Target Frame Size
This allows you to select the
size of the framed area you
wish to accept or reject from
the displayed Discrimination
Pattern. There is a choice of
three sizes.
Accept or Reject
Framed Area
Instructs Explorer SE to
accept the framed area
on selection of the tick
icon. Selection of the
cross icon will reject the
framed area. This edits
the current Pattern.
Horizontal Navigation
Pressing the shift buttons
adjacent to these arrows
moves the target frame
to the left or right of the
screen.
Discrimination Pattern
The shaded and unshaded
areas of the screen
schematically represent the
current Discrimination Pattern.
Vertical Navigation
Pressing the shift buttons
next to these arrows
moves the target frame
up or down the screen.
Summary of Contents for Explorer SE
Page 1: ......