


12
ASSEMBLY INSTRUCTIONS
Consider the following when assembling the chipper:
Due to the weight of the chipper, it is recommended that two people work together to assemble it.
The machine must only be lifted using the designated lifting points.
Only use suitable lifting equipment with sufficient lifting capacity to lift the machine.
WARNING! RISK OF CRUSHING!
Do not allow anyone to stand under suspended loads!
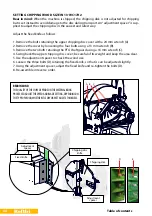
The equipment comes in a transport frame to protect it. The discharge chute, the control bar
and the chute flap have to be fitted. To fit these parts, begin by removing the upper part of the
protective frame with an angle grinder, hacksaw or cutting torch. Take great care so as not to
damage the machine or the surrounding area!
B
A
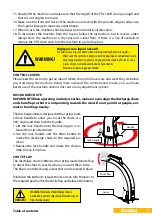
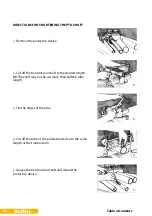
1.
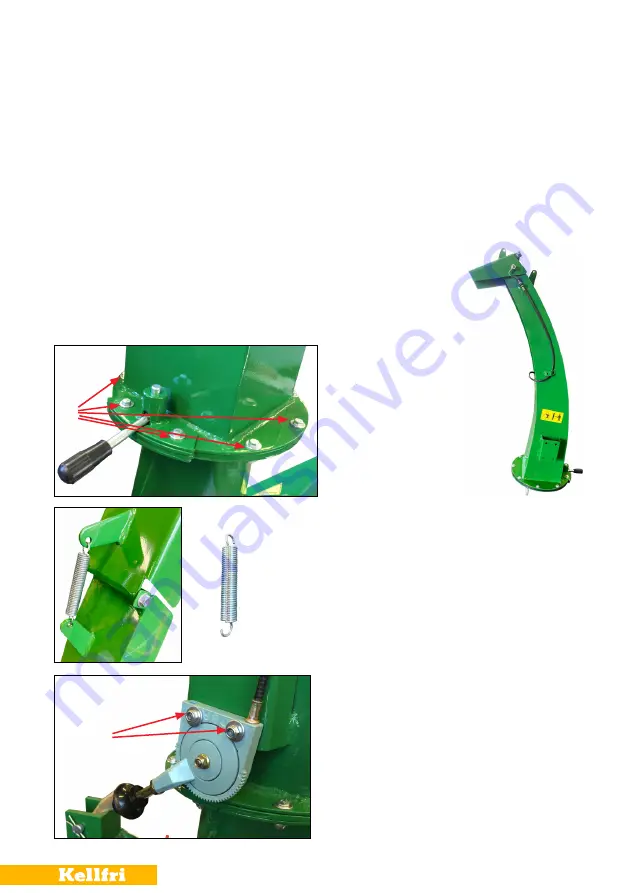
Install the discharge chute.
1. Unscrew one “crescent”.
(The tube is more stable during fastening, than
if both “crescents” are loosened.)
Position the tube on the plate.
Fit the discharge chute using all 8 screws, 16 washers and 8 lock nuts [A]
3. Attach the wire control to the top
two holes. [B]
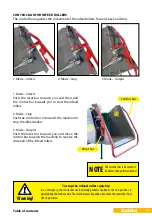
2. Fit the spring between the discharge chute and
chute flap.
Summary of Contents for 13-WC17H2
Page 34: ...34 Table of contents Version 1 1...
Page 36: ...36 Table of contents Version 1 1...