DC current calibration
After the 1M
Ω
resistance point has been calibrated, the unit will prompt you for 10mA.
Follow these steps for DC current calibration:
1.
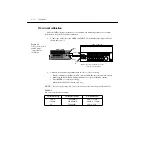
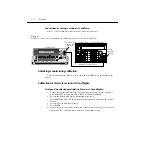
Connect the calibrator to the AMPS and INPUT LO terminals of the Model 2010 as
shown in
2.
Calibrate each current step summarized in
. For each step:
•
Set the calibrator to the indicated DC current, and make sure the unit is in operate.
•
Make sure the Model 2010 display indicates the correct calibration current.
•
Press ENTER to complete each step.
•
Allow the Model 2010 to finish each step.
NOTE
If you are performing DC-only calibration, proceed to Setting calibration dates.
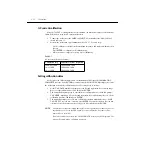
Table 2-5
DC current calibration summary
Calibration step
Calibrator current
Allowable range
10mA
100mA
1A
10.00000mA
100.0000mA
1.000000A
9mA to 11mA
90mA to 110mA
0.9A to 1.1A
2000 MULTIMETER
!
R
Output HI
Input
LO
Output
LO
Model 2010
5700A Calibrator
Amps
Note: Be sure calibrator is set for
normal current output.
Figure 2-3
Connections for DC
and AC amps
comprehensive
calibration
2-10
Calibration
Summary of Contents for 2010
Page 14: ...1 Performance Verification 1 Performance Verification...
Page 28: ...2 Calibration 2 Calibration...
Page 53: ...3 Routine Maintenance 3 Routine Maintenance...
Page 56: ...4 Troubleshooting 4 Troubleshoot ing...
Page 74: ...5 Disassembly 5 Disassembly...
Page 83: ...CONFIDENTIAL PROPRIETARY...
Page 84: ......
Page 85: ......
Page 86: ......
Page 87: ...6 Replaceable Parts 6 Replaceable Parts...
Page 98: ...CONFIDENTIAL PROPRIETARY...
Page 99: ...CONFIDENTIAL PROPRIETARY...
Page 100: ......
Page 101: ...A Specifications A Specifications...
Page 107: ...B Calibration CommandReference B Calibration CommandRef erence...


