background image

A-A ( 1 : 1 )

A

A

PC 24

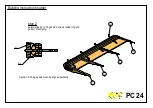
step 2

before sticking in hinges S22, shape rudder to get a
perfect channeling

S11

S12

S22

S20

S19

S18

S17

Caution: All hinges axis must be aligned perfectly

Building instructions rudder

Summary of Contents for PC 24

Page 1: ...step 1 rib frame assemblage on the plan sheet CAUTION don t glue together H24 and H25 That s the hinge line PC 24 H8 H7 H6 H5 H4 H3 H2 H25 H24 H1 H19 H10 H9 Building instructions elevator...

Page 2: ...per planking with light balsa 1 5mm thick H15 before you have to shape H9 H24 and H25 to fit elevator section planking in one part movable part of elevator is cut later PC 24 H15 Building instructions...

Page 3: ...let cure planking glue completely before turnig over install servo frames H26 and the lower spar H10 cut away all feet and shape all part in form of profile PC 24 H10 H26 H26 Building instructions el...

Page 4: ...f 3 parts H29 and H30 servocovers H31 and horns H38 PC 24 H30 H29 H29 H15 H31 H31 H15 H29 H30 separate movable part cut through between H24 and H25 hinged on the upper surface have a look on the fotos...

Page 5: ...PC 24 tube Aluminium H34 tube Aluminium H32 dowel H39 screw M5x50 H36 tube for screw head H33 drive in nut M5 Building instruction elevator overview cross section through fixation of elevator...

Page 6: ...step 5 central pod upper shaped piece PC 24 to align slide in H18 do not glue H13 H11 H12 step 6 central pod assembly H21 H14 H17 H16 H16 H18 H27 H20 H22 Building instructions elevator...

Page 7: ...PC 24 step 7 mating of central pod and elevator slide in elevator top down elevator axis must be parallel to the base plate of the central pod H34 H23 Building instructions elevator...

Page 8: ...PC 24 H32 H35 H28 H33 step 8 planking of central pod with balsa 1 5mm thick grain direction vertical H39 Building instructions elevator...

Page 9: ...PC 24 step 9 attach upper shaped piece step 5 to central pod Bring into line fillers H37 with rudder H37 H37 H36 Building instructions elevator...

Page 10: ...PC 24 S21 S15 3 S15 2 S15 1 step 1 Building instructions rudder...

Page 11: ...PC 24 step 2 before sticking in hinges S22 shape rudder to get a perfect channeling S11 S12 S22 S20 S19 S18 S17 Caution All hinges axis must be aligned perfectly Building instructions rudder...

Page 12: ...ith light balsa 1 5mm thick carbon tube approx 35mm protruding drive axel bond carbon tube to servo horn servo support can be moved downward when srews are loosened to unlock from rudder S16 S23 Build...

Reviews: