background image

Keeler AccuPen user’s guide

keelerusa.com


• 

keeler.co.uk 

• USA: 1-800-523-5620  • UK: +44 (0) 1753-857177

11

5.  The PachPen will emit a high-pitched chirp (beep) when you have automatically 

acquired a measurement.

6.  The PachPen will emit three high-pitched chirps (beeps) when the ninth 

measurement has been taken, or if the measurement time expires.

Notes

1.  The PachPen can take up to nine 

measurements and provide the 

average of those measurements. 

This average is the number used 

when calculating the true intraocular 

pressure (TIOP).

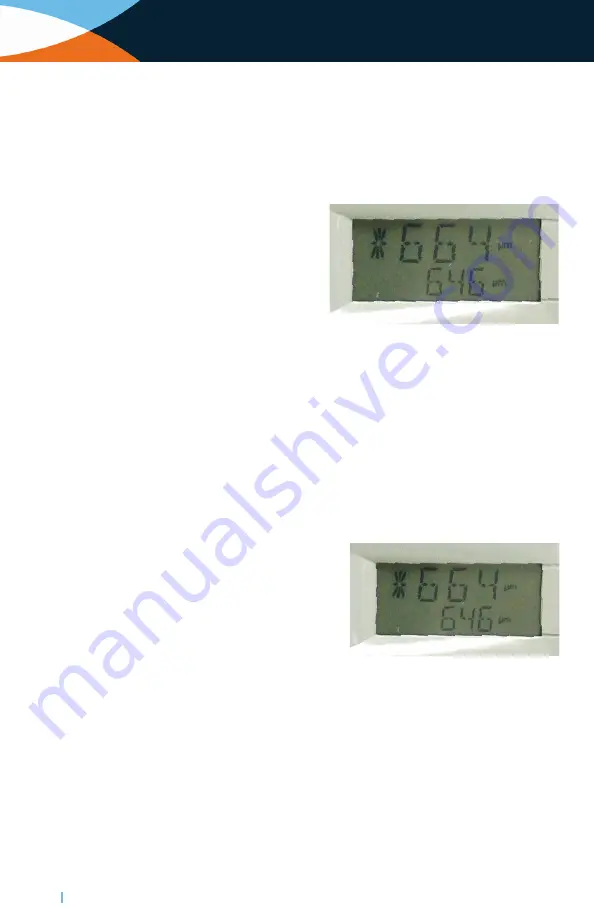
2.  The * symbol by a measurement 

indicates the reading that is furthest 

away from the average.

3.  You can review the measurements 

taken by pressing the up and down 

control buttons.

4.  You can delete any measurement taken by touching and holding either the up 

or down control button for several seconds (until the unit emits a high-pitched 

chirp). After deleting a measurement, the unit will automatically recalculate the 

average of the measurements.

How to perform a calculation

After you have completed a patient’s measurements, you can calculate the true IOP for 

the patient. You can perform the calculation from the MIOP screen.

To calculate true IOP:

1.  From the measurement screen, select 

the MIOP screen by pressing and 

holding the action control button for 2 

to 3 seconds.

2.  Enter the measured IOP by pressing 

the up and down control buttons until 

the proper measured IOP is displayed. 

If you make a mistake, just reselect the 

correct value.

3.  The True IOP based on the average of the 

measurements taken is displayed below the measured IOP.

4.  Return to the measurement screen by pressing and holding the action control 

button until the measurement screen appears.

Figure 3.6 - Measurement screen starting 
new patient

Figure 3.7 - True IOP screen

Summary of Contents for PachPen IFU-24-5100

Page 1: ...PachPen User s guide IFU 24 5100 REV C...

Page 2: ...ce to radio or television reception which can be determined by turning the equipment off and on the user is encouraged to try to correct the interference by one or more of the following measures Reori...

Page 3: ...on of the probe 6 Warnings 6 Electrical hazard and safety 6 Avoiding equipment damage 6 Avoiding electromagnetic and other interference 7 Chapter 3 Getting started 8 Overview 8 Unpacking instructions...

Page 4: ...Specifications 15 Overview 15 Physical specifications 15 Environmental specifications 15 Measurement accuracy 16 Operating modes 16 Acoustic output 17 Chapter 6 Warranty repairs 19 Warranty 19 Produc...

Page 5: ...Figure 3 7 True IOP screen 11 Table 3 1 IOP correction values 12 Table 4 1 PachPen troubleshooting information 14 Table 5 1 PachPen physical specifications 15 Table 5 2 Environmental specifications 1...

Page 6: ...tware protects your investment The PachPen provides the following general features Multi segmented high resolution LCD screen with control buttons to provide an intuitive user interface Long lasting l...

Page 7: ...trists and ophthalmologists who are experienced in corneal thickness measurement techniques This manual is organized as follows Chapter 2 Safety Summarizes safety precautions warnings symbols and term...

Page 8: ...t companies can provide assistance in the disposal of these cells and batteries 2 Disposal should be done in accordance with applicable regulations which vary from country to country In most countries...

Page 9: ...harged are considered as reactive hazardous waste Thus hazardous waste of spent cells and batteries can be disposed of after they are first neutralized through an approved secondary treatment prior to...

Page 10: ...products and procedures are effective and appropriate for ophthalmic applications The following information is provided for the guidance of users and specific products are mentioned for illustration o...

Page 11: ...an electrical connection and handling electrically powered devices Avoid the use of damaged electrical equipment If repair or maintenance is to be performed on the PachPen the equipment must be turne...

Page 12: ...phone or other device not compliant with EMC Class B requirements as its signals may cause the equipment to malfunction The effect of radio signals on medical devices is dependent on various factors a...

Page 13: ...rep pads Note Notify Keeler immediately if any components are missing or damaged See Chapter 6 of this user guide for contact information Battery specification and installation The power source for th...

Page 14: ...in a closed position Do not over tighten the screw Instructions for use Initial PachPen pachymeter setup The following steps outline the basic setup of the PachPen 1 If the battery is not installed in...

Page 15: ...displayed How to start a new patient 1 Hold the up and down control buttons on the PachPen simultaneously for 2 to 3 seconds 2 A single beep from the instrument will indicate that all measurements av...

Page 16: ...down control button for several seconds until the unit emits a high pitched chirp After deleting a measurement the unit will automatically recalculate the average of the measurements How to perform a...

Page 17: ...rs Correction values mmHg 405 7 425 6 445 5 465 4 485 3 505 2 525 1 545 0 565 1 585 2 605 3 625 4 645 5 665 6 685 7 705 8 Correction values according to corneal thickness of 545 micrometers These corr...

Page 18: ...ping everything except the tip with a clean lint free non abrasive cloth and alcohol Clean the PachPen pachymeter tip by dipping only the first inch of the tip into alcohol or in an ultrasonic cleaner...

Page 19: ...repair through Keeler technical service group see Chapter 6 No beep and or no display upon activation Action control button not held down long enough Hold down action control button longer Incorrect b...

Page 20: ...en physical specifications Main unit Dimensions 18 4 cm X 3 2 cm X 3 2 cm 7 25 X 1 25 X 1 25 Weight 85 g 3 oz Display Type Multi segment monochrome liquid crystal display LCD Size 28 6 mm 1 13 diagona...

Page 21: ...icrometers Electronic Resolution 1640 m sec 1 Micrometer Range 300 999 Micrometers Operating modes The table 5 4 summarizes the mode application possibilities for each system transducer combination Ta...

Page 22: ...ing control conditions Table 5 6 Guidance and manufacturer s declaration electromagnetic emissions The PachPen is intended for use in the electromagnetic environment specified below The customer or th...

Page 23: ...is the maximum output power rating of the transmitter in watts W according to the transmitter manufacturer and d is the recommended separation distance in meters m Field strengths from fixed RF transm...

Page 24: ...teration repair or modification of any product that is performed by persons not authorized by Keeler will immediately void the warranty Product returns Follow the instructions given below to return pr...

Page 25: ...andise held longer than 30 days Replacement parts Table 6 1 below lists items that are available from Keeler or from your local sales representative Please be sure to use the Keeler part number for th...

Page 26: ...Effective date November 8 2022 keeler co uk keelerusa com Contact us UK 44 0 1753 857177 USA 1 800 523 5620 India 91 99 3031 1090 Brazil 55 11 4302 6053 China 86 18512119109...

Reviews: