
The LifeTime HEPA
™
Filter is vacuum-able and should be cleaned regularly for optimum
performance.
To Clean the HEPA Filter:
•
DO NOT USE WATER OR OTHER LIQUIDS TO CLEAN THE HEPA FILTER.
• Turn the air purifier OFF and unplug from the wall outlet.
• After removing the filter assembly from the air purifier
(refer to section “Removing/Changing the Filters” in this
manual), separate and remove the carbon pre-filter from
the HEPA filter and place aside (or discard if pre-filter
needs replacement).
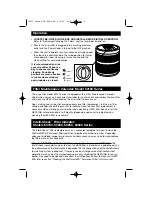
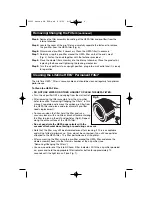
• To vacuum-clean the filter, hold the filter and run a
vacuum cleaner with a nozzle or brush attachment along
the filter to pick-up the dirt and particles (Fig.5). Repeat
along the entire surface of the HEPA filter.
•
Do not penetrate the HEPA paper pleats with the
vacuum attachment since tearing or puncturing can occur.
• Note that the filter may still be discolored even after cleaning it. This is acceptable
and will not affect performance. Also, do not be concerned if you still see particles
attached to the HEPA filter. The filter performance is still optimal.
• After vacuuming the filter, wrap the pre-filter around the HEPA filter and place the
whole assembly back into the internal chamber of the air purifier (see
“Removing/Changing the Filters”).
• You now need to reset the Intelli-Check
™
Filter Indicator. With the air purifier powered
on, press and hold the appropriate filter indicator button for approximately 10
seconds until the light turns off (see Fig. 1).
Fig 5
Cleaning the Lifetime HEPA
™
Permanent Filter*
Step 4:
Remove the filter assembly (consisting of the HEPA filter and pre-filter) from the
internal chamber.
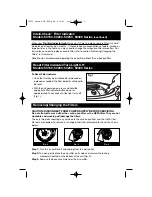
Step 5:
Locate the seam of the pre-filter and carefully separate the fastener to remove
the pre-filter from the HEPA filter (Fig. 3).
Step 6:
Discard used pre-filter if necessary. Clean the HEPA filter if necessary.
Step 7:
Carefully wrap the pre-filter around the HEPA filter so that the ends meet
(Fig. 4). Fasten the ends together with the fastener provided.
Step 8:
Place the whole filter assembly into the internal chamber. Close the product by
replacing the base and tightening the locking mechanism.
Step 9:
Turn the air purifier into an upright position, plug into a wall outlet and it is ready
for operation.
Removing/Changing the Filters
(continued)
50000 series OM EFS.qxd 8/4/05 4:18 PM Page 6


