background image

Page

22

2

PLA

YING THE 

PIANO

The speed or tempo of the song can be adjusted by pressing and holding the TEMPO button and pressing the 

VALUE buttons. 

While listening, different Concert Magic songs can be selected by pressing the VALUE buttons.

The small circles in the LCD display will be replaced by plus (‘+’) signs as the song is played back. These small 

symbols provide a visual playing guide, indicating when the next key should be pressed. The position and spacing 

between each circle shown in the LCD display represents an approximate timing between each key press.

The circles will be replaced by small plus signs as the song is played.

The key to performing using Concert Magic is to become familiar with the rhythm of each song. The approximate 

outline provided by the Note Navigator, allows the performer to gradually learn the rhythm of each piece.

„

 To listen to a different song, press and hold the CONCERT MAGIC button and press the key to which the desired song 

is assigned.  Then press the PLAY/STOP button.

…

 Step 2

Press the PLAY/STOP button again to fi nish listening to the song.

‘

 PERFORMING A SONG 

…

 Step 1

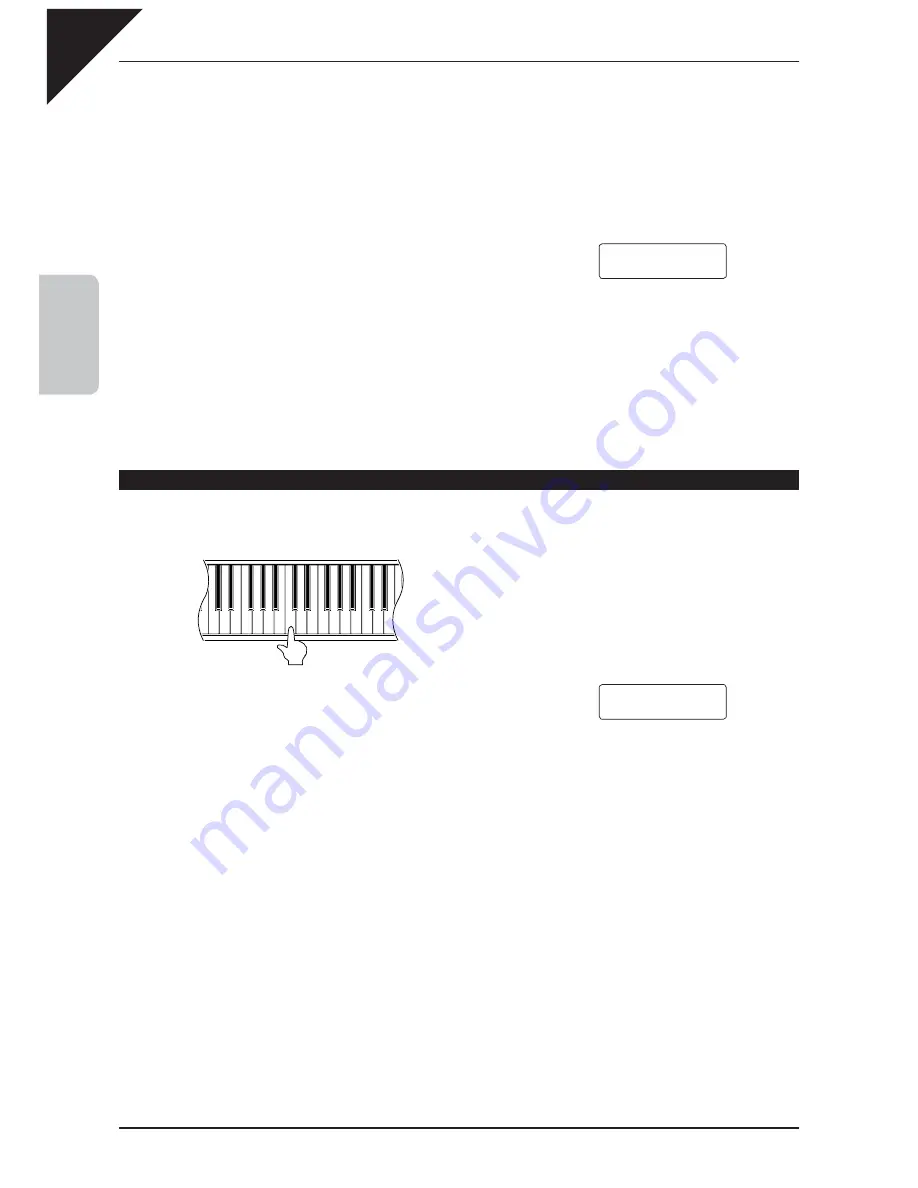
Tap out the rhythm of the selected song on any one of the piano’s 88 black or white keys.

Use the Note Navigator (the circles and plus signs) to learn the rhythm 

of the Concert Magic song.

Concert Magic songs will respond to changes in playing style. As the keys are tapped harder, the music will grow 

louder; if the keys are tapped more softly, the music will become quieter. Tapping faster will cause the music to speed 

up, while tapping slower will make the music slow down accordingly. Using Concert Magic, even inexperienced 

pianists can sound like they have been playing for years, simply by pressing one key with one fi nger.

Concert Magic is a perfect method for small children to learn music, especially when developing a sense of rhythm. 

For older people who may believe it is too late to learn the piano, Concert Magic offers an enjoyable fi rst step. With 

Concert Magic, the CN42 piano can be enjoyed by everyone in the family, even those who have never touched a 

musical instrument in their life.

~


~


~

+


+


~


~

Twinkle


Twinkle

+


+


~


~

CN42̲EN.indd   22

2008/12/11   13:28:53

Summary of Contents for CN42

Page 1: ...1 PART NAMES AND FUNCTIONS 2 PLAYING THE PIANO 3 LESSON FUNCTION 4 RECORDER 5 USB TO DEVICE OPERATIONS 6 MENU FUNCTIONS 7 APPENDICES Owner s Manual...

Page 2: ......

Page 3: ...TRING RESONANCE 50 9 FOUR HANDS ON OFF 51 10 TUNING 52 11 TEMPERAMENT 53 12 KEY OF TEMPERAMENT 55 MIDI OVERVIEW 56 CN42 MIDI FUNCTIONS 56 13 MIDI CHANNEL 57 14 TRANSMIT PROGRAM CHANGE ON OFF 58 15 LOC...

Page 4: ...se instructions 3 Heed all warnings 4 Follow all instructions 5 Do not use this apparatus near water 6 Clean only with dry cloth 7 Do not block any ventilation openings Install in accordance with the...

Page 5: ...periods of time at high volume levels Doing so may result in hearing problems It is a good practice to have the instrument near the AC outlet and the power cord plug in a position so that it can read...

Page 6: ...llow any foreign matter to enter the product Doing so may cause the illumination to fall over resulting in fire Do not place naked flame such as lighted candles on the product CAUTION Indicates a pote...

Page 7: ...a class B digital apparatus pursuant to the Radio Interference Regulations C R C c 1374 An information on Disposal for users If your product is marked with this recycling symbol it means that at the e...

Page 8: ...ompaniment notes regardless of which keys are pressed Anybody young or old can enjoy Concert Magic from the moment they sit down at the CN42 Page 21 z LESSON PresstheLESSONbuttontoaccess the etudes or...

Page 9: ...SPLIT The split function divides the keyboard into two sections upperandlower allowingeither part to be played with a different sound Page 14 z REVERB Use the REVERB button to add reverberation to the...

Page 10: ...R SWITCH is located at the right end of the front panel Press the POWER SWITCH again to turn off the power When the POWER button is pressed the LED indicator for the PIANO1 button will turn on and the...

Page 11: ...will then be selected at random Step 3 Press the CONCERT MAGIC and LESSON buttons simultaneously again or press the PLAY STOP button to exit the demo mode PIANO 1 Concert Grand KAWAI Studio Grand KAWA...

Page 12: ...on PRESET SOUNDS PIANO 1 Concert Grand HARPSI MALLETS Harpsichord Studio Grand Harpsichord 2 Mellow Grand Vibraphone Modern Piano Clavi PIANO 2 Concert Grand 2 STRINGS Slow Strings Studio Grand 2 Stri...

Page 13: ...change the String Ensemble sound to Slow Strings press and hold the PIANO 1 button and press the STRINGS button again If two sound variations assigned to the same SOUND SELECT button are to be layere...

Page 14: ...ault split point is set between B2 and C3 This point can be moved to any key on the keyboard Step 2 Press and hold the SPLIT button then press a key on the keyboard The pressed key will become the low...

Page 15: ...her sound variation assigned to that button Step 6 Use the BALANCE slider to adjust the volume balance between the upper and lower sections Step 7 Press the SPLIT button to exit the split mode The LED...

Page 16: ...the same as in SPLIT mode Press the desired SOUND SELECT button to change the sound for the upper section or press and hold the SPLIT button then press the desired SOUND SELECT button to change the so...

Page 17: ...are six types of reverb available Room 1 Room 2 Stage Hall 1 Hall 2 and Plate Step 1 Press the REVERB button The LED indicator will turn on to indicate that reverb is in use Press and hold the REVERB...

Page 18: ...e the speed of the rotor between SLOW and FAST Step 1 Press the EFFECTS button The LED indicator will turn on to indicate that the effect is in use Press and hold the EFFECTS button to show the curren...

Page 19: ...et sound When the power is turned off the touch settings will return to the default settings LIGHT and HEAVY do not represent the physical weight of the keys These are settings that affect the sensiti...

Page 20: ...tton is pressed the transpose value is decreased by one half step The piano can be transposed by up to 12 half steps higher or 12 half steps lower Pressing the TRANSPOSE button again turns the TRANSPO...

Page 21: ...njoy playing music from the moment they sit down at the CN42 piano SELECTING A SONG The 88 Concert Magic songs are assigned to each of the 88 keys and classi ed by song category into eight groups such...

Page 22: ...red song is assigned Then press the PLAY STOP button Step 2 Press the PLAY STOP button again to nish listening to the song PERFORMING A SONG Step 1 Tap out the rhythm of the selected song on any one o...

Page 23: ...f three different arrangement types depending on the skill level required to perform them EASY BEAT These are the easiest songs to play To perform them simply tap out a constant steady beat on any key...

Page 24: ...Play and SK for Skillful STEADY BEAT Steady Beat allows Concert Magic songs to be played by simply tapping any key with a constant steady beat regardless of the song arrangement type Step 1 Press and...

Page 25: ...ress the piano key to which the desired song is assigned The CN42 piano will play back the selected song and then continue to play the rest of the songs in the same category To stop the demo press the...

Page 26: ...again to stop the metronome CHANGING THE TIME SIGNATURE AND RHYTHM The metronome produces two types of click with the louder click heard on every fourth beat this is a 4 beat or 4 4 time signature The...

Page 27: ...n whether the tempo or time signature is being adjusted ADJUSTING THE METRONOME VOLUME The volume level of the metronome can also be adjusted Step 1 Press the TEMPO and BEAT buttons simultaneously The...

Page 28: ...k 2 43 Funk 3 44 Funk Shuf e 1 45 Funk Shuf e 2 46 Buzz Beat 47 Disco 1 48 Disco 2 49 Hip Hop 1 50 Hip Hop 2 No Rhythm 51 Hip Hop 3 52 Hip Hop 4 53 Techno 1 54 Techno 2 55 Techno 3 56 Heavy Techno 57...

Page 29: ...C and TRANSPOSE buttons simultaneously The CN42 control panel will stop responding to button pushes Panel Lock On will be shown in the LCD display Step 2 Press the CONCERT MAGIC and TRANSPOSE buttons...

Page 30: ...n will turn on to indicate that lesson mode is enabled The currently selected book name will be shown in the LCD display Lesson availability differs according to geographical location Lesson Book Name...

Page 31: ...pressed DUAL or SPLIT sounds cannot be selected in LESSON mode EXITING THE LESSON FUNCTION Step 1 Press the LESSON button The LED indicator for the LESSON button will turn off and the unit returns to...

Page 32: ...tton to stop recording the lesson practice PLAYING BACK THE RECORDING Step 1 Press the PLAY STOP button to listen to the recording The performance that has been recorded will be played The left and ri...

Page 33: ...t to be recorded rst on one track then the right hand part to be recorded later on the other track while listening to the rst part When recording or playing back a song each part track can be re recor...

Page 34: ...completely erase the previous one The total recording capacity of the CN42 piano s memory is approximately 15 000 notes with button and pedal presses also counted as one note When the maximum capacity...

Page 35: ...4 Press the PLAY STOP button again and the recorded song will start to play Playback information will be shown in the LCD display Step 5 Press the PLAY STOP button again to stop playback and return t...

Page 36: ...ey and has not been transposed Step 2 Press and hold the TRANSPOSE button then press the VALUE buttons to specify the transposition amount The LCD display will show a number indicating how many half s...

Page 37: ...song and part A con rmation message will be shown in the LCD display Step 4 Press the REC button again to con rm erasing the selected song and part To cancel the erase operation in Step 3 press the P...

Page 38: ...n the rst line of the LCD display Select the DIR UP entry to return to the previous folder If both USB_A and USB_B devices are connected an option to select the active device will also be shown in the...

Page 39: ...tracks to be recorded separately Step 1 After connecting a USB device and pressing the USB button press the VALUE S button to enter USB Recorder mode If the USB device is empty Empty_Song will be sho...

Page 40: ...SB button Recording information will be shown in the LCD display Step 2 While holding the USB button press the VALUE buttons to adjust the volume level of the USB Recorder The volume level of USB Reco...

Page 41: ...ttons to choose a character to name the recorded song then press the REC button Step 3 Press the MENU buttons to scroll through the list of les and directories then press the VALUE button to select th...

Page 42: ...of a song on the same USB device Step 1 Press the MENU and VALUE buttons to scroll through the list of les and directories then press the REC button to select the song to be copied Reading will appea...

Page 43: ...directory Step 3 Press the REC button again to make a new directory on the USB device Executing and then Complete will be shown in the LCD display 6 FORMAT This menu can be used to format a USB devic...

Page 44: ...the last menu item is displayed Press the MENU buttons to scroll through the various menu items in ascending descending order 1 BRILLIANCE This function allows the brightness of the sound to be adjus...

Page 45: ...ill return to the default setting of 0 each time the power is turned off Use the User Memory function page 63 to save the desired Lower Octave Shift setting allowing the current Lower Octave Shift set...

Page 46: ...cert Grand Piano and String Ensemble sounds the octave range for the String Ensemble sound can be raised or lowered Step 1 Press the MENU buttons to select the Layer Octave Shift function The Layer Oc...

Page 47: ...t Grand Piano and String Ensemble sounds simultaneously using DUAL mode the Layer Dynamics function can be used to adjust the String Ensemble dynamics Step 1 Press the MENU buttons to select the Layer...

Page 48: ...o ON and the sustain pedal is depressed sustained sounds will be sustained even after the keys are released When set to OFF and the sustain pedal is depressed sustained sounds will begin to decay fade...

Page 49: ...NU buttons to select the Damper Effect function The Damper Effect value will be shown on the second line of the LCD display Step 2 Press the VALUE buttons to set the desived Damper Effect value You ca...

Page 50: ...ition adjacent notes will also be resonated The string resonance function simulates this phenomenon This is called string resonance For example when you play the keys shown below while holding down th...

Page 51: ...second line of the LCD display Step 2 Press the VALUE buttons to turn the FOUR HANDS function ON or OFF Step 3 Press any one of the SOUND SELECT buttons to exit the menu The FOUR HANDS ON OFF function...

Page 52: ...o set the desired Tuning value The value can be set within the range of 427 0 to 453 0 Hz The pitch will be changed by 0 5 Hz each time one of the VALUE buttons is pressed Step 3 Press any one of the...

Page 53: ...is very limited for use with chords but it produces very characteristic melodic lines Meantone temperament Meantone This temperament which uses a mean between a major and minor whole tone to eliminate...

Page 54: ...Press the MENU buttons to select the Temperament function The Temperament type will be shown on the second line of the LCD display Step 2 Press the VALUE buttons to set the desired Temperament type A...

Page 55: ...f the LCD display Step 2 Press the VALUE buttons to set the desired Key of Temperament The key can be set within the range of C to B Please note that changing the key of the temperament will only chan...

Page 56: ...function to create a multi layer MIDI recording MIDI OUT MIDI IN MIDI OUT MIDI IN CN42 MIDI FUNCTIONS Transmit receive keyboard note information By transmitting MIDI data from the CN42 piano MIDI out...

Page 57: ...is turned on This is called omni mode on The CN42 piano will switch to omni mode off when a speci c channel is selected using the MIDI channel function and data will only be received on that speci ed...

Page 58: ...other panel information will be transmitted via MIDI Please refer to page 60 for information regarding Multi Timbral mode Step 1 Press the MENU buttons to select the Transmit Program Change ON OFF fu...

Page 59: ...buttons to select the Local Control ON OFF function ON or OFF will be shown on the second line of the LCD display Step 2 Press the VALUE buttons to turn the Local Control function ON or OFF Step 3 Pre...

Page 60: ...ed in the right half of the chart in page 69 to 75 Please refer to page 61 for information regarding the Channel Mute function Multi Timbral OFF This turns off the Multi Timbral capability Only one MI...

Page 61: ...display Step 2 Press the VALUE buttons to set the Play Mute status Step 3 Press any one of the SOUND SELECT buttons to exit the menu The Channel Mute function will return to the default settings of O...

Page 62: ...Number function The Program Change Number will be shown on the second line of the LCD display Step 2 Press the VALUE buttons to set the desired Program Change Number The value can be set within the r...

Page 63: ...LCD display Step 2 Press the VALUE buttons to set the desired MIDI Clock setting Step 3 Press any one of the SOUND SELECT buttons to exit the menu 20 USER MEMORY This function allows the CN42 piano t...

Page 64: ...This function will reset the CN42 piano to the default factory settings and is displayed only when the User Memory function has been used All parameters saved in the User Memory will be reset to the f...

Page 65: ...these jacks The CN42 piano s sound is mixed with the LINE IN signals The CN42 piano s VOLUME slider controls the output level of its own sound without affecting the level of the LINE IN signal 6 LINE...

Page 66: ...h OS X the unit will be recognized as a MIDI device automatically therefore no special driver is needed To establish MIDI communications with the unit by using an application select USB MIDI to de ne...

Page 67: ...al board B tighten the already provided screws one each on the left and right sides and then tighten two screws F on each side 4 Untie and pull out the pedal cable 5 Set the back panel D and tighten t...

Page 68: ...ceptacle and x the cord with the cord clamp J make sure that the protrusion of the connector is facing the correct direction and insert the connector straight 11 Turn the adjustor bolt E at the bottom...

Page 69: ...urch Organ 0 17 121 0 20 Diapason 0 18 95 7 20 Full Ensemble 0 19 95 1 21 Diapason Oct 0 20 95 6 20 HARPSI MALLETS Harpsichord 0 21 121 0 7 Harpsichord 2 0 22 121 3 7 Vibraphone 0 23 121 0 12 Clavi 0...

Page 70: ...e Marimba 0 63 121 1 13 Xylophone 0 64 121 0 14 Handbells 0 65 95 1 15 Tubular Bells 0 66 121 0 15 Church Bells 0 67 121 1 15 Carillon 0 68 121 2 15 Dulcimer 0 69 121 0 16 OTHERS DRAWBAR Soft Solo 0 7...

Page 71: ...dal Steel 0 109 121 1 27 Rhythm Guitar 0 110 121 2 28 Electric Guitar 0 111 121 0 28 E Guitar 2 0 112 121 1 28 E Guitar 3 0 113 121 2 29 Muted Electric 0 114 121 0 29 Cutting Guitar 0 115 121 1 29 Cou...

Page 72: ...ng 1 28 121 1 54 Synth Vocal 1 29 121 0 55 Analog Voice 1 30 121 1 55 Orchestra Hit 1 31 121 0 56 Bass Hit Plus 1 32 121 1 56 6th Hit 1 33 121 2 56 Euro Hit 1 34 121 3 56 OTHERS BRASS Trumpet 1 35 121...

Page 73: ...74 Recorder 1 75 121 0 75 Pan Flute 1 76 121 0 76 Blown Bottle 1 77 121 0 77 Shakuhachi 1 78 121 0 78 Whistle 1 79 121 0 79 Ocarina 1 80 121 0 80 OTHERS SYNTH LEAD Square 1 81 121 0 81 Square 2 1 82...

Page 74: ...123 121 0 108 Taisho Koto 1 124 121 1 108 Kalimba 1 125 121 0 109 Bag Pipe 1 126 121 0 110 Fiddle 1 127 121 0 111 Shanai 1 128 121 0 112 OTHERS PERCUSSION Tinkle Bell 2 1 121 0 113 Agogo 2 2 121 0 11...

Page 75: ...26 Car Passing 2 38 121 3 126 Car Crash 2 39 121 4 126 Siren 2 40 121 5 126 Train 2 41 121 6 126 Jet Plane 2 42 121 7 126 Starship 2 43 121 8 126 Burst Noise 2 44 121 9 126 Applause 2 45 121 0 127 Lau...

Page 76: ...Bell Ride Bell Ride Bell Ride Bell Ride Bell F Tambourine Tambourine Tambourine Tambourine Tambourine G Splash Cymbal Splash Cymbal Splash Cymbal Splash Cymbal Splash Cymbal G Cowbell Cowbell Cowbell...

Page 77: ...bourine Punch G Splash Cymbal Splash Cymbal Splash Cymbal Heart Beat G Cowbell Cowbell Cowbell Footsteps 1 A Crash Cymbal 2 Crash Cymbal 2 Concert Cymbal 2 Footsteps 2 A Vibra slap Vibra slap Vibra sl...

Page 78: ...ght Light Normal Heavy Heavy Off MIDI 16 part multi timbral capability Damper Hold Damper Effect String Resonance User Memory Factory Reset Lesson Function Right left part balance adjustable Tempo adj...

Page 79: ...0 03 06 08 00 Reverb Off 01 Room 2 02 Stage 03 Hall 1 06 Room 1 07 Hall 2 08 Plate 14 00 7F Dual Split balance 16 1F 60 Tune 40 440 Hz 17 00 7F 00 Program Change Off 7F Program Change On 18 00 07 00 L...

Page 80: ...100 101 Right pedal Center pedal Left pedal Bank Select Modulation Portament Time Data Entry Volume Panpot Expression Pedal Sustain Pedal Portament Sostenuto Pedal Soft Pedal Hold 2 Sustain Level Reso...

Page 81: ......

Page 82: ...CN42 Owner s Manual KPSZ 0281 816461 OW1012E S0812 Version 1 Printed in Indonesia Copyright 2008 KAWAI Musical Instruments Mfg Co Ltd All Rights Reserved...

Reviews: