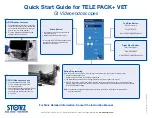
GI Videoendoscopes
Quick Start Guide for TELE PACK+ VET
For More Detailed Information, Consult the Instruction Manual
KARL STORZ SE & Co. KG, Dr.-Karl-Storz-Straße 34, 78532 Tuttlingen/Deutschland,
www.karlstorz.com
96181088
V
E
T
1
1.
0
12/
2022/
C
S
-E
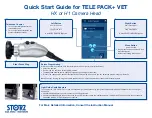
HD GI Videoendoscopes
• Plug videoscope into front of unit (only
touch the light cable by the handle and
never pull on the cable), with the light
post in the 12 o‘clock position
• Plug the integrated videoendoscope
adaptor into the X-line port
Menu Button*
• Short press to open on-screen Quick
Menu Navigation
•
Select
via pressing Menu/Lower
* In the case of CCD GI Videoendoscopes,
the menu button and top blue button
functions are reversed
Right Black Button
Short Press Right:
__________________
Long Press Right:
__________________
& Scroll Down in Menu Navigation
Top Blue Button
Short Press Left:
__________________
Long Press Left:
__________________
& Scroll Up in Menu Navigation
CCD GI Videoendoscopes
• Plug videoendoscope into front
of unit, with the light post in the
12 o‘clock position
• Attach videoendoscope adaptor TC013
to the videoendoscope lightsource
connector and the adaptor into the
X-line port.
Button Programming
While the camera is connected, click the Information Area (top right corner of Main Screen)
• Select the Videoendoscope
• Review how the camera is currently programmed
• The
Gear Icon
enables user to change programming (lower right of the menu)
• While in the change mode each button function becomes a drop down where you can adjust the
programming to preference. Please note that it is not possible to change the camera button settings
for all GI videoendoscopes.
Note:
The steps for programming the camera buttons is similar to other flexible videoscopes
and camera heads.


