For Technical Support Call: 800-343-7486 Monday-Friday 7AM - 4 PM (PST)
Page 4
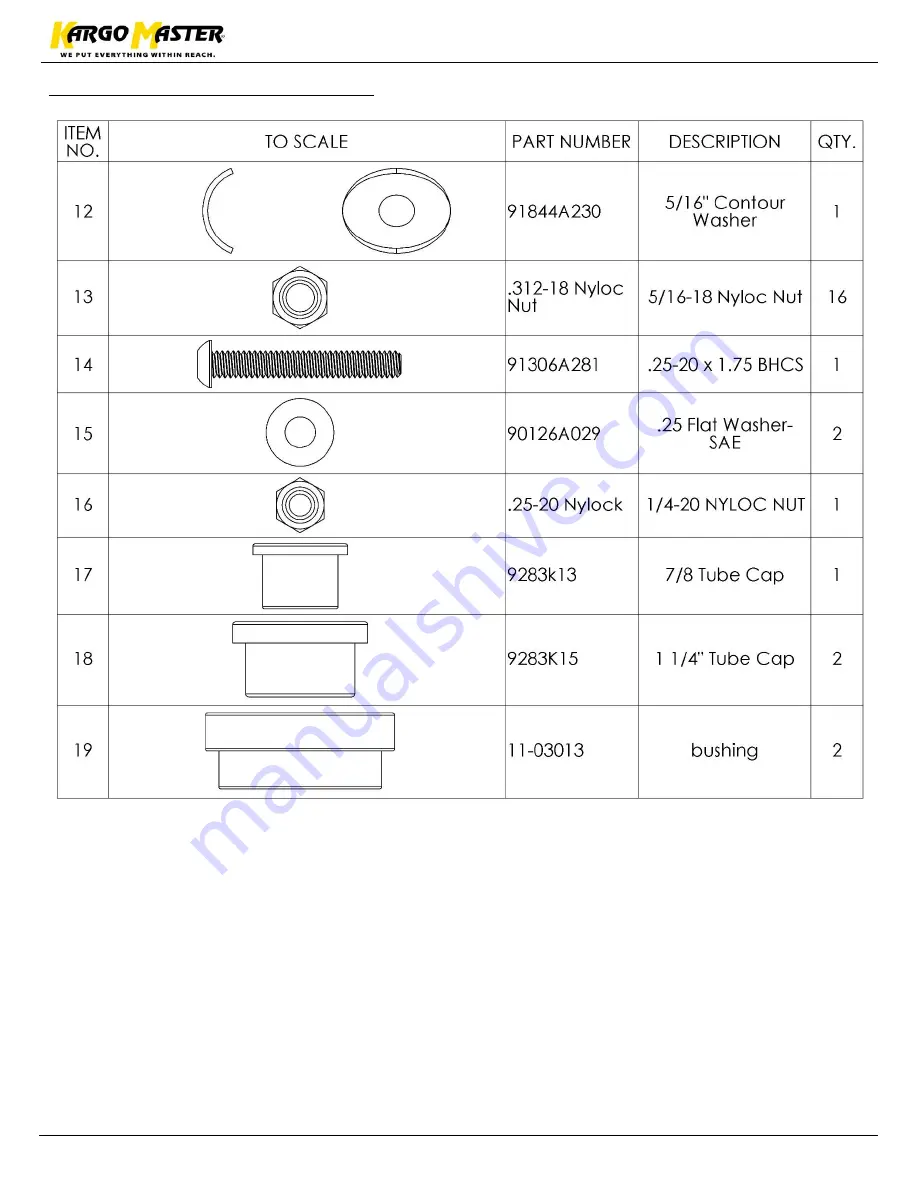
Instructions
–
4A873
Assembly Hardware
(con’t)
Page 1: ...Instruction Guide 4A873 Kargo Master Rancho Cordova CA 95742 800 343 7486 CustomerService KargoMaster com DATE ______________...
Page 2: ...2 Assembly Hardware 3 4 Install Hardware 5 Roof Rail Mounting Promaster City 6 NV200 City Express 7 Transit Connect 8 Rack Assembly Step 1 Assembly of Foot 9 Step 2 Ladder Stops 9 Step 3 Mount to Rail...
Page 3: ...For Technical Support Call 800 343 7486 Monday Friday 7AM 4 PM PST Page 2 Instructions 4A873 Parts...
Page 4: ...For Technical Support Call 800 343 7486 Monday Friday 7AM 4 PM PST Page 3 Instructions 4A873 Assembly Hardware...
Page 5: ...For Technical Support Call 800 343 7486 Monday Friday 7AM 4 PM PST Page 4 Instructions 4A873 Assembly Hardware con t...
Page 6: ...For Technical Support Call 800 343 7486 Monday Friday 7AM 4 PM PST Page 5 Instructions 4A873 Installation Hardware...
Page 7: ...y Installation Locate 6 mounting locations shown on roof of van Install Top Rail as shown using M6x20mm bolts with lock washers and flat washers Be sure to put rubber washer between the Top Rail and t...
Page 8: ...cate 4 mounting locations shown on roof of van Install Top Rail as shown using M8x25mm bolts with lock washers and flat washers Mount rail so there is about 1 from the rear door opening Be sure to put...
Page 9: ...on roof of van Be sure to put rubber washer between the Top Rail and the roof to ensure sealing Mount rail so there is about 1 from the rear door opening Install Top Rail as shown using M8x25mm bolts...
Page 10: ...ots that correspond to the measured distance between rails Bolt feet to bows as shown DO NOT TIGHTEN at this point Feet can be installed as shown or reverse depending on how you mounted the rail Use a...
Page 11: ...nt to Rails Place both bows on top of installed rails Have the ladder hooks on the driver side of vehicle Snug Tighten but allow movement Step 4 Assemble Side Tube Bolt side bar to side support bar us...
Page 12: ...e tube on top of installed bows Have the bend towards the front of the vehicle as shown Mount rotation bar plate to tube as shown Leave one square slot open at the rear Bolt together using 5 16 x 1 75...
Page 13: ...4A873 Step 6 Clamp Tube Place clamp and lock L bracket on top of installed bows Insert plastic bushings into the clamp and lock L bracket and the rotation bar plate installed in Step 5 with flange tow...
Page 14: ...cket to bows using 3 8 x 1 carriage bolt 3 8 flat washer and a 3 8 nylock as shown This view shown without clamp tube TIGHTEN Step 7 Handle Bolt handle to clamp tube using a 5 16 x 2 75 hex head two 5...
Page 15: ...of the mount tube that was installed in Step 5 using 5 16 x 1 75 carriage bolt 5 16 curved washer and a 5 16 nylock TIGHTEN Step 9 Ladder Hook Bolt ladder hook to the clamp tube in the orientation sho...
Page 16: ...at washer and a 3 8 nylock Snug Tighten but allow movement Final location will be determined once ladder is placed on rack Step 11 Ladder Hook Bracket to Bow Bolt ladder hook bracket to the bow in the...