background image

14 

English

The scope of delivery of your appliance is il-
lustrated on the packaging. Check the con-
tents of the appliance for completeness 
when unpacking.
In the event of missing accessories or any 
transport damage, please contact your 
dealer.

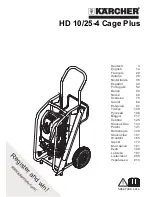
Illustrations on Page 2

1 High pressure connection
2 Appliance switch "0/OFF“/ „I/ON“
3 Storage for high-pressure hose
4 Transport handle
5 Storage for spray lance
6 Garden hose connector (female)
7 Water inlet connector
8 Water inlet (with water inlet filter)
9 Suction hose for detergent
10 Detergent Tank
11 Storage for trigger gun
12 Mains cable with mains plug
13 Bearing wheel
14 Trigger gun
15 Lock trigger gun
16 Clamp for high pressure hose
17 High pressure hose
18 Spray lance with Dirtblaster
19 Spray lance with pressure regulation 

(Vario Power)

20 Washing brush
21 Protective gloves
22 Safety goggles

Special accessories expand the possibili-
ties of using your appliance. Please contact 
your KÄRCHER dealer for further informa-
tion.

Mount loose parts delivered with appliance 
prior to start-up.

Illustrations on Page 2

Illustration 

Insert the transport handle.

Illustration 

Insert holder for trigger gun.

Illustration 

Insert the transport wheels and lock them.

Attach the wheel caps.

Illustration 

Pull out the clamp for the high-pressure 
hose from the trigger gun (e.g. with a 
small screwdriver).

Illustration 

Connect high pressure hose to trigger 
gun.

Push the clamp in until it locks. Check 
the secure connection by pulling on the 
high-pressure hose.

Note:

 Impurities in the water can damage 

the high-pressure pump and accessories. 
For protection, the use of the KÄRCHER 
water filter (optional accessory, order no. 
4.730-059) is recommended.

Observe regulations of water supplier.
For connection values, see type plate/tech-
nical data.

Caution

Garden hose (not included) must be at 
least 1/2 inch or 5/8 inch in diameter, mini-
mum length 7.5 m.

Illustration 

1 Screw the supplied coupling element to 

unit’s water inlet.

2 Screw the supplied garden hose con-

nector on to the end of your garden 
hose.

3 Push the garden hose connector on to 

the water inlet connector and make 
sure you hear it click into place before 
proceeding.

Connect garden hose to the cold water 
source and turn water on completely.

Operation

Scope of delivery

Description of the Appliance

Special accessories

Before Startup

Water supply

Water supply from mains

Summary of Contents for K 2.360

Page 1: ...Espa ol 3 English 11 Fran ais 19 K 2 360 59646550 04 12 CONSUMO DE ENERGIA 1 En Operaci n 1 460 kWh 2 En Modo de Espera N A Modelo K 2 360...

Page 2: ...2...

Page 3: ...r lesiones leves o da os materiales Los materiales de embalaje son reci clables Por favor no tire el embalaje a la basura dom stica en vez de ello en tr guelo en los puntos oficiales de recogida para...

Page 4: ...ad de los neu m ticos Los neum ticos de veh culo y las v lvulas de neum ticos deteriora dos suponen un peligro mortal Al efec tuar la limpieza aplique el chorro a una distancia m nima de 30 cm Peligro...

Page 5: ...n el ctrica que haya sido realizada por un electricista de confor midad con la norma CEI 60364 Conecte el aparato nicamente a co rriente alterna La tensi n tiene que co rresponder a la indicada en la...

Page 6: ...ER le dar informaci n m s detallada Antes de la puesta en marcha montar las piezas sueltas suministradas con el apara to Ilustraciones v ase la p gina 2 Figura Insertar mango de transporte Figura Inse...

Page 7: ...os entre Min y Max Suelte la palanca de la pistola pulveri zadora manual Girar la lanza dosificadora a la posici n deseada Para las suciedades m s dif ciles de elimi nar Precauci n No limpiar neum tic...

Page 8: ...aparato por el asa de transpor te Vaciar el dep sito de detergente Asegurar el aparato para evitar que se deslice o vuelque Precauci n Para evitar accidentes o lesiones tener en cuenta el peso del apa...

Page 9: ...imentaci n Comprobar si el cable de conexi n a la red presenta da os Comprobar el ajuste de la lanza dosifi cadora Purgar el aparato conectar el aparato sin conectar la manguera de alta pre si n y esp...

Page 10: ...te 13 A Grado de protecci n IP X5 Clase de protecci n II Conexi n de agua Temperatura de entrada m x 40 C Presi n de entrada 0 2 1 2 MPa Velocidad de alimentaci n m n 6 l min Potencia y rendimiento Pr...

Page 11: ...damage to property The packaging material can be recy cled Please do not place the packag ing into the ordinary refuse for disposal but arrange for the proper recycling Old appliances contain valuable...

Page 12: ...olvents or undiluted acids and solvents This in cludes petrol paint thinner and heating oil The spray mist thus generated is highly inflammable explosive and poi sonous Do not use acetone undiluted ac...

Page 13: ...For safety reasons we recommend that you operate the appliance only via a earth leakage circuit breaker max 30 mA Cleaning operations which produce oily waste water e g engine washes un derbody washes...

Page 14: ...Insert the transport handle Illustration Insert holder for trigger gun Illustration Insert the transport wheels and lock them Attach the wheel caps Illustration Pull out the clamp for the high pressu...

Page 15: ...Car tyres paint or sensitive surfaces such as wood should not be cleaned with the dirt blaster as there is a risk of damage Not suitable for use with detergents Suitable for use with detergents Please...

Page 16: ...g over Caution In order to prevent accidents or injuries keep in mind the weight of the appliance when selecting a storage location for it see Specifications Prior to extended storage periods as dur i...

Page 17: ...to the volt age of the mains supply Check the mains connection cable for damages Check setting at the spray lance Appliance ventilation Switch the appli ance on with the high pressure hose detached an...

Page 18: ...umption 13 A Protection class IP X5 Protective class II Water connection Max feed temperature 40 C Feed pressure 0 2 1 2 MPa Min feed volume 6 I min Performance data Max permissible pressure 11 1600 M...

Page 19: ...Piezas de repuesto Spare parts Pi ces de rechange...

Page 20: ......

Reviews: