background image

22

1. SYSTEM SETUP
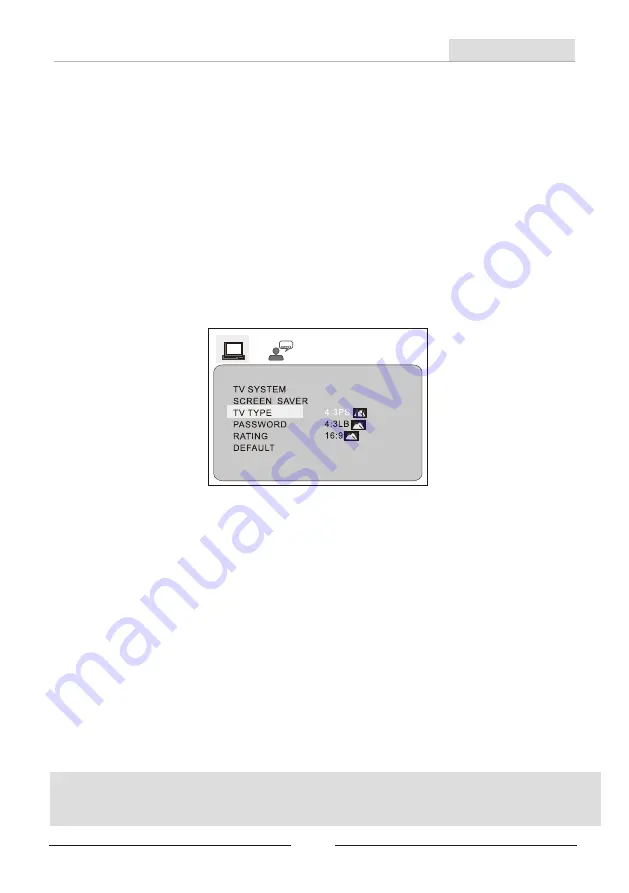
The system setup options are illustrated as below:
 
1.1  TV SYSTEM
Using UP/DOWN arrow button to make a selection for TV system.
There are some TV output systems for choosen: NTSC ,PAL, AUTO.

1.2  SCREEN SAVER
The SCREEN SAVER function is always on; when the machine is in STOP mode,
after few minutes in Open or No disc state, it will appear a DVD logo moving around
the screen.

1.3  TV TYPE
According to the TV type, you can choose 16:9,4:3LB or 4:3 PS.
16:9 : The picture fills the screen of a wide screen TV.
4:3 PS: Pan and Scan, the image is cut in order to fit the whole screen.
4:3 LB: Letter box, two black bands will appear on the upper and lower part
             of the screen.  

1.4  PASSWORD
The password option is initialized locked, and you can not set the ratings limit
or change the password. In order to set the Ratings feature to work, the password
mode must be turned on. If you want to set the rating limit, you will need to 
enter the default password. which is 0000,then press ENTER to confirm. To change
the password, you will be prompted for the old password, then be prompted for a new
one. Enter a 4-digit number ( this is your password). Please remember your PASSWORD,
as the DEFAULT setting will revert everything.

1.5  RATING 
The Rating feature is a rating limit system, like movie ratings. it works with
DVD discs that have been assigned a rating. This helps you control the types
for DVDs that your family watches.

1.6  DEFAULT
The DEFAULT setup options are RESTORE factory setup.
 

The Setup Menu System

Advanced Features

When your machine does not work properly. It may probably result from some wrong
setting. Please try the Restore Factory Setting function to see if the unit can restor 
to its normal working status.

Summary of Contents for GF946

Page 1: ...fore operating this product please read these instructions DVD MP3G CDG KARAOKE BLUETOOTH MEDIA PLAYER Smart Device not included User s Guide MODEL GF946 Smart Device not included EN Espa ol Fran ais...

Page 2: ......

Page 3: ...el Illustration 09 Connecting to a TV Set 10 Smart Device connection 10 Remote Control 11 Remote Control Operation 12 15 How to Play a Disc 16 MP3G Disc and MP3G Format Music Playback 17 Play Bluetoot...

Page 4: ...VICING TO QUALIFIED PERSONNEL This symbol is intended to alert you to the presence of uninsulated dangerous voltage within the unit s enclosure that might be of a sufficient magnitude to constitute a...

Page 5: ...vice this unit yourself Opening or removing covers may expose you to dangerous voltage or other hazards Refer all servicing to a qualified service technician 15 Power Sources Only connect to the type...

Page 6: ...tation of this product It is normal for the cover and rear panel to become warm after the player has been operating for an extended period of time Do not move this product during playing Doing so may...

Page 7: ...ol x 1 Cable for Warranty Card x 1 Disc x 2 User s Guide x 1 04 AC Adaptor x 1 DC12V 2A Smart Device x 1 MP3G Demo GF946 Before operating this product please read these instructions DVD MP3G CDG KARAO...

Page 8: ...Bridge Falling Down 105 London Street 106 Ma She s Making Eyes At Me 107 Mademoiselle From Armentieres 108 Marine s Hymn 109 Michael Row The Boat Ashore 110 Midnight Special The 111 Moonlight Bay 112...

Page 9: ...14 Brahm s Lullaby 15 Bringing In The Sheaves 16 Campanas de Navidad 17 Church in The Wildwood 18 Con Mi Burrito Sabanero 19 Daddy Sang Bass 20 Danny Boy 21 Deck The Halls 22 Ding Dong Que Alegria 23...

Page 10: ...up to 128GB USB Charger for Smart Device Balance Control Digital Key Control Audio and Video Input Audio and Video Output Audio Video RCA Cable 3 5mm to RCA Cable AC 100V 240V Adaptor DC 12V Car Adapt...

Page 11: ...the Recorded Track 8 Navigate UP in the Menu 9 Stop 10 Navigate DOWN in the Menu 11 Play or Pause 13 Enter Select a Menu Item 14 RECORD STOP Record Start Stop 15 Remote Control Infrared Receiver 16 S...

Page 12: ...OL Master Volume Control 8 CD DOOR OPEN BUTTON Open CD door 10 BALANCE Music only music and vocal 12 TONE Adjust the Level of Treble and Bass 09 5 CRADLE Removable Personal Player Cradle for holding S...

Page 13: ...to the machine 3 5mm AUX IN jack then select AUX IN mode on the machine Audio will play on machine speaker You will not see lyrics on the machine s screen from your device Connect your USB charging c...

Page 14: ...ons you must press and enter the relevant DISC SD USB mode NOTES 1 In this Manual the directional symbols are NAVIGATION ARROWS on the Remote Control Remote Control DOWN DISC USB SD SET UP FLAT DISPLA...

Page 15: ...s on your disc or your download file Used for navigation within a selection menu Record your vocal and music to the USB or SD card Note USB or SD card must be inserted before start recording DVD disc...

Page 16: ...e player will review the disc at 2 4 8 20 times and off normal speed as follows Use to specify a track number for playing or programming Press PAUSE during playback to pause Press PLAY to start playin...

Page 17: ...atedly The screen shows as below REP OFF REP REP1 REP REP ALL Press NEXT to skip to next chapter or track Press PREV to skip to previous chapter or track While PROGRAM is on press ENTER to display the...

Page 18: ...Remote Control in an extremly hot or humid place Do not spill water or put anything wet on the Remote Control Remote Control Preparation Battery installation 1 Open the Cover Notes DOWN DISC USB SD SE...

Page 19: ...DG MP3 MP3G and DVD format disc 1 Connect the AC adaptor to the unit 2 Load your disc 3 Close the CD door 4 Turn on the unit switch the machine to DISC USB SD BLUETOOTH mode and select 5 Press PLAY to...

Page 20: ...MP3G Disc and MP3G Format Music Playback 17...

Page 21: ...f they are paired the screen will show Bluetooth Connected and you will hear a beep sound E If they are not paired the screen will show BLUETOOTH NOT CONNECTION F Please repeat Steps 1 2 3 above until...

Page 22: ...shows Play Music Play SD Card and USB Current directory name Current file name Press PLAY or ENTER button The frame shows it is in music mode Press to select the file when the cursor appears in the f...

Page 23: ...er 3 If both a USB stick and SD Card are inserted the recording will always default to the USB stick If a recording is required on the SD Card you must remove the USB stick 4 Sing directly into the to...

Page 24: ...ded File 1 In order to enhance your vocal recording slightly increase the Master Volume level until you can hear your voice more obviously and comfortably 2 The Record function that this machine can p...

Page 25: ...tings limit or change the password In order to set the Ratings feature to work the password mode must be turned on If you want to set the rating limit you will need to enter the default password which...

Page 26: ...e Arrow buttons to choose the subtitle language you prefer Press ENTER to confirm if the disc you are playing has that language it will display subtitles in that language 2 3 MENU LANG Highlight the M...

Page 27: ...P 100 H 264 H 265 video encoder Audio output 2 0 channel output Power output 35W Peak Power Frequency response 150HZ to 15KHZ S N ratio 90 dB Total harmonic distortion 0 0025 Accessories AC Adapter x...

Page 28: ...n recording RCA cable connect in the wrong way Ensure the RCA cable connect to the correct AV input on your TV Wrong setting on your TV Ensure TV setting on the proper channel video 1 channel 1 etc No...

Page 29: ...unction at all wrong format or use too long time Backup your files on your computer and format the USB or SD card AUX IN cable not connected properly Ensure the AUX IN cable connect to the correct RCA...

Page 30: ...facing upwards When any mini size SD Card or TF Card is used firstly insert it to an Adaptor before application Compliant card type SDHC Card SD Card miniSD Card mini SDHC Card microSD Card mircoSDHC...

Page 31: ......

Page 32: ...Printed in China KARAOKE USA 12253 62ND ST N STE B Largo FL 33773 TECH SUPPORT WWW KARAOKEUSA COM CS DOWNLOAD SONGS WWW SINGTHEHITS COM SALES DEPARTMENT SALES KARAOKEUSA COM...

Reviews: