11
The laser unit leaves the factory fully calibrated. Kapro
recommends that the laser pointer be checked regularly
especially if the unit has been dropped or mishandled.
Checking accuracy – Plumb dots
1. Turn the laser pointer ON.
2. Place the unit on a tripod, at approximately 1m above the
floor and 3.5m from the ceiling.
3. Mark the Plumb Up and Plumb Down points on the ceiling
and floor.
4. Rotate the unit 180° and align the Plumb Down point with the
mark on the floor.
5. Mark the Plumb Up point on the ceiling.
6. Measure the distance between the two marks on the
ceiling. If the distance is less than or equal to 3mm, then the
unit is calibrated.
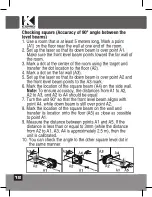
Checking accuracy – Level dots
1. Set-up the unit in a place with two walls, at a distance of
approximately 5m from each other.
2. Set-up the unit between the two walls, at about 0.5m from
one of the walls
3. Mark the position of the laser dot on one of the walls (A1).
4. Rotate the unit 180° and mark this dot on the opposite wall (A2).
5. Move the unit to a distance of about 0.5m from the second wall,
rotate to face the first wall and mark the position of the same
laser dot (B1).
6. Rotate the unit 180° and mark a the position of the dot on the
opposite wall (B2).
7. Measure the differences between vertical positions of the dots:
(A1-B1) and (A2-B2).
Calculate the following difference: (A1-B1) - (A2-B2)
If the difference is less than or equal to ±3mm, then the unit is
calibrated.
8. You can check each level dot in the same manner.
FIELD CALIBRATION TEST
Summary of Contents for PROLASER 896G
Page 15: ...15...

