


INSTRUCTION MANUAL
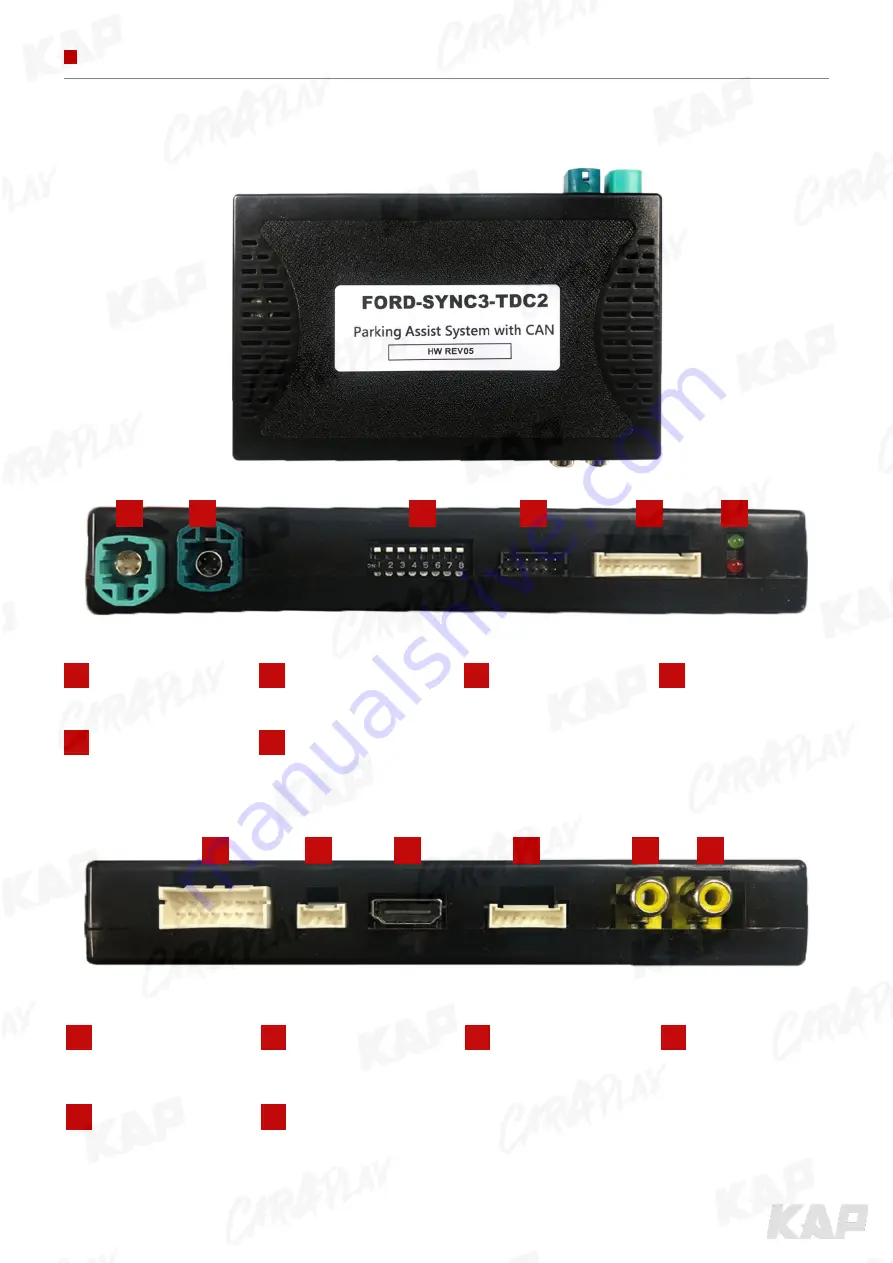
EXTERNAL DEVICE SPECIFICATIONS
3
4
5
6
7
8
9
10
11
12
2
LCD IN
1
LCD OUT
7
POWER/CAN
8
RESISTIVE TOUCH
9
DIGITAL RGB
10
ALNALOG RGB
11
FRONT
12
REAR
Interface error
check
4PIN Touch
FRONT CAMERA IN
DVB-T or DVD IN
REAR CAMERA IN
1
2
4
IMAGE
3
DIP SWITCH
OSD connection
6
LED
5
PROGRAM


