

4. LoggIng Into KdM
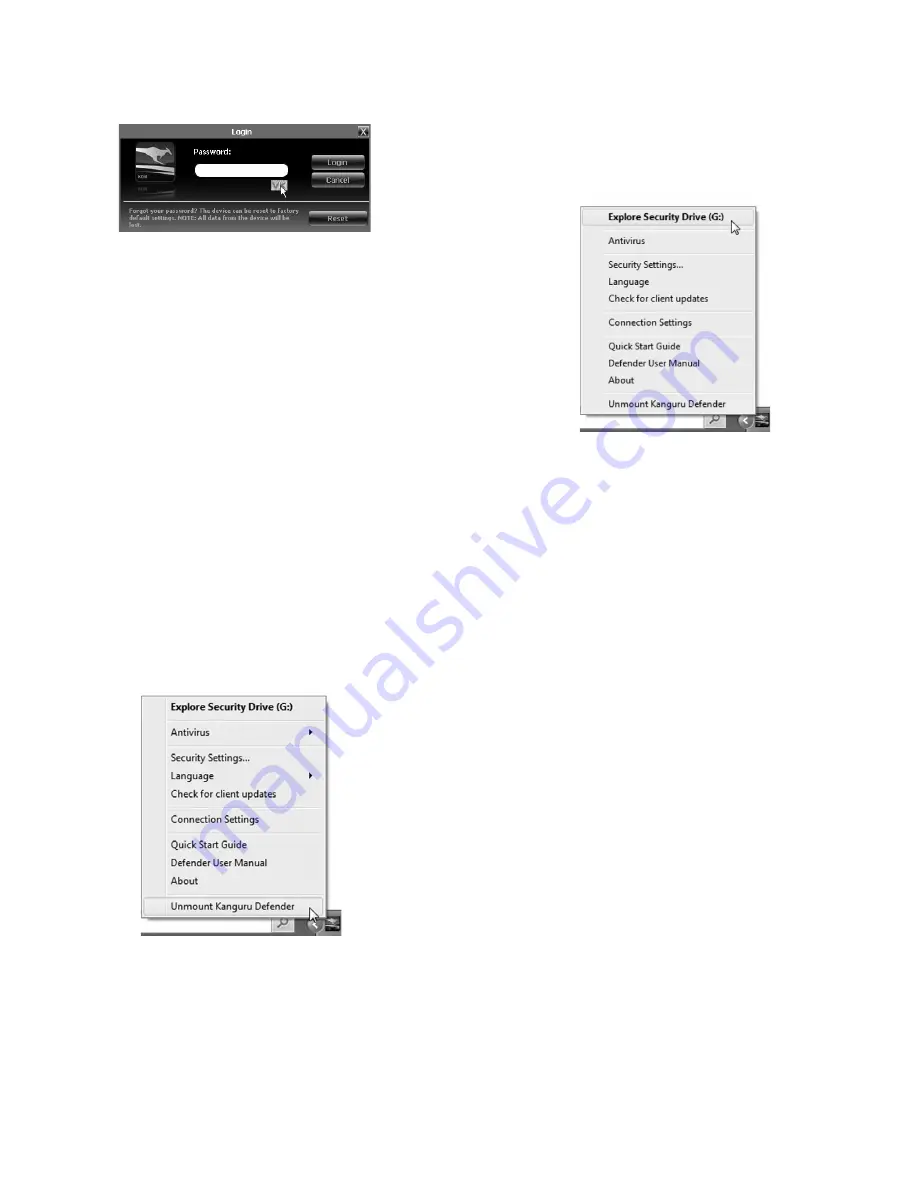
After completing the Setup Wizard, the KDM application will start. For security
reasons, you will be asked to enter your password.
To continue, enter your password and then click on the
Login
button.
note:
Click on the
VK
icon to access the virtual keyboard. The virtual keyboard
is a graphical representation of a standard keyboard layout. You can click on
the keys on the virtual keyboard to enter your password in order to prevent
keylogging software from spying your login password.
Once KDM has confirmed your login password, it will mount the secure
partition. You can now access the secure partition as you would a standard
removable drive.
caution!
If you exceed the number of allowed incorrect password entries, for
security purposes any data stored on the secure partition will automatically be
erased. You will be issued an on-screen warning when you have one attempt
remaining, to prevent accidental erasure.
5. encryPtIng fILeS and foLderS
A key feature of the Kanguru Defender is Drag & Drop functionality; allowing
you to simply drag files and folders that you want to encrypt onto the drive’s
secure partition using the standard Windows Explorer interface. The Kanguru
Defender automatically encrypts these files.
To open the secure partition, simply click on the KDM taskbar icon and select
explore Security drive
.
Alternatively, you can access the private partition through My Computer or
Windows Explorer. The secure partition will be labeled SECURITY once it is
unlocked.
note:
Files saved on the secure partition of your Kanguru Defender device are
only accessible after you have successfully logged into KDM.
6. reMoVIng your defender
To exit KDM, click on the KDM taskbar icon and select
unmount Kanguru
defender
.
When you exit the application, KDM will lock the SECURITY partition and
your files will become inaccessible until you login with the correct password
again.
warning!
Do not disconnect the Kanguru Defender without first properly
unmounting your device. Doing so may result in file damage or corruption.
note:
After you have umounted the security partition, use the “Safely Remove
Hardware” option from the system tray to disconnect your drive. Otherwise
you risk corrupting the data on your Kanguru Defender.
7. warranty & tecH SuPPort
This product carries a 1-year warranty from the date of purchase. Kanguru
Solutions is not responsible for any damages incurred in the shipping process.
Any claims for loss or damage must be made to the carrier directly. Claims
for shipping errors should be reported to Kanguru Solutions within three (3)
working days or receipt of merchandise.
If you experience any problems using your Kanguru Defender or have any
technical questions regarding any of our products, please call our technical
support department. Our tech support is free and available Monday thru Friday,
9am to 5pm EST.
Call 1-508-376-4245 or
Visit our website at www.Kanguru.com