HDMX42-18G
4.2
Rear Panel
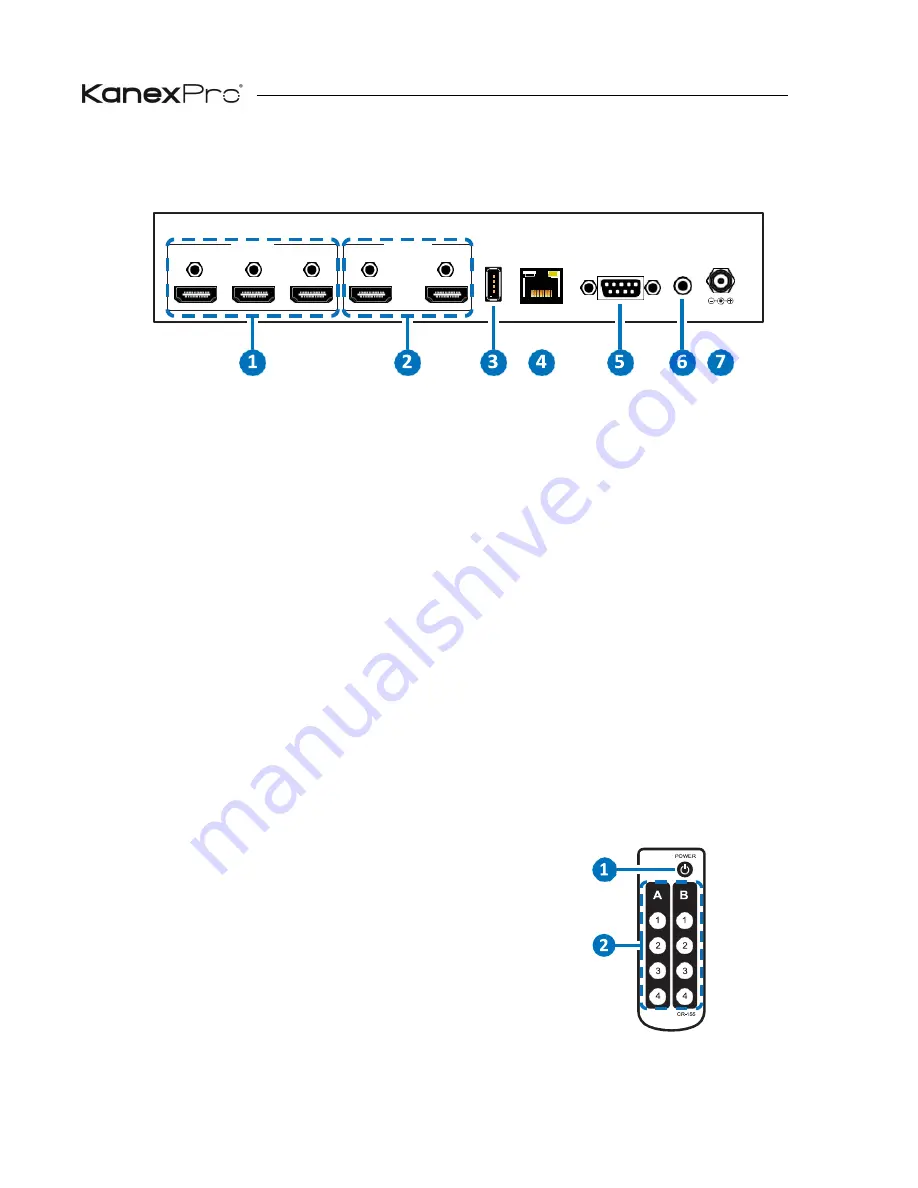
①
HDMI IN 2~4 :
Connect to HDMI source equipment such as a
media player, game console or set-top box. DVI sources are
also supported with the use of an HDMI to DVI adapter.
②
HDMI OUT A~B:
Connect to HDMI TVs, monitors or amplifiers
for digital video and audio output. DVI displays are also
supported with the use of an HDMI to DVI adapter.
③
ERVICE:
This slot (USB 2.0) is reserved for firmware update use
only.
④
ONTROL:
Connect directly, or through a network switch, to
your PC/laptop to control the unit via Telnet/WebGUI.
⑤
RS-232:
Connect directly to your PC/laptop to send RS-
232 commands to control the unit.
⑥
IR IN:
Connect to the provided IR Extender to extend the IR control
range of the unit. Ensure that the remote being used is within direct
line-of-sight of the IR Extender.
⑦
DC 5V:
Plug the 5V DC power adapter into the unit and connect
it to an AC wall outlet for power.
4.3
Remote Control
①
POWER:
Press this button to power on the unit or
place it into stand-by mode.
②
A1~A4 & B1~B4:
Press these buttons to change
the routing of outputs A & B.
4
HDMI IN
3
HDMI OUT
SERVICE CONTROL
RS-232
IR IN DC 5V
2
4
A
B
Summary of Contents for HDMX42-18G
Page 2: ......
Page 6: ...HDMX42 18G 1 ...


