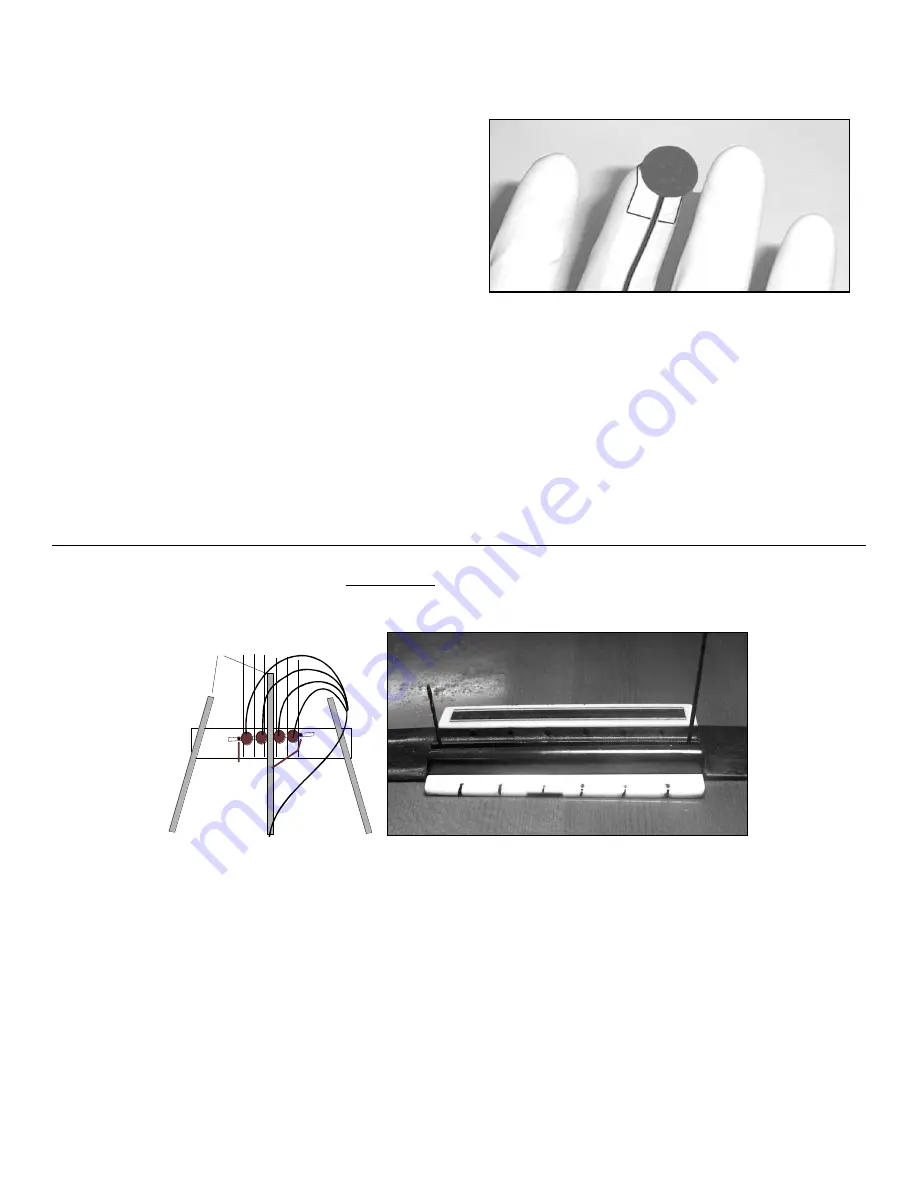
If using super glue
: Find out which hand you are
going to use for the installation and put on a latex
glove or one of the included finger cots.
Use some of the supplied double-sided adhesive tape
and stick a small piece to the tip of your index or
middle finger (whichever you use, see photo) and
stick the pickup to it. The golden side of the pickup is
facing up. This makes holding onto the pickup and
aiming a lot easier as you do not have to deal with
holding the cable.
IMPORTANT! The entire golden surface of the pickups should be covered with glue!
Spread a THIN
layer all over the golden side. Do not use just a drop in the center, as this will not distribute evenly.
Please do not worry or hurry; the glue will not dry immediately after it is applied to the pickup. You will
have sufficient time without rushing things. The superglue gel even allows for a very short
repositioning time after the pickup is in contact with the wood. Excess glue will ooze out at the edges
and eventually dry - that’s fine. Hold and press the pickup firmly in place for about 30 seconds at its
final location.
The four pickup heads are identical, they are all full range transducers. It does not matter in which
position you install any of the pickups.
5. INSTALLATION ON A GUITAR WITHOUT A BRIDGE REINFORCEMENT STRIP
•
Please inspect the bridge area inside the guitar with a mirror and a flashlight to make sure that
there is enough room for all 4 pickups. Usually there will be 5 fan braces with more than enough room
in between.
•
Drill two very small reference holes in each end of the saddle-slot, outside the e strings (see
pictures above). Use the smallest drill bit you can find I.E. 1/32” or 1mm.
•
Stick the drill bit (or pieces of an old low e-string or a small nail) through the reference holes so
that they extend at least
½
” inside the guitar.
•
Please practice the installation of each individual pickup before you use glue or tape!
bracing
REFRERENCE
HOLES


