6
Outils et matériaux nécessaires
Necessary Tools and Materials
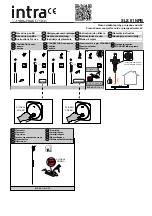
Step 1 - Frame Assembly
Note:
the
side jambs
are factory-assembled to the
wall jambs
;
remove the protective film and pull the wall jambs out of the
side jambs.
Screw the
side jambs
to the
header and bottom tracks
using
the
metal screws
provided (fig. 1, fig. 1.1 and fig. 1.2).
Perceuse électrique
Tournevis Phillips
Crayon
Ruban à mesurer
Mèche 5mm (7/32”) (mur de
céramique)
et/ou mèche 3mm (3/32”)
Niveau
Lime à métal
Couteau utilitaire
Calfeutrant clair au silicone
Electric drill
Phillips screwdriver
Pencil
Measuring tape
5mm (7/32”) drill bit (ceramic
wall)
and/or 3mm (3/32”) drill bit
Level
File
Utility knife
Clear silicone caulking
20 2
8
2
8
9
2
20
INTÉRIEUR /
INSIDE
8
9
Orientation des rails
Tracks orientation
Fig. 1.1
Fig. 1.2
M4.2 30mm
(1 3/16”)
Fig. 1
Etape 1 - Assemblage du cadre
Note :
les
montants de côté
sont pré-assemblés aux
montants
muraux
; retirer la pellicule protectrice et séparer les
montants
de côté
des
montants muraux
.
Assembler les
montants de côtés
au
rail du haut
et au
rail du
bas
à l’aide des
vis à métal
fournies (fig. 1, fig. 1.1 et fig. 1.2).
Summary of Contents for Nealia Slidex DR1041
Page 18: ...18 Notes...
Page 19: ...19 Notes...


