


9
b. Place the rack shelf on the unit. Determine how far the front panel
should extend beyond the faceplate, aligning the appropriate holes
with those just exposed when the black screws were removed.
c. Reinstall the three flat-head screws through the rack shelf and
into the aligned screw holes.
d. Slide the front faceplate on.
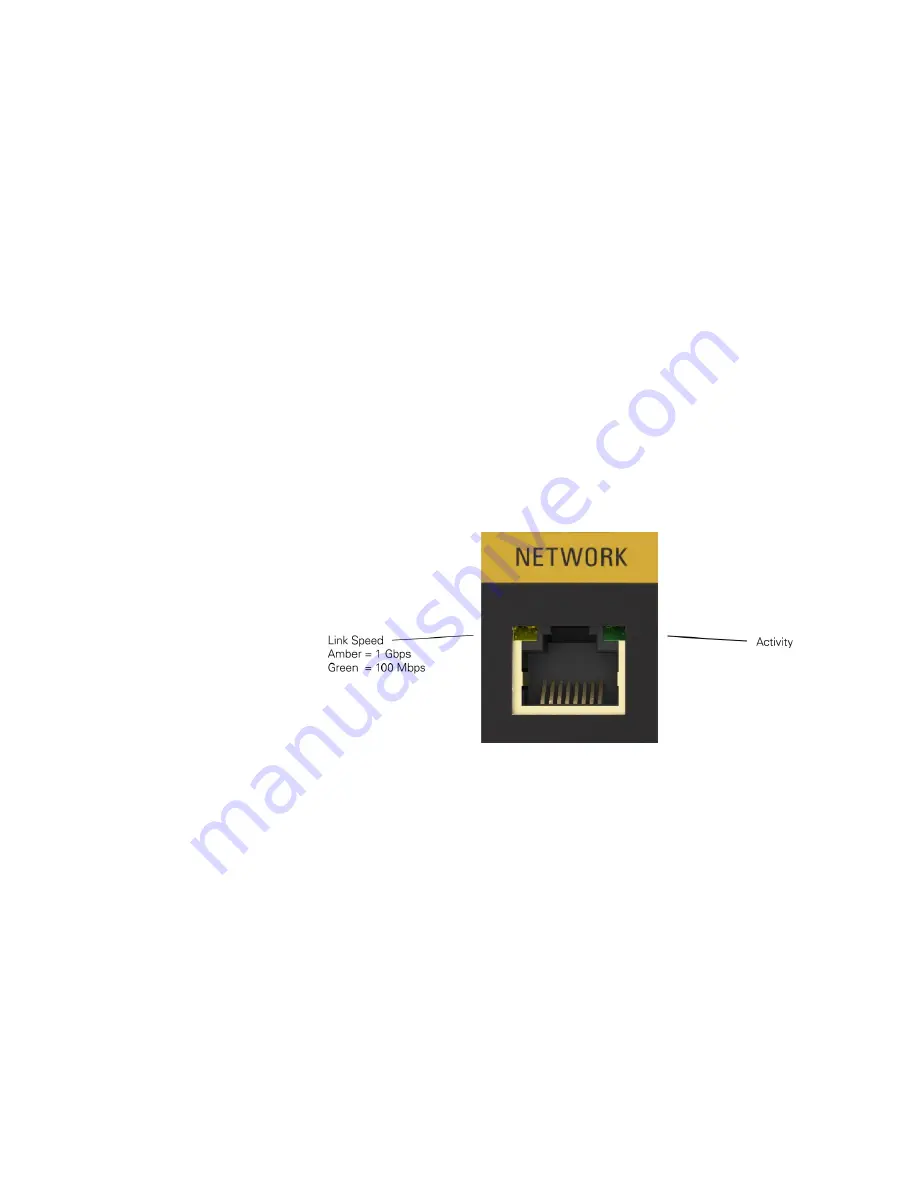
Network Connection
All Kaleidescape components must be connected to the same local
network to be grouped into the same system.
1. Ensure that any Kaleidescape Strato and/or Alto players that will be
grouped with Terra are connected to a wired network and powered on.
Note: Components must use Ethernet to group with a Terra server. Wi-Fi is not
supported when grouping with other components.
2. Insert an Ethernet cable (Cat5e or better) into the network port on the
back of the Terra server.
3. Insert the other end of the Ethernet cable into a 1000Base-T (Gigabit)
Ethernet switch/router.
Note: When Terra is turned on, the left network port light will illuminate to indicate
a successful network connection. It must be amber, indicating the connection is
1000Base-T. The light on the right blinks when there is network activity.
4. Connect power.
5. Turn on the Terra Server using the power button (see Front Panel
Buttons). The Kaleidescape logo will illuminate white. Initialization may take
several minutes.


