background image

B Mode Ultrasonic Scanner

User’s Manual V1.00

- 19 -

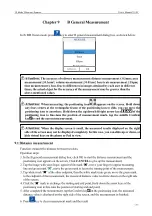
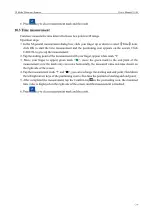
8.8 Play back and Measurement

Play back

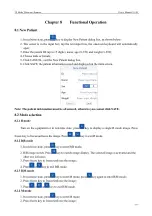
In real-time state, the system is always saving the scanning image. The playback images are for a

period time images before freeze.

Freeze image, press

key to enter the automatic playback status, and then press

key to return

to manual playback status, press

keys to choose the image needed playback. Press

key

unfreeze and exit playback status.

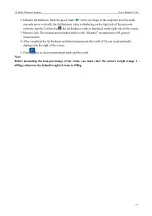
Playback measurement

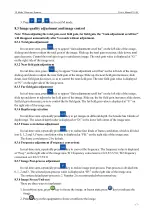
In manual playback status, choose measured image and perform measurement, the detail

measurement method refers to corresponding chapters. Press

key again to unfreeze and exit

playback status.

Note: If the images appear abnormal, that is without enough storage time and the images

have not been stored full.

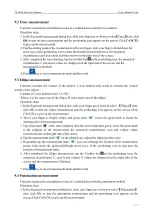
8.9 Notes

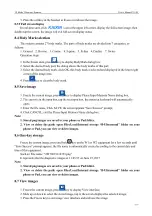
1. In the frozen state, press

key, this key is highlighted in green;

2. Tap the image area where need to be annotated, the cursor “|” appears on the screen and the

onscreen keyboard will automatically open;

3. After entering the annotations, move the cursor position to make multiple notes;

4. If you want to modify the contents during the note, move the cursor “|” to the character need to be

modified, delete the character or re-enter it;

5. Press

key again to complete the note entry;

6. Press

key to clear the notes;

7. Press

key to unfreeze and clear the screen.

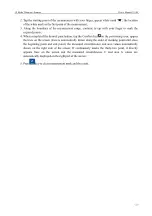
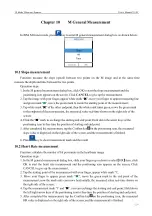
8.10 Arrow mark

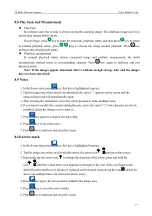
1. In the frozen state, press

key, this key is highlighted in green;

2. Tap the image area where need to add the arrow, the arrow icon

appears on the screen;

3. Repeatedly tap the arrow icon

to change the direction of the arrow; press and hold the

icon

until the virtual arrow icon appears on the right of the icon, slide your finger to the

desired location and leave it, the arrow is placed on the desired location; tap the icon

, delete the

arrow; tap multiple times can enter more arrow icons;

4. Press

key again, the arrow mark is added to the image area;

5. Press

key to clear the arrow marks;

6. Press

key to unfreeze and clear the screen.

Summary of Contents for W1

Page 1: ...KAIXIN W1 W2 B Mode Ultrasonic Scanner Vet User s Manual Xuzhou Kaixin Electronic Instrument Co Ltd...

Page 2: ...en permission of Kaixin Statement Kaixin has the final explanation right of this user s manual Kaixin was considered responsible for the safety reliability and performance in case of meeting all the f...

Page 3: ...ny case Kaixin shall not be liable for the problems damages or losses due to re installation alteration or repair the system by non Kaixin designated personnel 5 This product is intended to provide cl...

Page 4: ...danger or unexpected use condition that may result in light injury or property loss or affecting the use if not avoided 2 Safety Symbols Symbols Meaning Symbols Meaning Type B applied part Up Power s...

Page 5: ...6 1 Preparation before use 12 6 2 Turn on off the equipment 12 6 3 Getting Started 13 6 4 Change the language forAPP 13 Chapter 7 Settings 14 7 1 Enter the company name 14 7 2 Display the gray ruler...

Page 6: ...23 10 3 Time measurement 24 Chapter 11 Obstetric Measurement 25 11 1 Measurement and Calculation items 25 11 2 Obstetric Bovine 25 11 3 Obstetric equine ovine canine feline goat llama and swine 25 11...

Page 7: ...To convert electric signal to ultrasonic signal based on principle of converse piezoelectric effect The ultrasonic signal after entering the human body is reflected as echo wave and converted to elec...

Page 8: ...function 5 Frequency conversion function 6 Image post process function 7 Display full screen image 8 Image freeze unfreeze 9 Patient data input function 10 Auto time display case information and imag...

Page 9: ...B Mode Ultrasonic Scanner User s Manual V1 00 8 Chapter 3 System Configuration 3 1 Typical configuration 1 Main unit W1 or W2 1 unit 2 UltrasonicAPP software 1 PC 3 USB cable 1 PC...

Page 10: ...tic temperature change 8 Poisonous gas 9 Corrosive gas 10 Strong shock 11 Strong electromagnetic field e g MRI 12 Radiation e g X ray CT 13 Defibrillators or short wave therapy equipment Attention The...

Page 11: ...reen display or no working for system operation try to restart the system by turning on off the power 5 4 Charge the equipment Charge the equipment with the included USB charger on the phone Pad or po...

Page 12: ...power outlet 2 If the charger plug shell or power cable has damaged don t continue to use to avoid electric shock or fire 3 If the charger is wet soaked or severe moisture please stops using and cont...

Page 13: ...ons to enter permission interface tap B Ultrasound and open the Storage 3 After finish the operation you can use it 6 2 Turn on off the equipment Turn on the equipment Press and hold the power switch...

Page 14: ...st turn on W1 or W2 equipment and then set up the phone s WLAN After WLAN connection is successful you must wait 5 6 seconds and then open the ultrasoundAPP 2 The network ID of W1 or W2 equipment is t...

Page 15: ...ose the keyboard 4 Click CANCEL exit the Setup dialog box 5 Click SAVE the company name is displayed on the upper left of the main screen 7 2 Display the gray ruler 1 In the Setup dialog box tap the g...

Page 16: ...Channel13 3 Click SAVE and exit the Setup dialog box Note 1 The wireless channel is set to 7 by default If use multiple devices at the same time it is recommended that the number of channels are not...

Page 17: ...u cannot click SAVE 8 2 Mode selection 8 2 1 B mode Turn on the equipment or in real time state press key to display a single B mode image Press freeze key to freeze unfreeze the image Press or key to...

Page 18: ...ncreases slide down far field gain decreases so as to control the far field gain The far field gain value is displayed at F on the right side of the image area 8 3 4 Depth range selection In real time...

Page 19: ...x the onscreen keyboard will automatically open 3 Enter the file name Click SAVE the screen appears Save Success prompt 4 Click CANCEL exit the Please Input Memory Name dialog box Note 1 Stored png im...

Page 20: ...ed the cursor appears on the screen and the onscreen keyboard will automatically open 3 After entering the annotations move the cursor position to make multiple notes 4 If you want to modify the conte...

Page 21: ...r completed the measurement tap the Confirm key on the positioning icon the measured distance value is displayed on the right side of the screen and the measurement is finished 6 Press key to clear me...

Page 22: ...or down to select Ellipse item click OK to start the ellipse measurement and the positioning icon appears on the screen Click CANCEL to give up the measurement 2 Move your finger to display ellipse an...

Page 23: ...nctuation tap the Confirm key on the positioning icon appear the trace on the screen trace is automatically drawn along the order of marking point until close the beginning point and end point the mea...

Page 24: ...nd end point 5 After completed the measurement tap the Confirm key on the positioning icon the measured slope value is displayed on the right side of the screen and the measurement is finished 6 Press...

Page 25: ...ment with your finger appear white mark 3 Move your finger to appear green mark move the green mark to the end point of the measurement now the mark only can move horizontally the measured value real...

Page 26: ...e obstetric measurement and the positioning icon appears on the screen Click CANCEL to give up the measurement 2 The measurement method refers to the Distance measurement of B general measurement 3 Th...

Page 27: ...s value is displayed on the right side of the screen 3 Measure loin The measurement method refers to the Distance measurement of B general measurement 4 After completed the fat thickness and loin meas...

Page 28: ...le water to rinse the remaining chemical on the probe 4 Use a sterilized cloth or gauze to wipe the water on the surface of probe Do not dry the probe by heating it Warning Turn off the equipment befo...

Page 29: ...uld be replaced only by KAIXIN authorized service personnel 12 2 2 The maintenance for the rechargeable battery 1 Battery is consumable the battery cycle life is based on the times of charge and disch...

Page 30: ...terminal directly which will lead to the leakage explosion or fire 9 Do not disassemble the battery in any way which will lead to the leakage explosion or fire 10 Do not charge the battery near the he...

Page 31: ...ether the mobile terminal device is opened the WLAN 2 Check that the mobile terminal device is properly connected to the WLAN Image display is not clear 1 Adjust the total gain near field far field 2...

Page 32: ...f measures have been taken inside the packing case to allow for transport by air railway land and sea The goods shall not be exposed to poor weather conditions like rain and snow nor shall the goods b...

Page 33: ...n Mansion C 01 Economic Development Zone Xuzhou Jiangsu China Post Code 221004 Tel 86 516 87732932 87733758 Fax 86 516 87732932 87792848 Website http www kxele com E mail info kxele com Information co...

Reviews: