background image


1.                12  %      

( !      " !   %). 


2.  € - "       "" "      !      

"  *  (  # %, !,  *        ). 


3.  Q      " , "#      , ,     

 % .         4  %      . 


4.         (  ,   ,      

   #  " ,   ")          
      ,      . 


5.  >    "    "          "  

      ,   ,        #  
" . 


6.  |       *         #       , 

    "     "! "         3-    
„  . 


7.  |     "  "%,  . 


8.  |    #    ,           ", "  

#     " . 

   : 


1.   " , "     "   ! ,   , 

  ! #     ,       !  , 
"      #  #  ,       %  
%    "         "      
%,     ,   "  "       " . 


2.   " ,                !  

 ,   #      . 


3.    ,   "  "#  "  ,  :    

!  ,        , !,      ! ,     
.. 


4.            ,  !        "    ,    *  

    " ,         „—. 


5.   %,  #            ! , "   %   %. 


6.      !    ,    #          % 

   "   "      ", (     )  : , 
*  . .,     #       . 


7.         ,     " "  ,    =%  

%. 


8.  { !    , "         " "-"   -  

   " „  . 


%}$}%#;%X% X|X?j]X'$"% \';\%@*\ [X@%{"$;JX X[$*+#.  

?X"}'X]"@%;J % %*%@ X@'%@*@'%X*@J }$ j`%?| }]X?X'J< " 

*X|*@'%X*@", %*;" ‡@X '+}'$X %*X|;<]%"%# X?#  

j*@$X':" ";" "*[X;J}X'$"%# %"*[?$'X>X X|X?j]X'$"\ 

66 

Summary of Contents for KC

Page 1: ...USER MANUAL GEBRAUCHSANWEISUNG ИНСТРУКЦИЯ ПО ОБСЛУЖИВАНИЮ И ЭКСПЛУАТАЦИИ RU EN DE COOKING HOB VITROCERAMIC KOCHFELD GLASKERAMIK ВСТРАИВАЕМАЯ ВАРОЧНАЯ ПОВЕРХНОСТЬ СТЕКЛОКЕРАМИКА KC KCT 3 5 3 5 ...

Page 2: ... the cooking hob will bring you a lot of pleasure for a long time Our cooking hobs correspond to the main demands of the security hygiene and environment protection according to the directives of the EU which is confirmed with certificates DIN ISO 9001 ISO 1400 according to the norms counting within the frames of the EU they also correspond to the Gosstandart of Russia standards of the CIS which i...

Page 3: ... Bedienungsanleitung entsprechen wird Unsere Kochfelder entsprechen den Hauptforderungen der Sicherheit der Hygiene und des Umweltschutzes laut den Direktiven der EU was mit Zertifikaten DIN ISO 9001 ISO 1400 entsprechend den im Rahmen der EU geltenden Normen bestätigt ist und genauso auch den Anforderungen von Gosstandart in Russland und Standards anderer GUS Länder was durch die Identifikationsz...

Page 4: ...hobs 8 BRIEF DESCRIPTION 10 Location drawing 10 Control panel 14 EQUIPMENT 16 Heating elements 16 USAGE 20 Cooking zones control models KCT 69 20 Cooking zones control models KCT 39 42 Cooking zones control models KC 20 KC 39 KC 69 56 CARE AND ATTENDANCE 58 ENVIROMENTAL COMPATIBILITY 62 ...

Page 5: ...amtansicht 11 Bedienblende 15 AUSSTATUNG 17 Heizelemente 17 BENUTZUNG 21 Kochfeldersteuerung Modelle KCT 69 21 Kochfeldersteuerung Modelle KCT 39 43 Kochfeldersteuerung Modelle KC 20 KC 39 KC 69 57 PFLEGE UND WARTUNG 59 UMWELTVERTRÄGLICHKEIT 63 7 7 9 11 11 15 17 17 21 KCT 69 21 KCT 39 43 KC 20 KC 39 KC 69 57 59 63 ...

Page 6: ...and plugs capable of handling the power specified on the appliance s data plate and capable of resisting heat The power cable should never reach a temperature 50 C above ambient temperature at any point along its length If the appliance is to be connected directly to mains terminals fit a switch with minimum aperture of 3 mm between the contacts Make sure that the switch is of sufficient capacity ...

Page 7: ...d auf dem unter das Gerät angegebene Stromaufnahme und der Betriebstemperatur entspricht Das Kabel darf an keiner Stelle keinesfalls eine Temperatur von über 50 C erreichen Wenn ein direkter Netzanschluss gewünscht wird muss ein allpoliger Schalter mit Kontaktöffnung von min 3 mm vorgesehen werden der erlaubt das Gerät vom Netz zu trennen der den technischen Daten der geltenden Vorschriften entspr...

Page 8: ...tenance according to the laws and standards in force Any of these operations must always be carried out when the appliance has been disconnected from the electric system The appliance can be fitted into a working area as illustrated on the figure Apply the seal supplied over the whole perimeter of the working area 580 510 560 490 45 270 494 288 510 450 40 490 470 510 8 ...

Page 9: ... Instandhaltung gemäß den geltenden Gesetzen und Normen gerichtet Alle Arbeiten sollen nur bei abgeschaltet vom elektrischen Netz Apparat durchgeführt werden Der Apparat ist für den Einbau in eine Arbeitsplatte vorgesehen Siehe Abbildung Auf den ganzen Perimeter der Platte die mitgelieferte Dichtmasse verteilen min 600 min 50 490 min 15 600 9 ...

Page 10: ...EN BRIEF DESCRIPTION LOCATION DRAWING KCT 69 1 Cooking zone 2 Touch control KCT 39 1 Cooking zone 2 Touch control KC 69 Combi 1 Cooking zone 2 Residual heat indicator 1 2 1 1 1 2 1 1 2 10 ...

Page 11: ...11 DE RU KURZBESCHREIBUNG GESAMTANSICHT KCT 69 1 Kochzone 2 Touch control KCT 39 1 Kochzone 3 Touch control KC 69 Abhängig 1 Kochzone 2 Restwärmeanzeige KCT 69 1 2 KCT 39 1 2 KC 69 1 2 ...

Page 12: ...oking zone 2 Indicator Power ON Power OFF 3 Cooking zone knob 4 Residual heat indicator KC 20 1 Cooking zone 2 Indicator Power ON Power OFF 3 Cooking zone knob 4 Residual heat indicator 4 2 1 3 1 1 1 1 4 3 3 2 4 12 ...

Page 13: ...13 DE RU KC 69 1 Kochzone 2 Anzeige Ein Aus 3 Drehregler des Kochzone 4 Restwärmeanzeige KC 20 1 Kochzone 2 Anzeige Ein Aus 3 Drehregler des Kochzone 4 Restwärmeanzeige KC 69 1 2 3 4 KC 20 1 2 3 4 ...

Page 14: ...2 Cooking zone 3 Power display 4 Higher Lower 5 Dual circuit 6 Timer 7 Timer display 8 Control lock key 9 Dual circuit LED 10 Timer LED 11 Lock LED 12 Decimal point KC 69 1 Cooking zone knob 2 Residual heat indicators 3 ON OFF indicator light KC 20 29 1 Cooking zone knob 2 Residual heat indicators 3 ON OFF indicator light 5 3 4 1 1 2 4 10 2 2 5 3 3 7 9 6 11 8 12 3 1 2 3 1 1 1 6 8 9 7 2 3 2 1 1 ...

Page 15: ...Minus Plus 5 Zweikreiskochzone 6 Timer 7 Display für Timer 8 Inbetriebnahme Kindersperre 9 LED zweiter Heizkreis 10 LED Zeitschaltuhr 11 LED Sperre 12 Leuchtpunkt KC 69 1 Drehregler des Kochzone 2 Restwärmeanzeige 3 Kontrolleuchten Ein Aus KC 20 29 1 Drehregler des Kochzone 2 Restwärmeanzeige 3 Kontrolleuchten Ein Aus KCT 69 1 2 3 4 Q 5 U 6 Q 7 Q 8 LED 9 LED KCT 39 1 2 3 Q 4 X 5 Q 6 U 7 Q 8 Y 9 LE...

Page 16: ...zone Ø120 mm 0 7 kW or Ø210 mm 2 1 kW KCT 691 1 Cooking zone Ø145 mm 1 2 kW 2 Dual circuit cooking zone Ø170 mm 1 4 kW or 170x265 mm 2 2 kW 3 Cooking zone Ø145 mm 1 2 kW 4 Dual circuit cooking zone Ø120 mm 0 7 kW or Ø210 mm 2 1 kW KCT 690 1 Cooking zone Ø210 mm 2 1 kW 2 Cooking zone Ø145 mm 1 2 kW 3 Cooking zone Ø180 mm 1 7 kW 4 Cooking zone Ø145 mm 1 2 kW 4 3 2 1 4 3 2 1 4 3 2 1 16 ...

Page 17: ...kW 3 Kochzone Ø145 mm 1 2 kW 4 Zweikreiskochzone Ø120 mm 0 7 kW oder Ø210 mm 2 1 kW KCT 690 1 Kochzone Ø210 mm 2 1 kW 2 Kochzone Ø145 mm 1 2 kW 3 Kochzone Ø180 mm 1 7 kW 4 Kochzone Ø145 mm 1 2 kW KC 692 1 Ø145 mm 1 2 kW 2 Q Ø170 mm 1 4 kW 170x265 mm 2 2 kW 3 Ø145 mm 1 2 kW 4 Q Ø120 mm 0 7 kW Ø210 mm 2 1 kW KCT 691 1 Ø145 mm 1 2 kW 2 Q Ø170 mm 1 4 kW 170x265 mm 2 2 kW 3 Ø145 mm 1 2 kW 4 Q Ø120 mm 0...

Page 18: ...ooking zone Ø180 mm 1 7 kW 3 Cooking zone Ø145 mm 1 2 kW KC 690 1 Cooking zone Ø145 mm 1 2 kW 2 Cooking zone Ø180 mm 1 7 kW 3 Cooking zone Ø145 mm 1 2 kW 4 Cooking zone Ø210 mm 2 1 kW KC 39 KC 20 1 Cooking zone Ø145 mm 1 2 kW 2 Cooking zone Ø180 mm 1 7 kW 3 2 1 4 3 2 1 2 1 18 ...

Page 19: ...mm 1 2 kW 2 Kochzone Ø180 mm 1 7 kW 3 Kochzone Ø145 mm 1 2 kW 4 Kochzone Ø210 mm 2 1 kW KC 39 KC 20 1 Kochzone Ø145 mm 1 2 kW 2 Kochzone Ø180 mm 1 7 kW KCT 39 1 Q Ø120 mm 0 7 kW Ø180 mm 1 7 kW 2 Ø180 mm 1 7 kW 3 Ø145 mm 1 2 kW KC 690 1 Ø145 mm 1 2 kW 2 Ø180 mm 1 7 kW 3 Ø145 mm 1 2 kW 4 Ø210 mm 2 1 kW KC 39 KC 20 1 Ø145 mm 1 2 kW 2 Ø180 mm 1 7 kW ...

Page 20: ...riod of time the electronic control automatically switches back into the stand by mode Should it recognize key activation other than that the control remains in the stand by mode If the child safety feature is active when switching on all cooking zones show L LOCKED also refer to Key lock If the cooking zones are in a hot status the display shows L and H in alternation The control can only be swit...

Page 21: ...tatt geht die Elektronik selbständig wieder in den Stand by Zustand Sollte eine beliebige weitere Taste ebenfalls als betätigt erkannt werden bleibt die Steuerung im Stand by Zustand Sollte zum Zeitpunkt des Einschaltens die Kindersicherung noch aktiv sein wird auf allen Kochzonen ein L wie LOCKED angezeigt siehe auch Verriegelung Falls Kochzonen den Status Heiss besitzen wird das L im Wechsel mit...

Page 22: ...r the selection the cooking zone has been released for 0 3 seconds After selection of a cooking zone the setting can be increased by continously pressing the key 1 starting at step 1 it is increased by 1 step every 0 4 seconds When setting 9 is reached the setting will not be changed further end stop If the selected cooking zone will be switched ON by means of the key the cooking zone starts at th...

Page 23: ...n für 0 3 Sekunden als losgelassen erkant worden sein Nach der Selektion einer Kochzone kann die Koch stufe durch kontinuier liches Drücken der Taste 1 beginnend bei Stufe 1 alle 0 4 Sekunden um 1 Stufe erhöht Nach Erreichen der Kochstufe 9 wird keine weitere Veränderung der Kochstufe vorgenommen Endanschlag Wird nach der Selektion der Kochzone die Kochzone mittels der Taste eingeschaltet so start...

Page 24: ...ooking zone is hot H will be displayed instead of 0 Switching OFF all cooking zones Immediate switching off of all cooking zones can be achieved anytime by means of the ON OFF key 4 In the stand by mode an H appears on all cooking zones which are hot All other cooking zone displays are not illuminated Wattage settings The output of the cooking zones can be set in 9 steps which are indicated by the...

Page 25: ...ne Kochzone den Status Heiss besitzen wird anstelle der 0 ein H angezeigt Ausschalten aller Kochzonen Das sofortige Ausschalten aller Kochzonen ist jeder zeit mit der EIN AUS Taste 4 möglich Im Stand by Zustand erscheint ein H in allen Kochzonen die den Status Heiss besitzen Die anderen Kochzonen anzeigen sind dunkel Leistungsstufen Die Leistung der Kochzonen ist in 9 Stufen einstellbar und wird d...

Page 26: ...n setting If a lower setting will be selected with the key 2 after the A has appeared in the display the automatic heat up function will be interrupted By means of the key 1 a higher continious setting can be chosen here the duration of the heat up boost will be automatically adapted to the actual selected setting When the heat up time is over the selected continious setting will be indicated on t...

Page 27: ... Kochstufe in der Anzeige 3 Wird nach dem Erscheinen des Symbols A mit der Taste 2 noch eine kleinere Fortkochstufe gewählt so wird die Ankochautomatik abgeschaltet Es kann mit der Taste 1 eine höhere Fortkochstufe gewählt werden hierbei wird die Ankochdauer automatisch an die aktuell gewählte Fortkochstufe angepasst Nach Ablauf der Ankochzeit wird die eingestellte Fort Kochstufe angezeigt Restwär...

Page 28: ...he object which has been mistakingly placed onto the operation surface The displays show the failure code E R 0 3 If the failure carries on for more than 10 seconds only the code E R 0 3 will be displayed as long as the failure will be recognized by the electronic control If the cooking zone is in the hot status H will appear on the display in alteration with the failure notice If no cooking zone ...

Page 29: ...abgestellten Gegenstand entfernen kann Auf den Anzeigen wird der Fehlercode E R 0 3 blinkend angezeigt Liegt der Fehler länger als 10 Sekunden an wird nur noch der Fehler E R 0 3 blinkend ausgegeben und zwar so lange wie die Störung als vorhanden erkannt wird Sollte die Kochzone den Status Heiss besitzen wird das H im Wechsel mit der Fehlermeldung ausgegeben Wird nach dem EIN Schalten mittels der ...

Page 30: ...an described above may be operated Otherwise the input will be interrupted because of incompleteness the cooktop will not be locked then The electronic control remains in a locked condition until it gets unlocked even if the control has been switched OFF and ON in the meantime Also a reset of the control after a voltage drop does not cancel the key lock Unlocking for cooking purposes To unlock and...

Page 31: ...alls wird die Eingabe als nicht voll ständig abgebrochen und das Kochfeld ist nicht verriegelt Die Elektronik bleibt bis zur Entriegelung im verriegelten Zustand auch wenn die Steuerung zwischenzeitlich Aus und wieder Eingeschaltet wurde Auch ein Reset nach spannungslosen Zustand der Steuerung hebt die Verriegelung nicht auf Entriegeln zum Kochen Für das Entriegeln und Bereitschalten der Steuerung...

Page 32: ... a cooking zone is hot H will be displayed instead of the static 0 If all steps have been carried out in the right order within 10 seconds the key lock gets cancelled and the control is OFF Otherwise the input will be considered incomplete the control remains locked and switches OFF after 20 seconds Audible signal buzzer While the control is in operation the following activities will be signaled b...

Page 33: ...stelle der statischen 0 das H angezeigt Wenn alle Schritte in der richtigen Reihenfolge und innerhalb von 10 Sekunden durchgeführt wurden ist die Verriegelung aufgehoben und die Steuerung befindet sich im AUS Zustand Ansonsten wird die Eingabe als nicht vollständig interpretiert und die Steuerung bleibt im verriegelten Zustand und schaltet nach 20 Sekunden ab Akustische Rückmeldung Summer Folgende...

Page 34: ...he respective outer circuit of the assigned active cooking zone can be cut off any time An activated outer circuit will be indicated by an additional LED 2 x A renewed operation of the multi circuit key will add the outer circuit s at any time The assigned LED s 2 glow again Timer function optional The timer function is realized in two versions Stand alone timer 1 99 min sound signal when the time...

Page 35: ... entsprechenden Kochzone jederzeit abgeschaltet werden Ein aktivierter Außenkreis wird durch eine zusätzliche LED 2 angezeigt x Das erneute Betätigen der Mehrkreistaste schaltet den die Außenkreis e jederzeit wieder zu Die zugeordneten LED s 2 leuchten wieder Timer Funktion optional Die Timer Funktion ist in zwei Ausführungen realisiert Timer als Kurzzeitwcker 1 99 min akustisches Signal bei Zeita...

Page 36: ...ctivation of the or key results in a dynamic increase of the adjustment speed up to maximum value without sound signal When the or key is released in the meantime the adjustment speed starts again from a low initial value Adjustment can be made with a continously activated or key or by tip operation with sound signal After the timer is set the time runs down according to the adjustment When the ti...

Page 37: ...rhöhung der Verstellgeschwindigkeit bis zu einem Maximalwert ohne Signalton Nach einem zwischen zeitlichen Loslassen der oder Taste beginnt die Verstell geschwindigkeit wieder von einem niedrigen Anfangswert Einstellung erfolgt durch dauernd gedrückt halten der oder Taste oder im Tipp Betrieb mit Signalton Nach der Timer Einstellung beginnt läuft die Zeit ab der zuletzt vorgenommenen Einstellung a...

Page 38: ...d signal x The timer will be switched off by counting down to 0 with the key or by operating the or key together which sets the timer directly to 0 For 6 seconds the timer display remains at 0 before it will be switched off If the control will be switched ON by means of the Power key 3 the stand alone timer will be switched off also 1 2 3 38 ...

Page 39: ...x Abgeschaltet wird der Timer indem man ihn über die Taste auf 0 herabzählt oder indem man über das gemeinsame Betätigen der oder Taste den Timer direkt auf 0 setzt Die Timeranzeige bleibt für 6 Sekunden auf Null stehen bevor dieser abgeschaltet wird Sollte die Steuerung über die EIN AUS 3 eingeschaltet werden wird der Timer ebenfalls abgeschaltet j U 1 2 x 0 0 0 6 3 ...

Page 40: ... any longer When switching over from one cooking zone to another the timer display always shows the present timer value of the respective cooking zone However the programmed timers of other cooking zones remain active The further setting behaviour corresponds to the Timer as countdown tmer For increasing the adjusted time the key 4 of the respective cooking zone has to be used When the timer has r...

Page 41: ...alten von einer Kochzone auf eine andere wird in der Timeranzeige immer der aktuelle Timerwert der jeweiligen Kochzone dargestellt Die durch den Benutzer eingestellten Timer anderer Kochzonen bleiben aber aktiv Das weitere Einstellverhalten entspricht dem Timer als Kurzzeitwcker Zum Erhöhen der eingestellten Zeit muss jedoch die Taste 4 der betroffenen Kochzone verwendet werden Nach Ablauf des Tim...

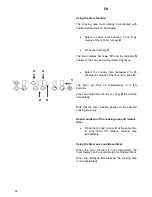
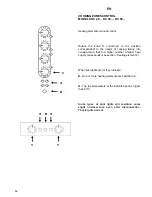
Page 42: ...nctions Accordingly to regulate the power of the hob first select the zone with key 5 then adjust the relative power level using the and keys 6 this done x Select the timer function with key 7 and proceed to set the duration likewise using the or key 6 Switching on the cooking area Once the device has been activated switch on the cooking area within 10 seconds as follows x Press one of the keys 5 ...

Page 43: ...t mit der Taste 5 die betreffende Zone und mit den Tasten und 6 die Leistungsstufe x Dann mit der Taste 7 die Timer Funktion und stellt mit oder 6 die Zeit ein Einschalten der Kochzone Nach dem Einschalten des Gerätes haben Sie 10 Sekunden Zeit eine Kochzone einzuschalten x Dazu wählen Sie durch Berühren einer der Tasten 5 die gewünschte Kochzone aus Auf dem dieser Zone entsprechenden Display 2 er...

Page 44: ...ted with relative decimal point 1 illuminated x To shut down the selected cooking area immediately press the and keys 2 at the same time Residual heat indicator If the temperature of the cooking area is still high and a burn risk still present after it has been switched off the display 3 for the area will indicate the letter H residual heat The letter will only switch off when the burn risk is no ...

Page 45: ...uss auch der entsprechende Leucht punkt 1 leuchten x Zum automatischen Abschalten der gewählten Kochzone berühren Sie nun gleichzeitig die Tasten und 2 Restwärmeanzeige Ist die abgeschaltete Kochzone noch so heiß dass man sich daran verbrennen könnte wird auf dem Display 3 dieser Kochzone das Restwärme Symbol H angezeigt Diese Anzeige erlischt erst wenn die Temperatur auf 60 C gesunken ist Ausscha...

Page 46: ...cuit zone must already be activated with relative decimal point 1 illuminated x Select the required setting 1 9 2 x Press the twin circuit key 3 to switch it on The LED 4 for the selected zone will light up the second circuit will be activated together with the first Switching off the second Circuit The twin circuit zone must already be activated with relative decimal point 1 illuminated x Press t...

Page 47: ...ert sein der entsprechende Leuchtpunkt 1 auf dem Display der betreffenden Kochzone muss also leuchten x Stellen Sie die gewünschten Leistungsstufe ein 1 9 2 x Schalten Sie dann durch Berühren der Zweikreistaste 3 den zweiten Heizkreis zu Die LED 4 der gewählten Kochzone leuchtet auf und es schaltet sich zu dem ersten Heizkreis auch der zweite Heizkreis zu Abschalten des zweiten Heizkreises einer Z...

Page 48: ...ng areas is inadvertently left on the safety system will shut the zones down automatically after a certain time has elapsed after which the letter H will be displayed Automatic preheating This function is designed to facilitate cooking given that the cooking cycle may be carried out without the need for human supervision The function uses maximum power to preheat the cooking area to bring it to th...

Page 49: ...n eine oder mehrere Kochzonen nach dem Benutzen abzuschalten wird dies nach Ablauf der maximalen Einschaltzeit automatisch besorgt In einem solchen Fall erscheint das Symbol H Ankochautomatik Die Ankochautomatik erleichtert das Kochen da Sie nicht die gesamte Kochzeit am Herd stehen müssen Mit dieser Funktion heizt die Kochzone mit maximaler Leistung an und erreicht dadurch schneller die eingestel...

Page 50: ...ill alternate the set power level 6 and the automatic preheating function indicated by the letter A 3 Switching off the automatic preheating Function x To deactivate the preheating function indicated by the letter A on the display press the key 2 At least 10 seconds since the function has been activated Timer function This function too simplifies operation by not requiring human supervision during...

Page 51: ...3 zeigt abwechselnd die eingestellte Heizstufe 6 und das Symbol A für die Ankochautomatik an Ausschalten der Ankochautomatik x Zum Ausschalten der Ankochautomatik Symbol A auf dem Display berühren Sie die Taste 2 Allerdings muss zwischen Ein und Ausschalten mindestens 10 Sekunden Zeit verstreichen Timer Function Auch diese Funktion erleichtert das Kochen da Sie nicht mehr die ganze Zeit am Herd st...

Page 52: ... the and keys 2 The timer will start up automatically in a few seconds Press and hold down the or key 2 to scroll the time setting Note that the timer function applies to the selected cooking area only Rapid shutdown of the cooking area and relative timer x Press the and keys 2 at the same time to shut down the relative cooking area immediately Using the timer as a countdown timer When the timer f...

Page 53: ... sich die Timer Funktion innerhalb von wenigen Sekunden automatisch ein Halten Sie die Taste oder 2 länger gedrückt können Sie die Garzeit ganz schnell einstellen Die Timer funktioniert nur für die gewählte Kochzone Sofortiges Abschalten der Kochzone und der Timer x Zum sofortigen Abschalten der Kochzone berühren Sie gleichzeitig die Tasten und 2 Timer Function als Kurzzeitwcker Wird die Timer fun...

Page 54: ...go out x Press the timer key 3 x Set the time required by means of the and keys 1 Deactivating the minute counter function When the set time has elapsed an acoustic signal is emitted for two minutes x To silence the signal press any key To interrupt the countdown timer proceed as follows x Press the timer key 2 x Press the key to reset the time Rapid deactivation of the minute counter x Press and ...

Page 55: ... nun mit den Tasten und 3 die gewünschte Zeit ein Abschalten der Küchenuhr Funktion Wenn die eingestellte Zeit abgelaufen ist ertönt ein etwa 2 Minuten langes Signal x Zum vorzeitigen Abschalten des Signals drücken Sie einfach irgendeine Taste Zum vorzeitigen Abbrechen der Funktion x Drücken Sei die Zeitschaltuhr Taste 2 x Und setzen dann die Zeit durch Gedrückthalten der Taste auf Null zurück Sof...

Page 56: ...nside ration that to a higher number a higher heat supply corresponds see section Heating elements When pilot lights are lit they indicate 2 One or more heating elements are switched on 3 The top temperature at the indicated spot is higher than 60 C Some types of pilot lights will maintain some slight luminescence even after disconnection That is quite normal 1 3 2 3 2 3 1 1 56 ...

Page 57: ...meversorgung entspricht siehe Kapitel Heizelemente Die Kontrolleuchten zeigen an 2 Dass die ein bzw mehrere Heizelemente eingeschaltet sind 3 Die Temperatur der betreffenden Heizkörper liegt über 60 C Das Fortbestehen eines leichten Nachleuchtens ist bei bestimmten Kontrolleuchten auch nach Abschaltung des Apparats allerdings als normal zu betrachten KC 20 KC 39 KC 69 1 c 2 3 U 60 X X X X X X X X ...

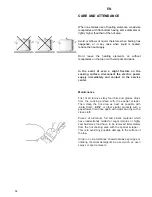
Page 58: ...act to the service center Maintenance First of all remove stray food bits and grease drops from the cooking surface with the special scraper Then clean the hot area as best as possible with Cera Clen Eilfix or other similar products with a papertowel then rinse again with water and dry with a clean cloth Pieces of aluminum foil and plastic material which have inadvertently melted or sugar remains ...

Page 59: ...ich in das Servicezentrum Instandhaltung Vor allem Essensreste und Fettspritzer von der Kochoberfläche mit einem Schaber entfernen Danach die warme Fläche mit Cera Clen oder Eilfix und Küchenpapier säubern dann mit Wasser abwaschen und einem sauberen Lappen trocknen Spuren von Aluminiumfolie Plastikgegenständen Zucker oder stark zuckerhaltigen Speisen müssen sofort von der warmen Kochfläche mit ei...

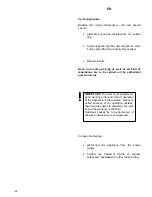
Page 60: ...ed out by authorized personnel only In case of a damage x Disconnect the appliance from the power supply x Contact the Customer Centre or another authorized organisation to order the servicing IMPORTANT The user is responsible for good working order and correct operation of the appliance If the customer service is called because of an operating mistake the servicing costs are carried by the user e...

Page 61: ...ienststelle oder einen autorisierten Installateur durchgeführt werden Bei jeder Störung x Stromversorgung abschalten x Die Notwendigkeit der Reparatur melden Service Center bzw eine andere Organisation die entsprechende Rechte hat X _ X X x x x X X X j X X X X J X X X X XX j _ _ x x WICHTIG Der Benutzer ist für den einwandfreien Zustand des Geräts und die fachgerechte Benutzung verantwortlich Wenn...

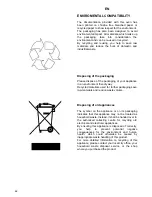
Page 62: ...ly way Recycled materials used for further packaging save raw materials and reduce waste volume Disposing of old appliances The symbol on the appliance or on its packaging indicates that this appliance may not be treated as household waste Instead it shall be handed over to the authorized collecting centre for recycling old electrical and electronic appliances By ensuring this appliance is dispose...

Page 63: ...kführe der Verpackungsmaterialien in den Materialkreislauf spart Rohstoffe und verringert das Müllaufkommen Altgeräte Entsorgung Das Symbol auf dem Produkt oder seiner Verpackung weist darauf hin dass dieses Produkt nicht als normaler Haushaltsabfall zu behandeln ist sondern an einem Sammelpunkt für das Recycling von elektrischen und elektronischen Geräten abgegeben werden muss Durch Ihren Beitrag...

Page 64: ...64 ...

Page 65: ...65 ...

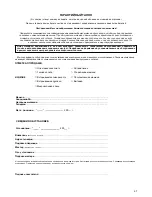
Page 66: ... 1 12 2 3 Q 4 4 5 6 3 7 8 1 2 3 4 5 6 7 8 X X X j X X J X X X X J X X J j X X J X X X X X X j X X J X X X X X j X 66 ...

Page 67: ... Nr Q j X X X X X X j X J X J X X X X X X X j X X X X j X X J X X X J X X_ X X ____ ______________ 200__ X X ____ ______________ 200__ X X J J j X X J X J X j 67 ...

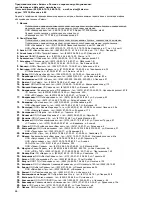
Page 68: ...82 8672 57 44 44 575 222 12 18 4922 30 50 55 60 Q 4922 44 72 80 44 72 81 Y 39 19 X X X 1 8442 23 41 36 23 05 94 58 8442 97 50 10 173 20 X X X 6 06 61 81 21 21 X _ X 1 8443 56 60 22 Q 21 22 X X 8172 24 16 67 X 80 23 X X U 4732 46 31 79 56 74 61 U 91 4732 39 29 45 39 27 50 9 5 24 X 34141 4 07 37 6 25 j 343 335 23 78 334 08 28 335 25 92 Q 31 U 343 212 52 77 55 26 X X 4932 47 29 84 47 23 23 47 29 86 1...

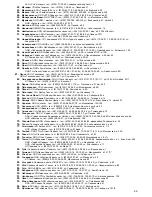
Page 69: ...7933 33 97 97 19 67 X X X j Q 863 2 47 09 55 94 68 J 4912 24 68 54 24 68 53 14 69 846 263 75 75 263 74 74 X 15 307 70 X 8452 27 22 68 52 37 74 X 134 146 71 X X XYU 39042 2 78 18 8 80 72 X _ Y 81842 2 66 17 104 73 X 4812 45 09 70 45 09 69 64 78 00 19 74 X X J U 8652 94 41 13 94 42 13 468 8652 74 04 10 944 764 2 9 8652 38 34 07 180 75 _ X U 4725 44 10 82 24 45 84 24 76 j j U 3462 25 25 63 25 69 70 4...

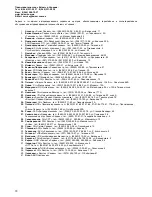
Page 70: ...X_ X 056 440 07 64 73 18 j 0642 588 510 420 842 589 477 136 Y 66Y 19 J X X 032 296 54 13 231 48 83 X 12A 20 j X J 0629 52 92 82 24 53 23 X 94 130 U 7 21 X 0512 55 29 04 177 22 X X J _ 05662 49 141 2 24 88 52 23 1 048 728 21 45 U 7 2 0482 372 192 Y 76 24 X 05632 311 93 3 25 X 0532 57 21 68 57 21 66 57 21 64 776 91 778 61 22 0532 506 789 40Y 26 X X Y 0362 23 53 03 23 52 78 Y 45 27 X X J Q 0692 555 6...

Page 71: ...to be considered necessary or useful without jeopardizing the essential characteristics Die Herstellerfirma übernimmt keinerlei Verantwortung für eventuell in dieser Broschüre enthaltene Ungenauigkeiten die auf Druckfehler zurückzuführen sind und behält sich das Recht vor an ihren Produkten alle für notwendig erachten Änderungen anzubringen ohne die wesentlichen Eigenschaften zu Beeinflussen 71 ...

Page 72: ...cod 1 004 53 0 ...

Reviews: