


EN
6
6
7
2
5
1
3
4
2
9
8
INSTALLATION INSTRUCTIONS
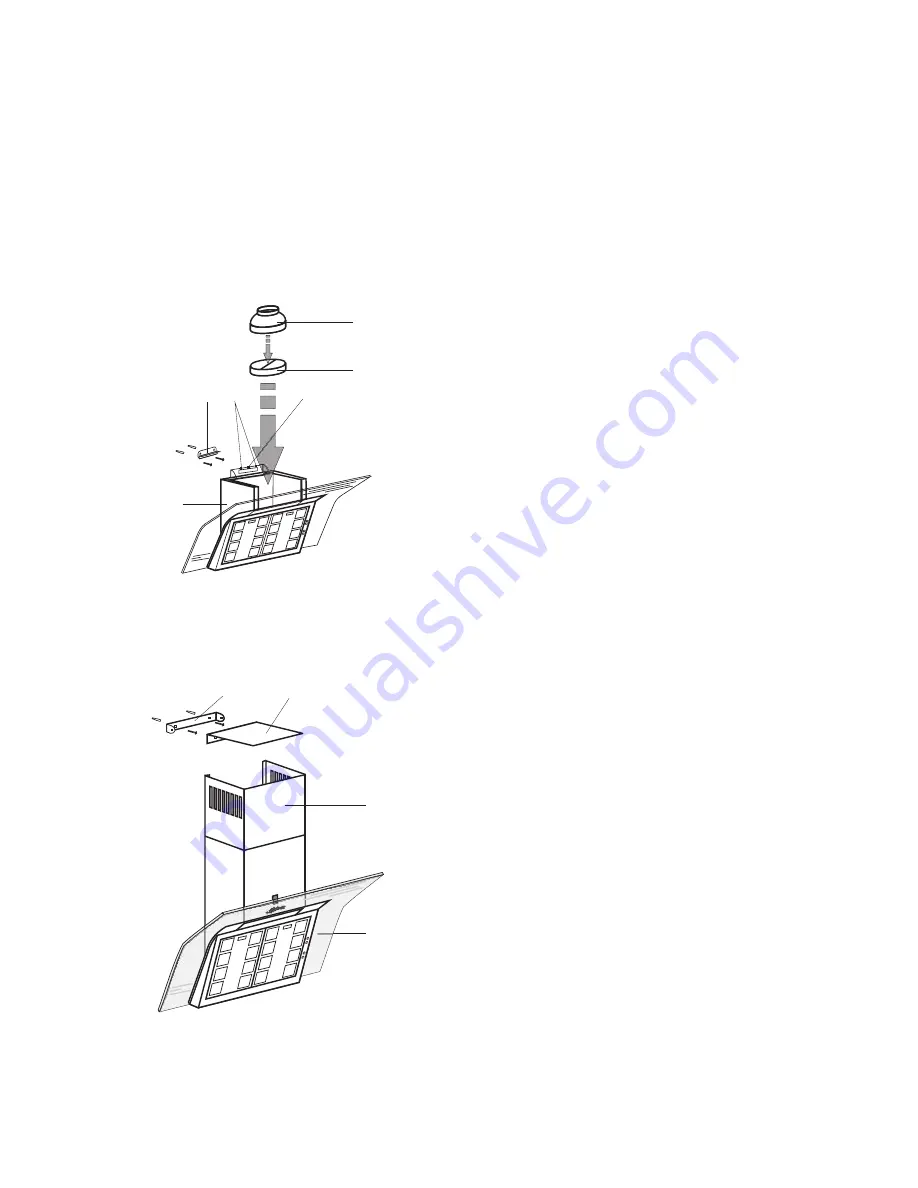
INSTALLATION OF THE WALL HANGER
•
Trace a vertical line on the wall to indicate the
center of the cooker plate.
•
Hold a hood hanger profile
1
to the wall, set it
symmetrically in relation to the central line, with
the distance between the holes in the profile
1
and the cooker plate amounting to min. 1062 mm,
level the profile preliminarily, indicate the spacing
of mounting holes on the wall.
•
Drill the holes as indicated on the wall, using drills
of diameter corresponding to the attached
expansion plugs, drive the plugs in and then
screw the hanger profile to the wall.
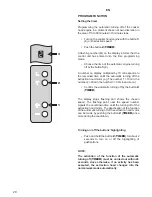
INSTALLATION OF THE HOOD
•
2
1
3
4
.
•
On an exhaust vent establish the V-flap
8
.
•
If the cooker hood will be use in extractor mode it
is necessary to mount a vent conduit of Ø 150 mm
on the fixed V-flap
8
. By connection of a conduit of
Ø 120 mm use an adapter
9
.
•
f the cooker hood will be operate in odour
absorber mode it is necessary to buy and install 1
(
300 × 280 × 10
m
m
)
or 2 charcoal filters
(
230 ×
280 × 10
m
m
)
(see p. 24).
•
5
2
.
•
5
.
•
6
locking cover
7
.
•
.
•
Hang the hood body on the installed hanger ,
level it with adjusting screws and then tighten
the screw preventing the hood from sliding off
the hanger
I
Attach the telescoping column of the masking
cover on the mounted hood
Extend the top masking cover to the required
height, indicate its max. reach on the center line,
remove the cover
Hold the hanger of the top masking cover at the
center line, at a distance of 63 mm from the
indicated point of max. reach, indicate the
mounting holes on the wall and install the hanger.
Install the
if required, using the
same mounting screws
Install the masking cover column again and,
using apprpriate screws, fix it to the bottom
masking cover and the top hanger profile
Connect the hood to the power supply network.


