


SAFETY PRECAUTIONS
01 - ENG
Before using your KB camera please ensure
you read and understand the following
product and safety precautions.
●
DO NOT use the camera in water
without the waterproof case.
●
Always check the waterproof case seal
is clean and free of debris prior to use
in water.
●
DO NOT attempt to open the camera or
modify it in any way. If the camera has
been opened the warranty will be void.
Maintenance and repairs should only be
performed by Kaiser Baas.
●
DO NOT handle or charge the camera
without its waterproof case using wet
hands. Failure to observe this may result
in damage to camera and persons.
●
ONLY recharge the camera battery using
the supplied USB cable.
●
If using a wall charger, ensure that it is
a certified product for your region. AC
Input: 100-240VAC 50/60Hz. DC Output:
5V 1A. Only use a USB wall charger with
suitable approval and certification. Do
not charge in conditions outside of the
10°C - 45°C range. If you do not know
the voltage and current of your charger,
use the included cable to charge from
your computer.
●
The camera should not be used in heat
exceeding 55°C (131°F).
●
DO NOT drop, crush, pierce, bend,
deform, microwave, incinerate or shoot
the camera.
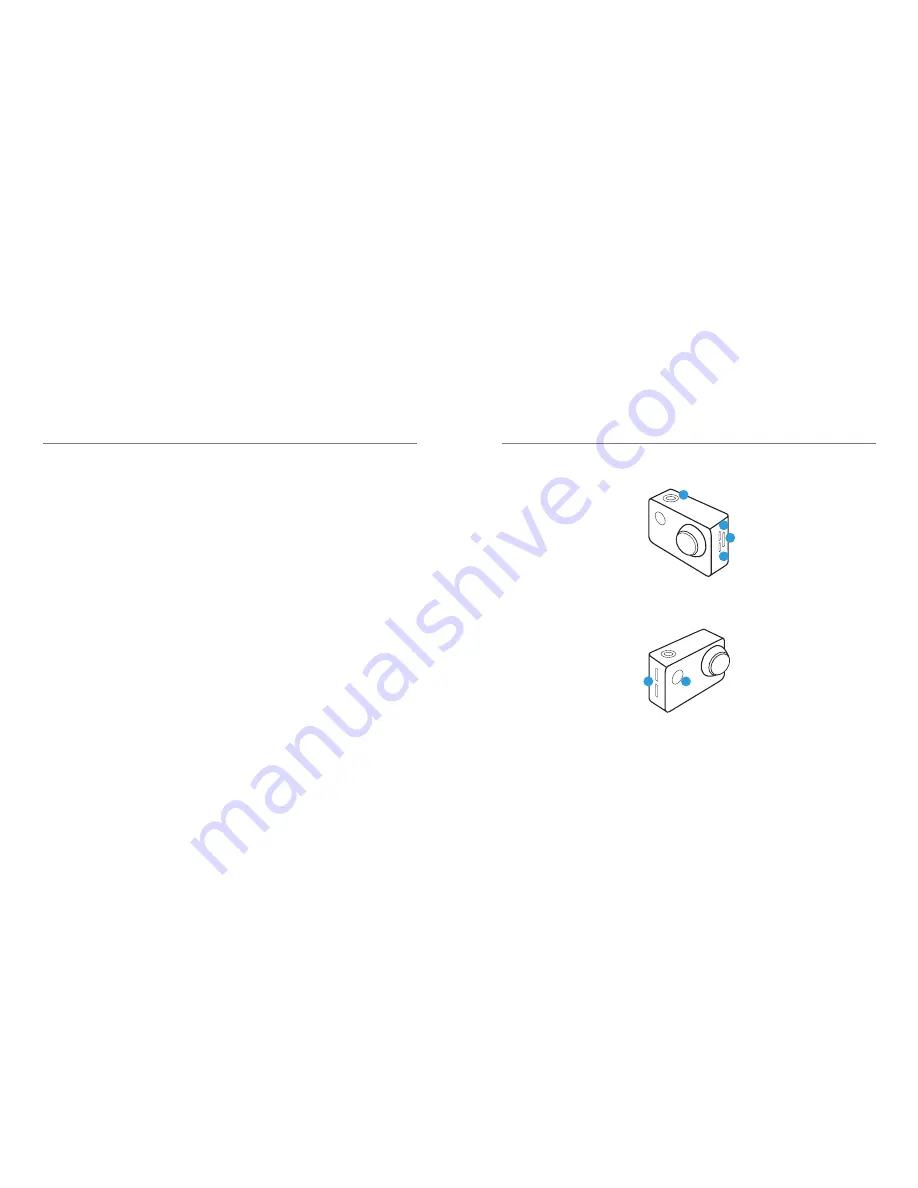
PRODUCT DIAGRAM
02 - ENG
1. Record / OK
START / STOP RECORD
2. Micro USB
CHARGING AND DATA
TRANSFER
3. Micro SD Port
INSERT SD CARD
4. Micro HDMI
CONNECT TO YOUR
SCREEN
5. Scroll Up / Down
NAVIGATE THROUGH THE
CAMERA OPTIONS
6. ON / OFF Mode
TURN THE CAMERA ON
/ OFF
1
2
3
4
5
6


