background image

Ɣ6SHFLDOIXQFWLRQEXWWRQJXLGH

-12-

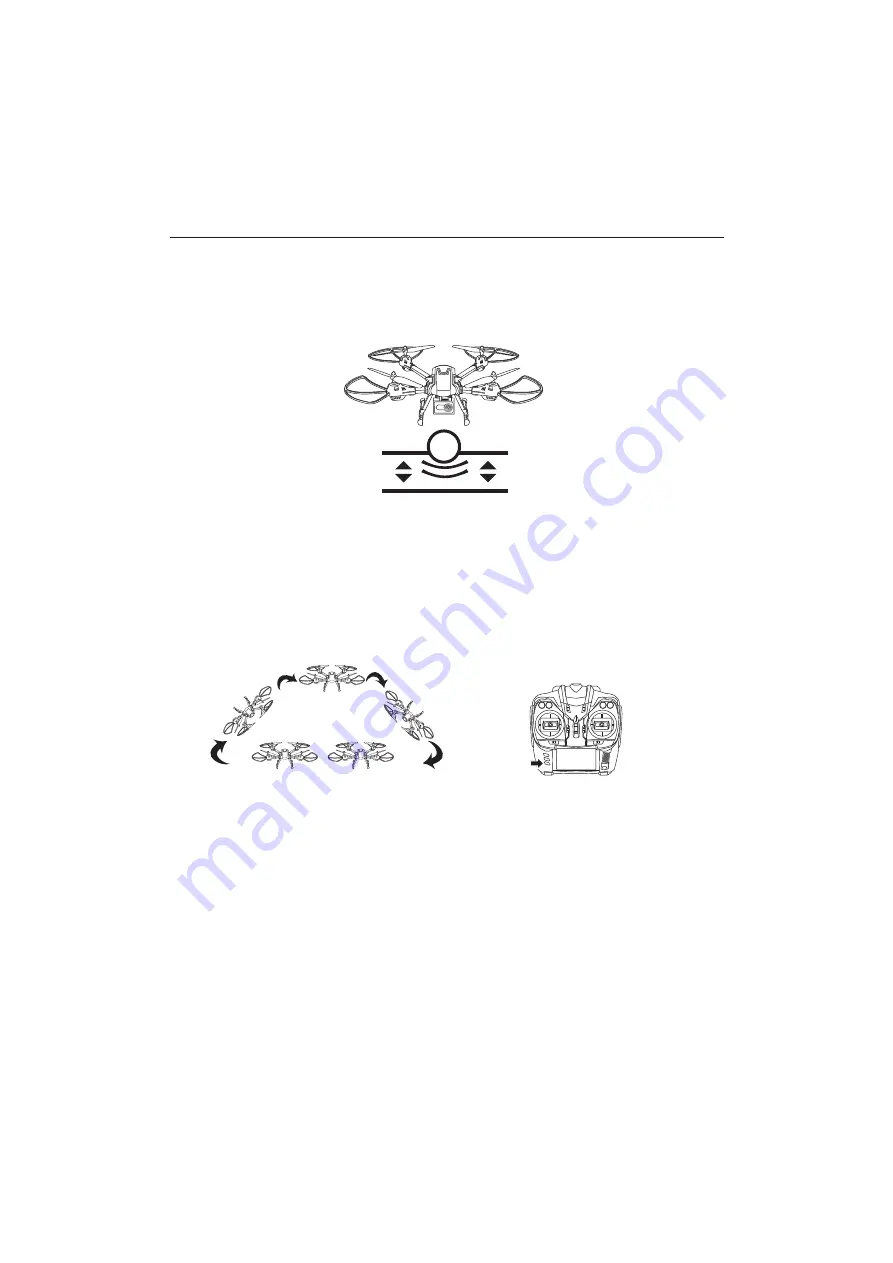
$XWRKRYHU

3D Flip

6SHHGVZLWFK

Push the throttle up slightly and release it, the drone will stick to a specific 
height steadily, push the throttle down when decent the drone.

Ascending the drone to 2 meters high, press the 3D flip button(remote 
controller will make two sound didi continuously, the sound will stop when 
finished the movement) and then push the right control stick in any direction 
at the utmost, the drone will roll over accordingly.

NOTE: The 3D function can not work under low power and carrying camera.

The sky warrior features 3 speed modes. Low speed is for beginners and high 
speed for advanced users.
The default speed is 35%,press the speed switch button you will hear “DI DI” 
which indicate it switch to middle speed 75%, and press again with “DI DI DI” 
indicate it switch to high speed 100%. Press again with “DI” back to default 
low speed.

Summary of Contents for K70 Sky Warrior

Page 1: ...llent stability 3 loading capacity up to 500g 4 Auto hover Headless function One key to return 5 360 degree 3 dimensional stunt and tumbling function 6 WIFI Photo Video 7 2MP camera Photo Video 8 5MP...

Page 2: ...ion of K70 Remote Controller Specification of K70 Preparation before flight Basic Operation Guide Special function button guide CF mode Upgrade accessories Selective Buying Drone accessories Selective...

Page 3: ...blink three times when recording blink two times when saving the photo or video 3 camera lens up down 4 left control stick 5 left right turning trimmer 6 LED light control switch 7 CF mode 8 3D flip...

Page 4: ...MM Weight 233g without battery Operating Temperature Range 0 C to 40 C Battery 4 1 5V AA 3UHSDUDWLRQ EHIRUH IOLJKW 1 Use screwdriver to loose the battery cover in counterclockwise direction as figure...

Page 5: ...nsert the landing gear firmly to the slots on the drone Figure1 2 Use screwdriver to tighten the landing gear in clockwise direction Figure2 1 Use screwdriver to loose the landing gear in anti clockwi...

Page 6: ...axis as figure 1 show 2 Insert the main axis sleeve into main axis tube as figure 2 show Make sure the notch of the main axis sleeve match with the hole on the main axis tube and then insert the iron...

Page 7: ...hield in clockwise direction as shown in figure 2 1 Use screwdriver to loose the protect shield in anti clockwise direction 2 Take out the protect shield QVWDOODWLRQ 1 Insert the motor to the motor ba...

Page 8: ...his time the red light and green light are on the green light will off after finished charging Note 1 Cut off the power before you pull out the battery 2 Be cautious about the polarity when connecting...

Page 9: ...RQ Two dimension code is provided on color box packing and back cover of specification to scan Connection instruction 1 Turn on the drone the FPV indicate light blink slowly which shows the drone is r...

Page 10: ...Put the fixed clip on the handle of the controller then use screwdriver in clockwise direction to tighten it as figure 2 show 1 Use screw driver to loose the screws on the fixation kits and open the f...

Page 11: ...e throttle lever to the lowest position the buzzer makes the sound DI the lights on the remote controller change from flicker to constantly on which indicate the frequency matching successfully After...

Page 12: ...t turns balanced When hovering if the quadcopter keeps left right side fly without control push the trimmer right left until it turns balanced When hovering if the quadcopter keeps turn left right fly...

Page 13: ...stop when finished the movement and then push the right control stick in any direction at the utmost the drone will roll over accordingly NOTE The 3D function can not work under low power and carrying...

Page 14: ...copter change from constantly on to flickering the quadcopter turns in CF mode When the quadcopter is in CF mode press the CF mode button on the remote control the buzzer makes the sound di the lights...

Page 15: ...confirmation of the direction Push the right control stick up the quadcopter flies forward based on the direction which the operator faced in the adjustment step Push the control stick to make right...

Page 16: ...rotect shield black 707 Base body 708 Blade 713 Battery 15 701 702 705 200W Camera Resolution of photo video 1280X720 500W Camera Resolution of photo video 1980X1080 703 FPV WIFI 0 3MP Camera resoluti...

Page 17: ...ee axis acceleration sensor lose its balance after crashing Put the quadcopter on the ground for 5 10 seconds The indication light of the quadcopter is flashing and without reaction The quadcopter s b...

Page 18: ...nd can radiate radio frequency energy and if not installed and used in accordance with the instructions may cause harmful interference to radio communications However there is no guarantee that interf...

Reviews: