background image

Color LCD MP3 w/ FM Radio            V10M10_IM_EN_02192008


- 21 -

OPERATING INSTRUCTIONS 


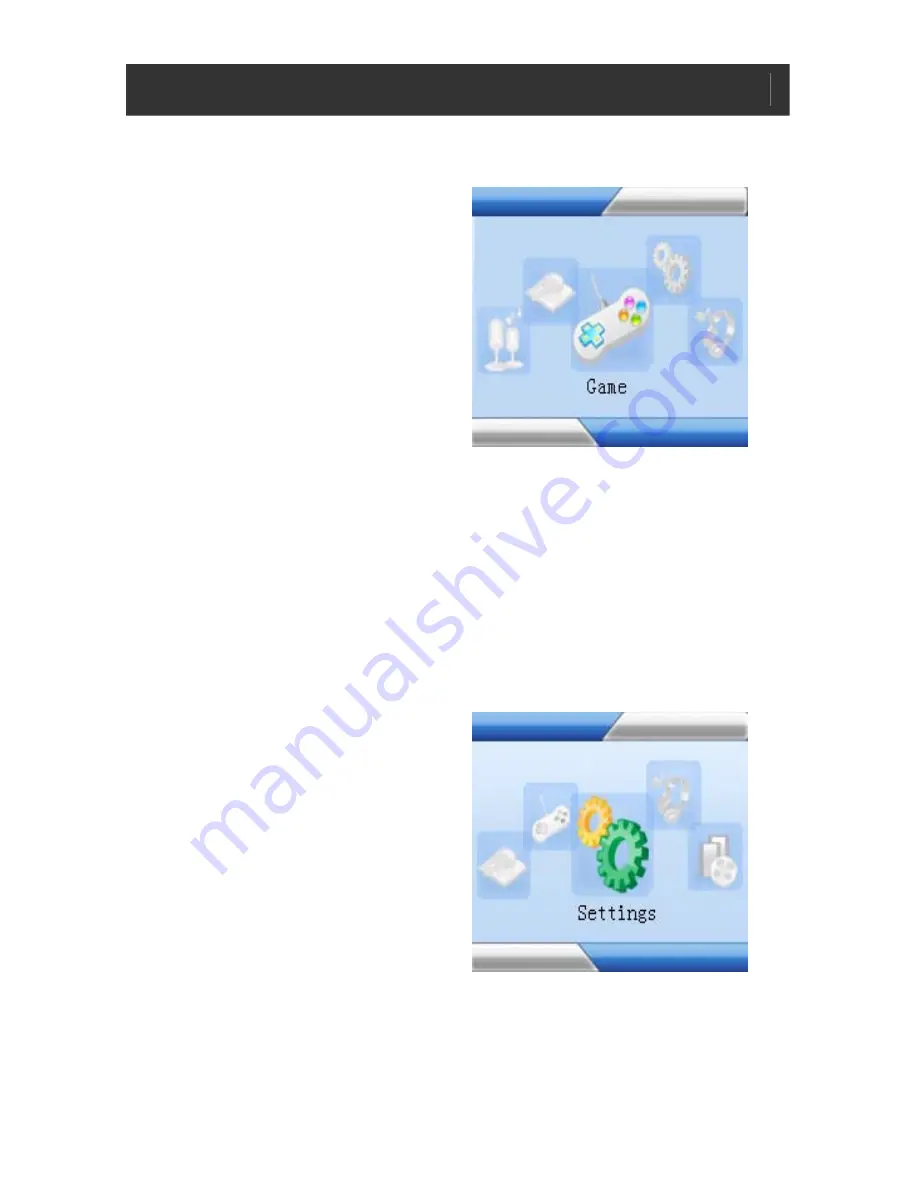
Playing the Brick Game 

The player comes with a free 
built-in Brick Game.  


In Main menu, select 
Game menu and touch 
the [

M

] button to enter 

Game mode. 


Game Control Keys  

1. 

To begin / pause, 
press the [

`

II

] button. 

2. 

To move to left or right, touch the [

VOL+

] or the [

VOL-

buttons.  

3. 

To rotate the “Falling Brick”, press the [

FW

] button.  

Note:

 In Game mode, press and hold the [

M

] button to return to 

Main menu.


Settings Mode  

There are 7 settings available in the Settings mode.  


In Main menu, select 
Settings menu and 
touch the [

M

] button to 

enter Settings mode.   

 Touch 

the 

[

FF

] or the 

[

FW

] buttons to select 

the desired settings in 
each option.  


Summary of Contents for JX-MP301

Page 1: ...N_12272006 2 0 TFT Color LCD Video MP3 Player with FM Radio Instruction Manual JX MP301 302 304 Please read this manual carefully before operating and save it for future reference Have a question Please visit http www jWIN com ...

Page 2: ...d appliances you make an important contribution to protect the environment Please inquire at your local community administration for the authorized disposal location Important Safety Instructions 1 READ INSTRUCTIONS All the safety and operating instructions should be read before the appliance is operated 2 RETAIN INSTRUCTIONS The safety and operating instructions should be retained in a secure pla...

Page 3: ...lled into the device s openings 10 CARTS AND STANDS The appliance should be used only with a cart or stand that is recommended by the manufacturer An appliance and cart combination should be moved with care Quick stops excessive force and uneven surfaces may cause the appliance and cart combination to overturn 11 SERVICING The user should not attempt to service the appliance beyond that described ...

Page 4: ...y damage or damage to the unit follow these instructions 14 LEAD AND MERCURY This product may contain lead and or mercury Disposal of these materials may be regulated by your local authorities due to environmental considerations For more detailed disposal or recycling information please contact your local authorities or the EIA Electronic Industries Alliance http www eiae org FCC Notice USA This d...

Page 5: ...listening to the loud sounds hearing will adapt and will give the impression that the volume has been reduced What seems normal may in fact be harmful To guard against this BEFORE HEARING ADAPTS set the volume at a low level and slowly increase the volume level until sound can be heard comfortably and clearly without distortion Damage to hearing is accumulative and is irreversible Any ringing or d...

Page 6: ...t in flash memory 1GB 2GB 4GB File storage capability Integrated FM stereo radio 87 108MHz USB 2 0 for fast file transfer Supports MP3 WMA AVI JPEG and TXT files Photo viewer Portable E book reader TXT file support Built in digital voice FM radio recorder Built in speaker Supports multiple languages Supports ID3 tag and lyric display 7 preset EQ Normal 3D Rock Pop Classic Bass Jazz User EQ Replace...

Page 7: ...TING STARTED Location of Controls 1 Color LCD Screen 7 PLAY PAUSE button 2 Power On Off switch 8 FW button 3 Headphone jack 9 Vol button 4 Mini USB jack 10 Vol button 5 Battery compartment 11 M button 6 Microphone 12 FF button 2 3 4 5 1 7 8 9 10 11 12 6 ...

Page 8: ...00 and Windows XP 32MB of RAM 128MB recommended Up to 100MB of available hard disk space Standard USB Port USB Connection Connect one end of the supplied mini USB cable to the player Connect the other end of the mini USB cable to the computer Charging process begins automatically You can also charge the player via AC Power Adapter not included ...

Page 9: ...he player will be locked In Lock mode press and hold II button and M button for 2 seconds at the same time again to unlock Note All buttons on the player will be unlocked Playing Music In Main menu select Music menu and touch M button to enter Music mode Music playback begins automatically During Music playback touch M button to enter Music playlist Press FF or FW key to select a Music file Touch ...

Page 10: ...tor 4 Play Pause Status 10 A B Repeat 5 Playback Setting 11 Current Track number 6 Volume Level 12 Total Track number Adjusting the Volume During Music playback press the VOL or VOL buttons to adjust volume level Note Pressing and holding the VOL or VOL buttons will also adjust the volume level value settings from 00 to 40 Skipping to Previous Next Music File During Music playback Press the FF or ...

Page 11: ... the VOL button to delete 4 At the Delete File prompt YES NO scroll to YES option and touch the M button to confirm deletion 5 When the file is deleted the player returns to previous submenu options Note Press and hold the M button to return to Main menu A B Repeat During Music playback press and hold the M button 1 The A B Repeat indicator displays A 2 Press and hold the M button again and A B is...

Page 12: ...de When Video playlist is displayed touch the FF or FW buttons to select a Video file When a folder is selected touch the M button to enter folder When a Video file is selected touch the M button and playback begins automatically FW FF a Video file During Video playback press and hold the FF or FW buttons to FW or FF playback Adjusting the Volume During Video playback press the VOL or VOL buttons ...

Page 13: ...n a Video file is selected press the VOL button to delete 4 At the Delete File prompt YES NO scroll to YES option and touch the M button to confirm deletion 5 When the file is deleted the player returns to previous submenu options Note Press and hold the M button to return to Main menu Listening to the Radio The earphones must be connected to the player when using FM mode They act as an antenna fo...

Page 14: ...ed by the M button 4 When the preset station list is displayed touch the FF or the FW buttons to scroll to a desired station shown in red color followed by the M button to save the frequency 5 At the Save Channel prompt select YES option and press the M button to confirm changes 6 Press the II button to return Note The preset frequency will now be displayed in the preset station list Auto Frequenc...

Page 15: ...etc Press and hold the M button to return to Main menu Deleting a Preset Frequency In FM mode touch the M button to enter submenu 1 Scroll to DEL option followed by the M button The preset station list will be displayed 2 Touch the FF or the FW buttons to select a preset frequency to be deleted followed by M key 3 At the Del Channel prompt select YES option and press the M button to confirm deleti...

Page 16: ...ically 2 During recording press the II button to pause 3 Press the II button again to resume 4 To end and save the recording press and hold the M button Notes The FM recording will be saved as filename FM00001 WAV in the player root directory when connected to the computer FM recording can be played in Music mode In areas where the signal is weak some channels may be unavailable or reception may b...

Page 17: ...d touch the M button to enter folder 2 When a Photo file is selected touch the M button and Photo playback begins automatically 3 Touch the FF or the FW buttons to view previous or next photo file During Photo playback touch the M button to return to Photo playlist or press and hold the M button to return to Main menu Deleting a Photo File In Photo playlist when a photo file is selected press VOL ...

Page 18: ...the M button to enter folder 3 When a Text file is selected touch the M button and playback begins automatically 4 Touch the FF or the FW buttons to scroll backward or forward to view text During Text playback press the M button to return to Text playlist or press and hold the M button to return to Main menu Deleting a Text File 1 In Text playlist when a Text file is selected press VOL key to dele...

Page 19: ...to view Text 2 At the desired page to create a bookmark press the II button and the 3 bookmark will be displayed 3 Touch the FF or the FW buttons to Scroll to any of the 3 following bookmarks and touch the M button to confirm settings To View a Bookmark Page During Text playback press M button to view the 3 bookmarks Touch the FF or the FW buttons to select a bookmark followed by the II button and...

Page 20: ...uch the M button to enter Record mode 1 In Record mode touch the II button and recording begins automatically 2 During recording press the II button to pause recording and press the II button again to resume 3 To end recording press and hold the M button to end and save the recording Note Recording files WAV format can be played in Music menu ...

Page 21: ...e FF or the FW buttons to select a file 3 When a folder is selected touch the M button to enter folder 4 When a file is selected touch the M button and playback begins automatically Note During playback press and hold the M button to return to Main menu Deleting a File 1 In Explorer playlist when a file is selected press the VOL button to delete 2 At the Delete File prompt select YES option and to...

Page 22: ... To begin pause press the II button 2 To move to left or right touch the VOL or the VOL buttons 3 To rotate the Falling Brick press the FW button Note In Game mode press and hold the M button to return to Main menu Settings Mode There are 7 settings available in the Settings mode In Main menu select Settings menu and touch the M button to enter Settings mode Touch the FF or the FW buttons to selec...

Page 23: ...y Mode Order Music playback in sequence Shuffle Music playback randomly EQ Select Normal 3D Rock Pop Classic Bass Jazz User EQ User EQ Mode User can customize their favorite EQ settings In the User EQ settings press VOL or VOL buttons to adjust on each individual frequency segment 60Hz 300 Hz 1KHz 3KHz 6KHz Frequency settings are adjusted in 6dB 6dB intervals Touch the FF or the FW buttons to skip...

Page 24: ...r file size General Quality Normal recording quality with smaller file size REC Volume The highest settings 5 will produce the loudest recording quality 1 2 3 4 5 Display Settings Blight Time To set the backlight ON timer unit in seconds This function will be disabled when the time is set to Always On 5s 10s 15s 20s 30s Always On Lum To set the backlight brightness 1 2 3 4 5 Blight Mode When set t...

Page 25: ...20 Minutes Language Settings To change the desired language settings on the player Using the AVI Converter Software This player supports AVI format video files and can transform other video formats to the supported AVI format by using the bundled AVI Converter Software The software fully supports fast speed video conversion of multi video format into high quality AVI format System Requirements to ...

Page 26: ...VI Converter setup program EXE file bundled in the player to begin 2 Follow the on screen instructions to complete the installation 3 Upon a successful installation an AVI Converter program icon will be created on the computer desktop 4 Double click on the AVIConverter icon to begin 5 Click on Add button to select a video file to convert 6 Click on Source File button ...

Page 27: ...Installation the AVI Converter Software continued 7 Select the Target File Path button to save the converted video file Keep the rest of the settings as default and Click on Save button followed by Close button 8 Click on Convert Now button to start video conversion process ...

Page 28: ...formation shows 100 and OK Click on Close button to quit Finally transfer using copy paste the converted video file AVI format into the player and you are now ready for video playback Note Please use only the bundled AVI Converter Software in this player for video conversion Video files converted using third party software might not work properly with this player ...

Page 29: ... and remove the file that is corrupted or non standard audio video file on the player Disconnect the player from the computer and try again What is the common file type that is causing the Warning File Format Error error When any file type is not supported by the player is detected the error message will occur If this error occurred on a video file try to convert the video file by using the AVI Co...

Page 30: ...Portuguese Russian Chinese traditional Chinese simple Japanese Korean Connectivity o 3 5mm stereo headphone jack o Mini USB port Power Sources o Replaceable rechargeable 600mAh battery System Requirements MS windows 98 ME 2000 XP May require driver installation Frequency Range o FM 87MHz 108MHz Unit Dimensions W x H x D 3 x 1 7 x 0 5 76mm x 43mm x 14mm Unit Weight Approx 1 7 oz 47 g Features and s...

Page 31: ... in any form without the prior written consent of jWIN Electronics Corp by any means electronic or mechanical including photocopying recording or use of an information storage and retrieval system Any unauthorized distribution or reproduction of this printed material or product or any portion thereof will be prosecuted to the fullest possible extent of the law TEL 516 626 7188 FAX 516 626 7105 web...

Reviews: