


37
Photography-Selecting Particular Effects
Photography-Selecting Particular Effects
Photography-Selecting Particular Effects
Photography-Selecting Particular Effects
Photography-Selecting Particular Effects
Changing Image Resolution and Quality
Changing Image Resolution and Quality
Changing Image Resolution and Quality
Changing Image Resolution and Quality
Changing Image Resolution and Quality
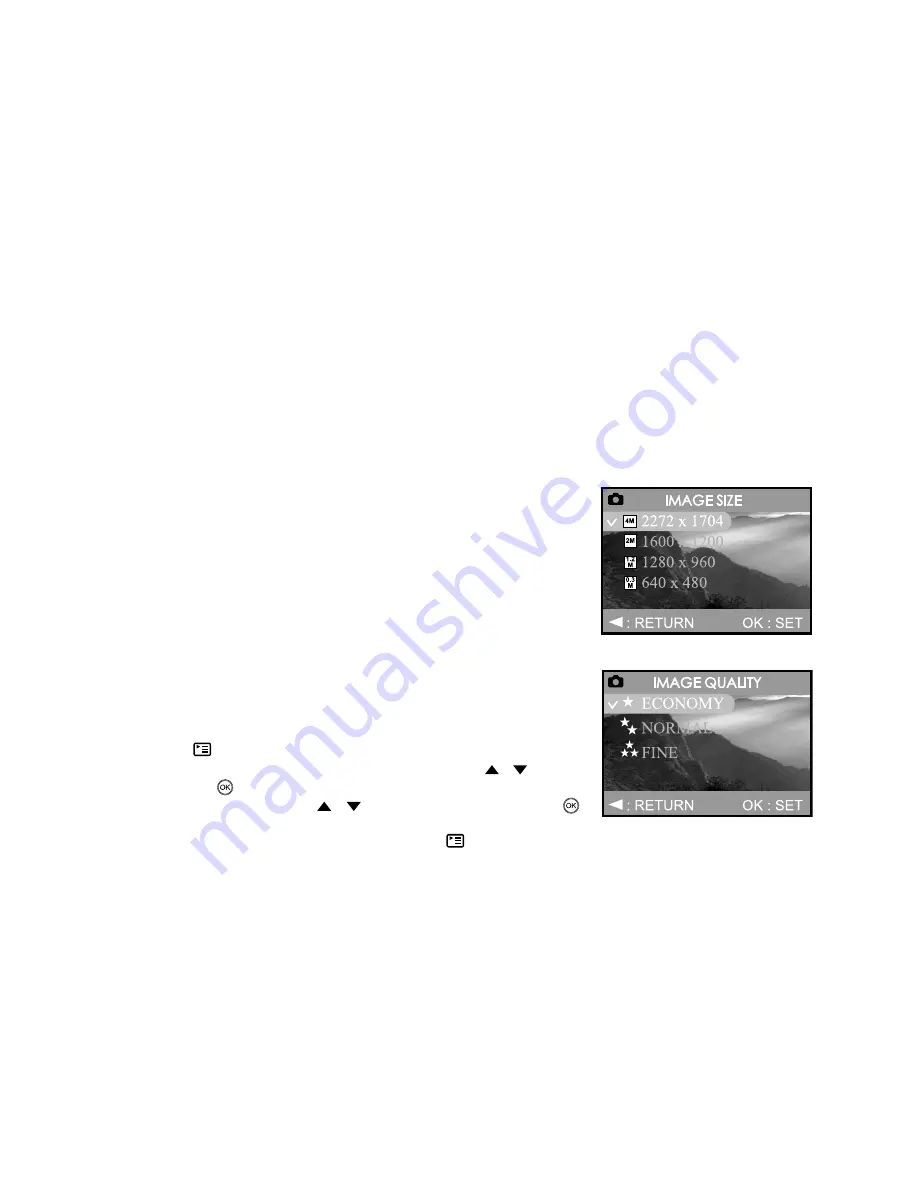
Resolution and quality settings determine the pixel size (dimension), image file size, and compression
ratio for your images. These settings affect the number of images that can be stored in memory, or on
an SD memory card. As you get to know the camera, it is recommended that you try each quality and
resolution setting to get an appreciation for the effects that these settings will have on your images.
Higher resolution and higher quality images offer the best photographic
results but produce large files sizes. Therefore, fewer images will take
up more memory space.
High resolution and quality settings are recommended for printed output
and situations requiring the finest detail. Lower resolution/quality images
take up less memory space and may be quite suitable for sharing
images via e-mail, in a report, or on a web page.
To change image resolution and quality settings:
1. Rotate the mode dial to one of [
A
] Auto mode, [
M
] Manual mode,
[
Av
] Aperture Priority mode, [
Tv
] Shutter Speed Priority mode,
[
SCENE
] Scene mode or [
P
] Program mode.
2. Power on your camera.
3. Press the [
] menu button.
4. Select
IMAGE SIZE
or
IMAGE QUALITY
by using the / button,
then press the
button.
5. Change the settings with the / button and press again the
button to confirm.
6. To exit from the menu mode, press again the [
] menu button.
7. Compose your picture.
8. Press the shutter button.